I played this live stream session with Todd June 9th, here is a quick write up of our game play [you can see the game play on Itinerant Hobbyists YouTube page]:
The British 6th Para Division elements have been tasked with holding off a determined German counter attack on D-Day. [ 7th Battalion, 5th Regiment]

Schwere Grenadier Battalion from the 21st Panzer Division [ 125th Regiment] elements including; a Panzer IV, a Stug III and a Marder support 4 squads of regulars and 2 specialist assault teams with Mg’s.
The Brits have two PIAT’s, a hero, a handful of leaders and 6 squads of paratroopers who earn a melee bonus and an Assaulter bonus [+1 extra for adjacent fire]
The Germans have 7 turns to cover 1.25 boards and secure four spread out buildings. Quiet a challenge.
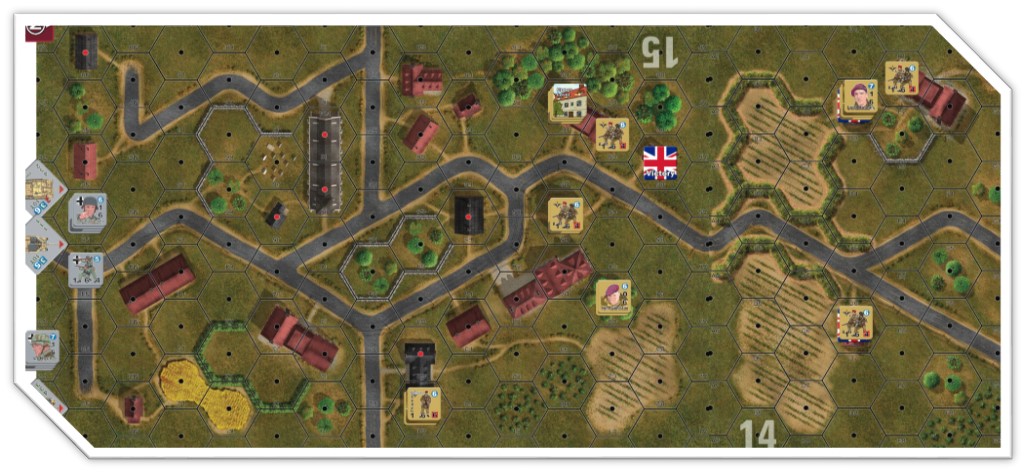
As the Brits, I elect to defend forward, and cover the approaches with PIAT and supporting infantry units. With the intent of slowing down the German rush for the buildings on map 14. Of which all are occupied, and one has a leader and a support unit adjacent. I’d expect that we will lose the building on map 15 pretty quickly if he rushes it. With that in mind I just want to get a few shots on his tanks and AFV’s and if possibly not expose my self to too much fire. Shaking any of his troop headed my way would be a bonus too.
The Germans enter as stacked units, not riding the tanks, and limit their opening move to 4 hexes.
The downside here is he will take until turn 2 or three to connect with me, if he uses assault move.
His opening salvos fail to do much, and our PIAT fire in response in the Eastern side of the map is poor. I did push up a commander and another squad to support the lone hero now that we know where two tanks are going.
I attempt to assault his tank. But its been so long since I did one that I mess up the rule for it. In any case, our subsequent fire is ineffective. The Marder gets shaken and holds it position, while infantry advance around the west end of the 1st victory location in turn 3.
They try to close, I try to fire, no one hits much. The lone PIAT on the uppoer floor, has no target as the Marder is too far away, so they hunker down and wait.
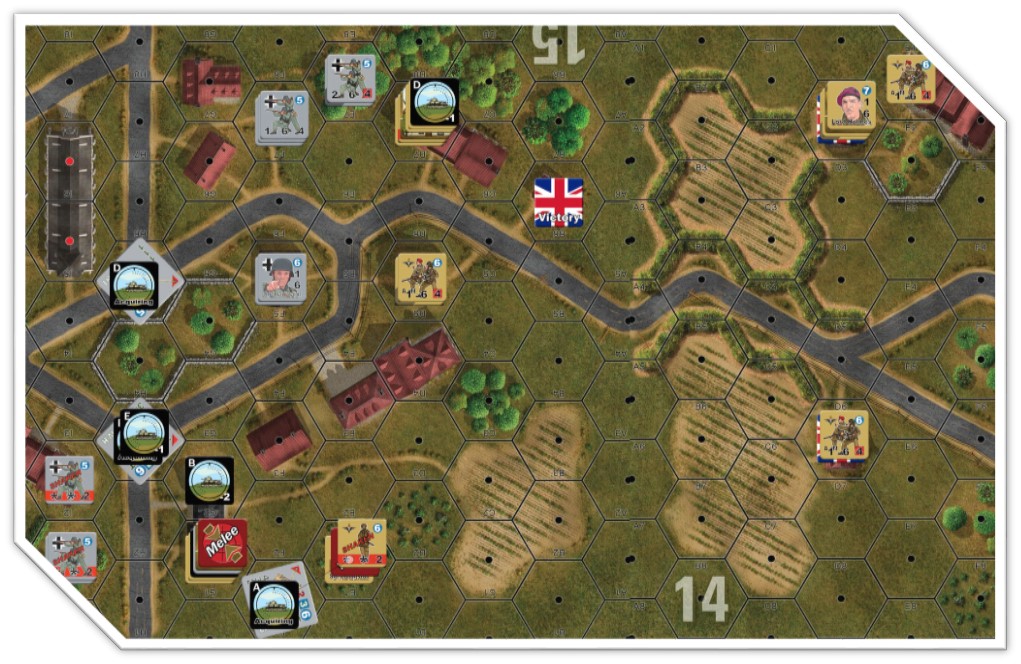
On the East side the shaken teams and the wounded leader attempt ot skulk out of the building the Panzer IV has been blasting. All are shaken. Then as they take a moments respite the Stug traverses past the Hero, who misses with the PIAT….and that places the STUG in good shape and he kills all the men barring one half squad. The Germans have two shaken squads left behind in the advance, and the remnants [a generated hero], enters melee with my hero. Neither kills the other.
At the end of turn 4 the Germans realize they cannot physically make the ground, and eliminate units in time for a German victory so they concede. It would be a different story if the scenario was longer, OR perhaps if there were less British leaders, as this would force the British to be a bit closer together.
So what happened?
A forward passive defense worked here. Once we saw the enemy choose a primary approach I reinforced it. This split the tank fire away from the Hero with the PIAT and forced the Germans to attack two stacks. On the other side of the board, I merely waited on great shots, but then proceeded to roll terribly for them anyway, but not as badly as the Germans did…so thanks VASSAL..I guess?
Having plenty of leaders allows the poms to split up forces and keep everyone able to rally. That really helped. I had a great defense for the last western building that had to be cleared, as it would have taken 2-3 turns to secure.
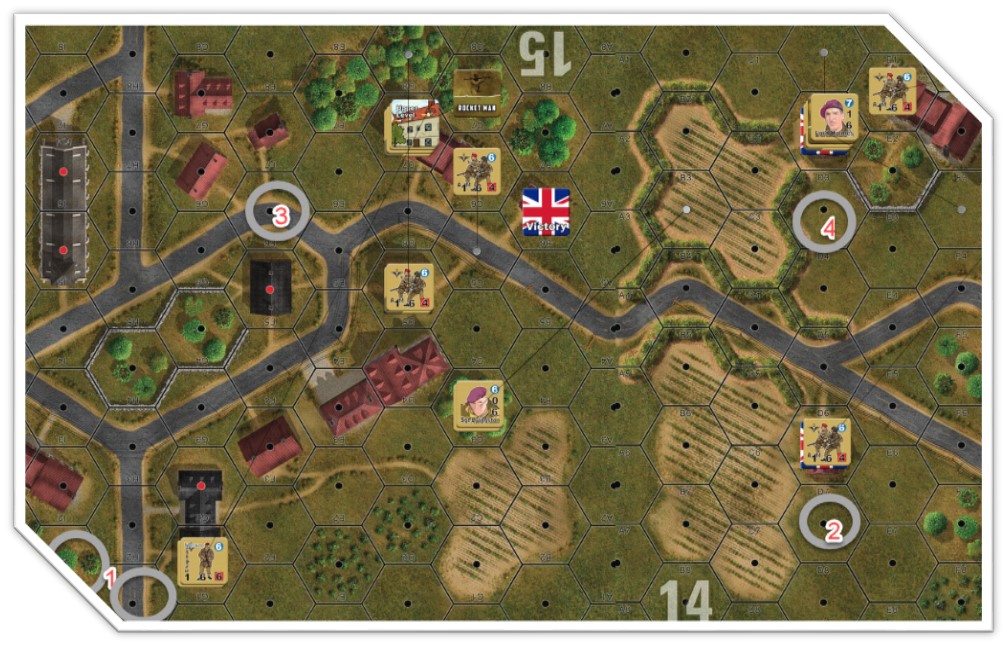
The Germans main challenge was taking advantage of the ideas around combined arms. The good news was they AFV’s and infantry stuck together. The bad news was it was too slow an approach. So If for instance the Marder or Pzr IV had loaded up infantry and stopped at say location 1, and unloaded, fired, they might have weakened or killed the Hero. They could then reload on the AFV or assault into melee.
Another option would be to move a unit into melee tying up the hero, and then drive by with the tank to location 2, to commence pounding it with HE. They just need to shake that unit, then get a squad into its hex, as it has no leader support. He can keep one AFV with one squad loaded up and in the rear, waiting for a chance to sprint past, or to provide some fire support assault support.
That would then allow a progression to position #4. Where you rinse repeat. The tricker building is the top of the map. Position three would give some shooting positions, but that PIAT has to be cleared from upstairs and that should be done via HE, then assault once shaken. Hard to do with a leader and full squad downstairs waiting for you. All in all a challenging one for both sides.
I really like the narrative that the game drove on this, not to mention your writing skills! I’ve only explored this system for modern tactical; one day I’ll need to jump into their WW2 stuff!
cheers Greg!