The way Air to Air actually works… is not what we posted yesterday.
So here is the skinny. 2 IJN pilots one who is an Ace attack the close escort F4F. They have a combined 11 factors (+1 for the Ace). We role on the table previously shared with you and earn a 5/2 . This aborts the F4F. As its defense combat factor is 5 [ we use same number for attack and defense except for bombers] and the result is equal to or greater than its defense. If the result was 10/2 we would abort 2 units worth of AP. So you use the strength of the unit to determine the number of ‘steps or Air Points’ aborted/killed.. The Zeros close on the SBD’s. Here they also abort another unit with a 5/2 result.
But the USN gets to fight back. We tally up their 1 factor offense combat factors for a total of 5 they earn a 5/1 and abort a zero determined randomly.
Moving now to the Low level torpedo bombers and escort the IJN end up with a no effect result and the F4F misses also, so do the two Torpedo bombers.

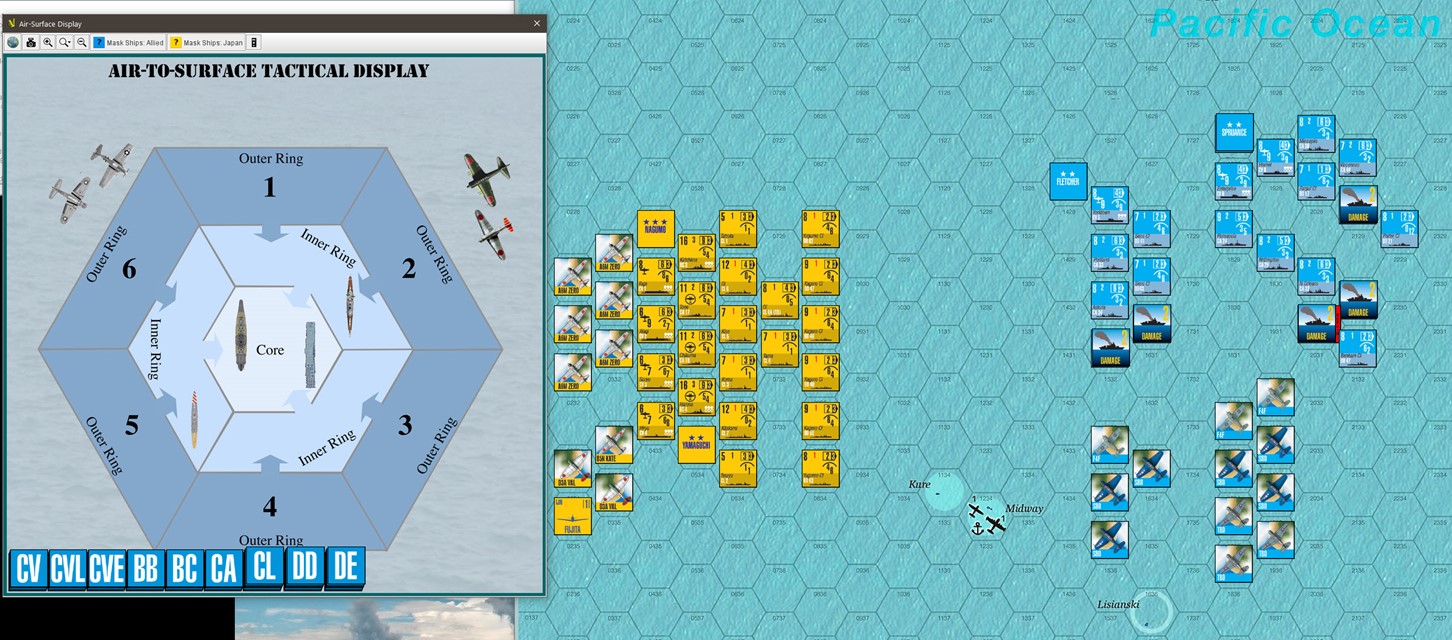
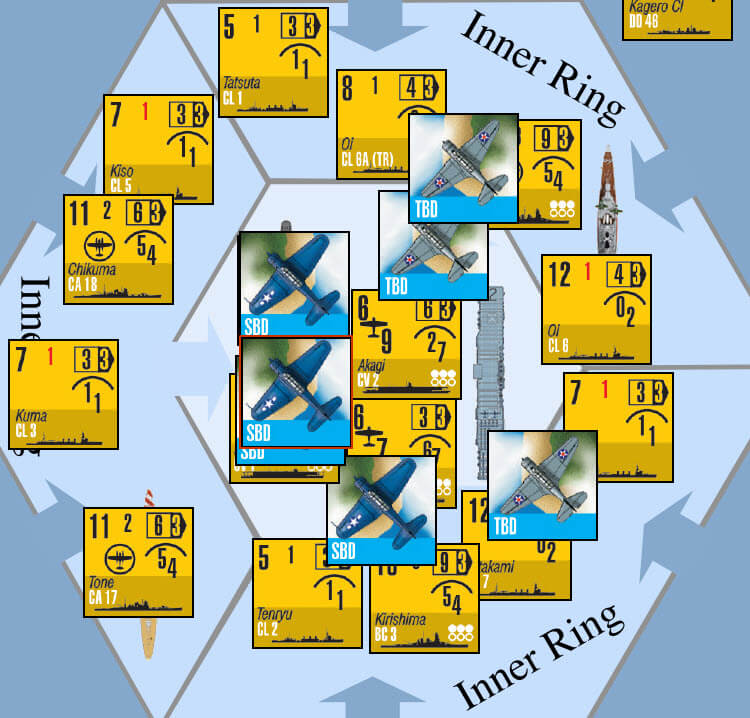
Now we move our aircraft to the Anti Air Phase and place the attackers on the Tactical Ship display.
AA guantlet:
We roll randomly for where our pre selected waves attack into and end up attacking into zones 2 & 3.

The cool thing here is we face off against 3 levels of AA! [Thats a joke] The outer ring comprised on Destroyers [ which in hind sight I would have had close to the Carriers] fire at the waves.
The 2 Torpedo AP take fire from the ships using the ‘low rating’ [this rating is the AA number on the right of the yellow counters 1 above the other. [One for High Altitude/Medium Alt shots and the other for Low altitude shots]] the smaller target [just 2 AP] makes it a bit harder to hit. The Destroyer has just a strength of 4, and roll a 9 for no effect. As the pilots weave into get closer the the CV’s they now take fire from the Inner circle and outer combined. Still no effect with a roll of 4.
The other wave coming in through zone three now runs its own path through the zones.
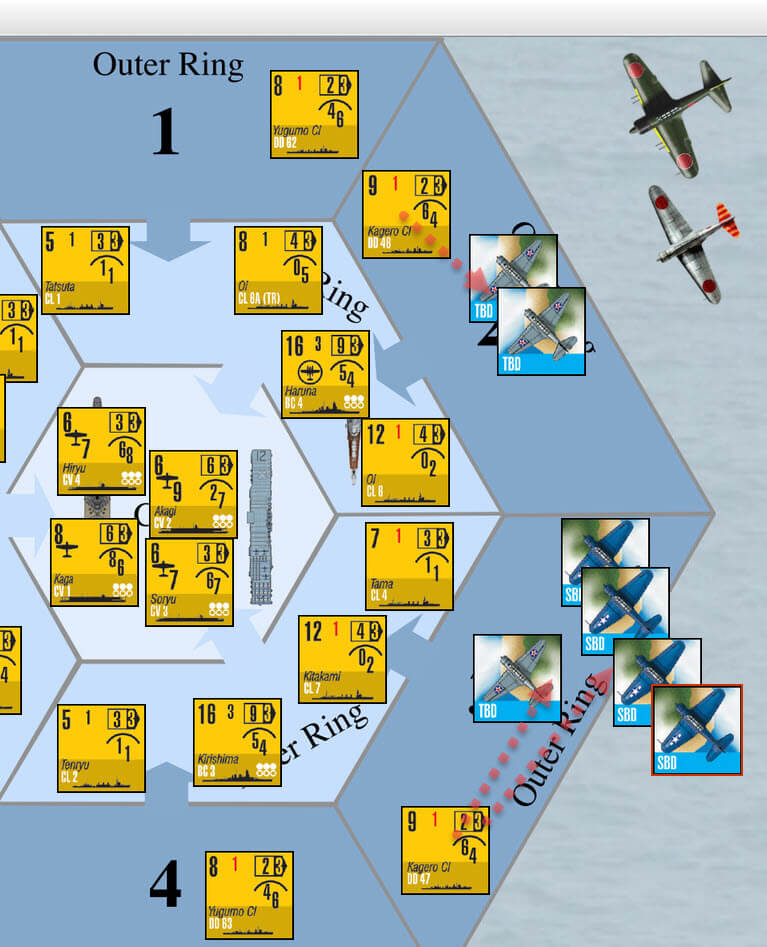
Despite taking heavy fire no units abort or are shot down. We are totally just the units in the numbered zones not the entire ring. The Medium altitude wildcats face off against 20 factors of AA with their 5 AP of aircraft. It shifts 1L as it is a combined attack.
Even with a 12 rolled by the IJN ships they get lucky and suffer no loses on a 2/1 result [ as the damage # is lower than the defensive fire/defensive factor].

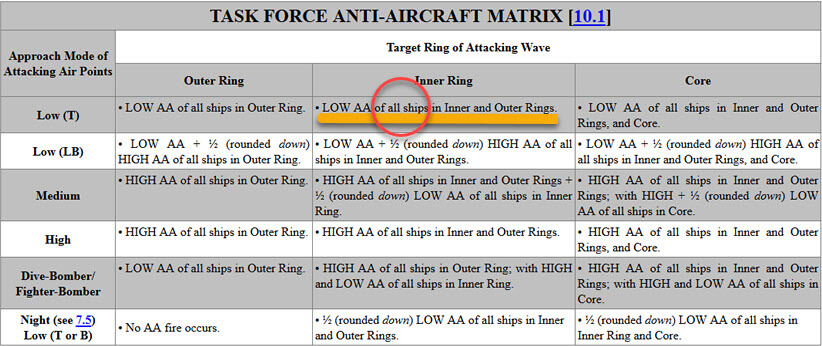
Im assuming we only apply factors from the target sectors not ALL sectors like this table says.
The Core resolution combines both Inner and Outer from the High Altitude gunnery factor and the High altitude factors from the Core + 1/2 the low core factors also. Its brutal. That is 39 factors but sifted 1L. with a miss on a 5 rolled. It feels like the Yanks should have lost more on this attack against the AA? Don’t you think? I’ll do some research and double checking of rules.
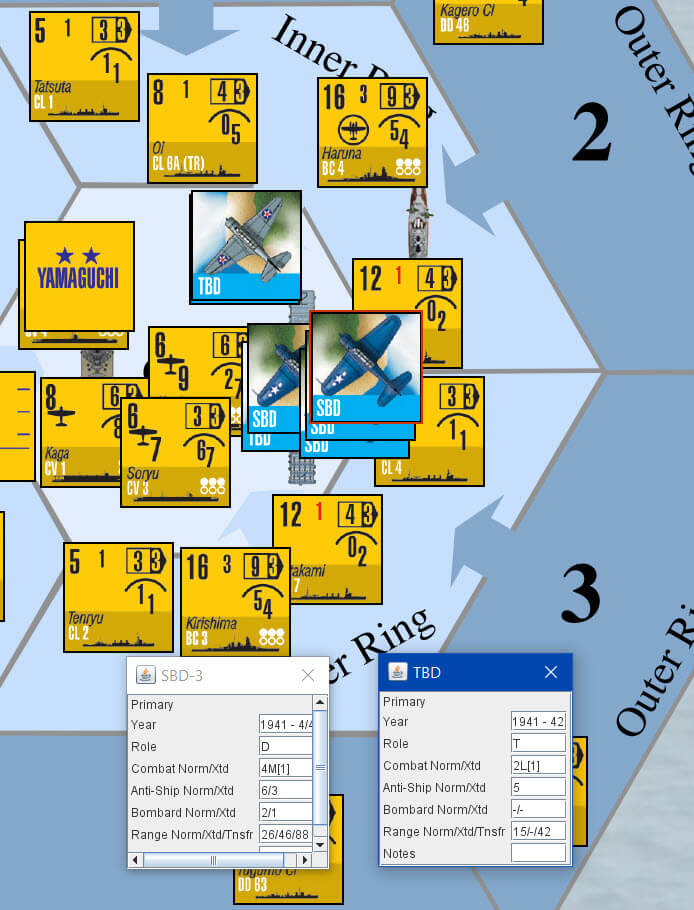
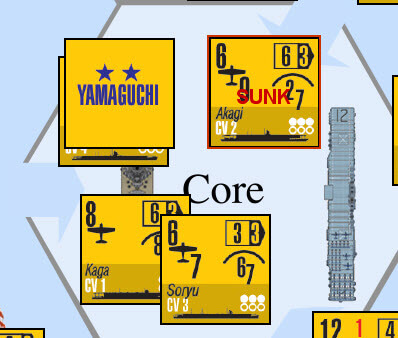
Now the nerve wracked pilots begin thier run. 2 TBDs target the Akagi, but miss. from Low altitude.
So now it is up to the combined 1xTBD and 4 xWildcats to hurt the ship. They have an attack factor of 6 x4 =24. + 5 for the lone Torpedo Bomber! = 29.
They roll a 3 on a 1d6. We had 29 factors and the speed class is 3 for the Akagi! we get 30 hit points [see table below].
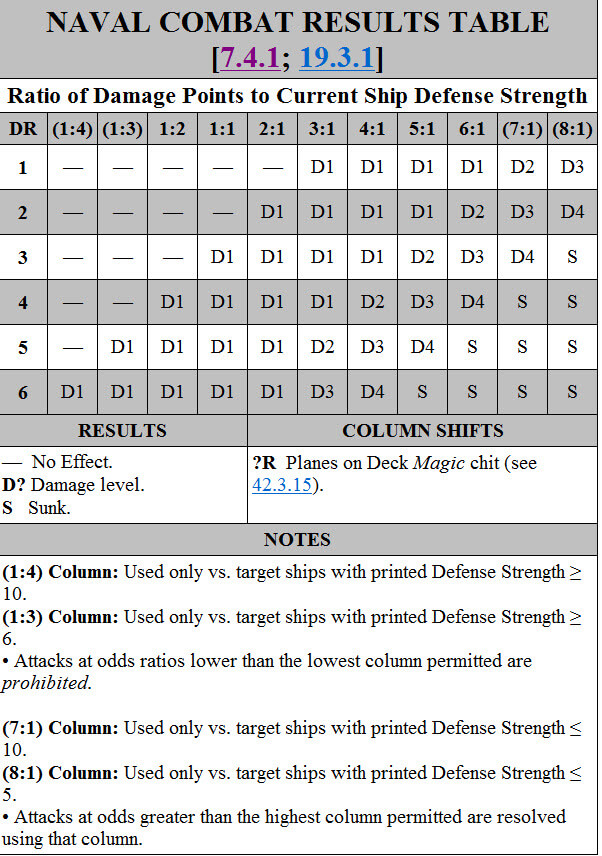
We make a ratio out of this factor against the defense value of 4 for the Akagi. – 7:1.
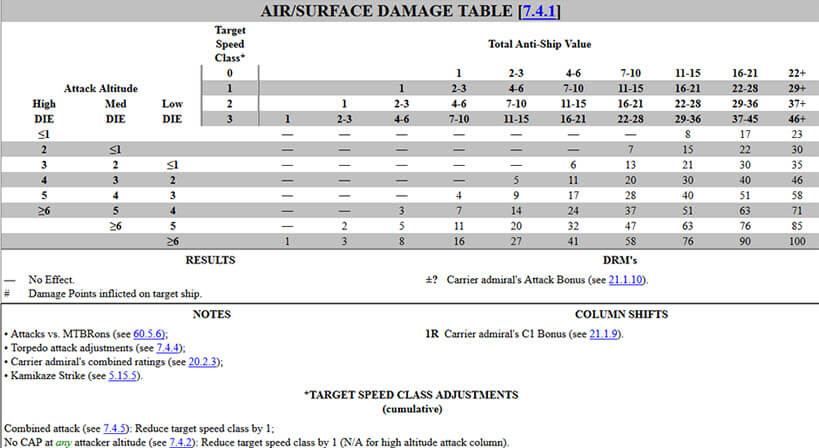
That 7:1 spells trouble! The ship is sunk!with a 5.
There was an alternative here. We could have potentially split our attack up. with 2 Wildcats on each of say the Akagi and the Soryu.
This would have yielded 11 factors of damage and a result of D1 on the Naval CRT odds table. The critical hit roll however steps the D1 loss up to a D2. The Sorju fares not much better with 14 factors on it and a D2 result also. Both lose -4 AP, -2 to defense and -1 to speed!
Which would you have preferred an out right sink like the Akagi or 2 damaged CV’s>