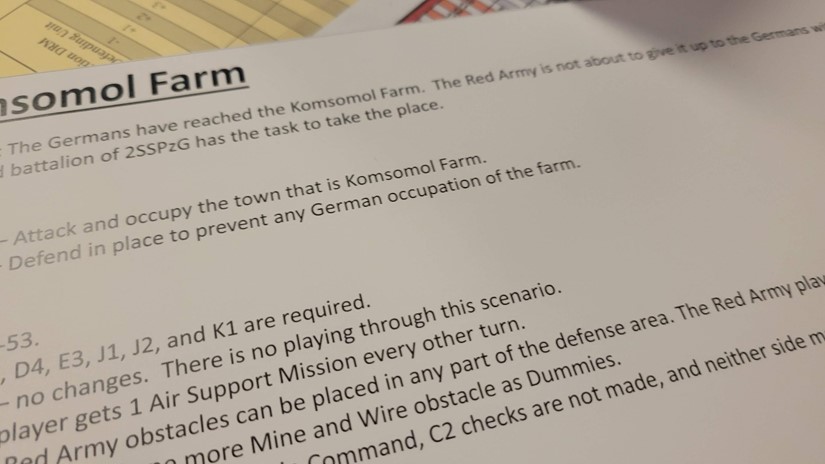
One of the nit picky things I have against the Death Ride Kursk designs is the lack of care for scenario setup and potentially scenario design.
It appears often that these are merely ‘here is who was here, here is what happened’ Your Mileage May Vary, with no thought put into victory conditions to make for interesting, rewarding scenario exploration and replay.
However the biggest issue is what appears to be constant errors in the scenarios themselves or lack of thorough review on behalf of the designer. When I briefly met Chris Fasulo he was wary of chatting with me I guess as I was part of the ‘group playing and commenting on facebook’ with Dave Maupin as he put it….OK. Yeah four of us are trying to make heads n tails of your system mate, throw us a bone. We all put a LOT of work in prior to engaging in a four player face to face [several months of vassal based live play]. That report is still being written up. So lets look at the specifics for this scenario and we will save my overall impressions and views on the system, components, rules and game play for later.
This scenario diagram..

Looks reasonable. But lets see the victory conditions below:
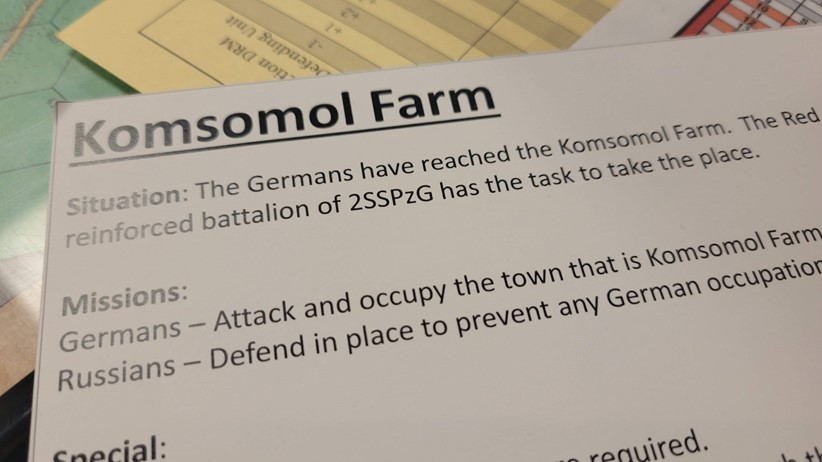
The scenario defines the Russians as defender and German as attacker.
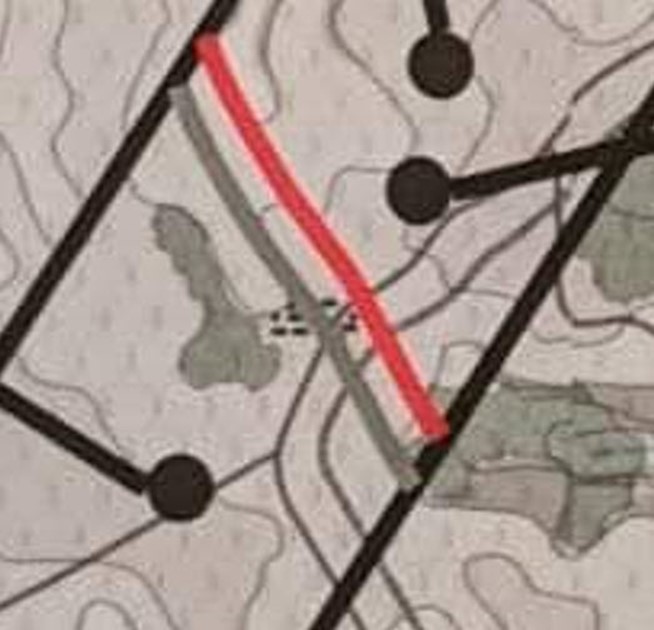
Yet the red setup line on the map has it NOT going through the village. So technically the Germans may set up at the farm up to the GRAY line? The Russians are to establish a defensive line OUT of the village? So auto victory turn 1…LOL
HUH?
Obviously not. The same thing happened with the larger scenario we played, where at least 10 hexes of defensive line were NOT in the module or maps that we had setup [huge error after a full day of setting up]. That had the impact of shortening up the Russian defence and enhancing the line as there were now no reason to have fortifications on the Soviet right wing in the open as it was OFF map.
In this scenario you will also note that generic pointers allow you to place units somewhere in the box? OR is it actually where the pointer ends.
These scenario sheets have a load of white space.
How about a scenario design that says the following:
Place the formation comprised of the following units for Germans Regimental unit a,b,c, from Formation X:
At or behind [East/West etc] of the grey line denoted by hex start point #### and ending #### inside the box bounded by XX/ZZ/XX/ZZ which is the scenario boundary. There. Simple it took less than 30 seconds to slap that half arsed sentence together.
Instead we have a scenario that fights the historical set up, denies you the actual scenario described in the text if you took everything literally, and well its just wrong and fricken lazy.
End of turn below using a rational setup:
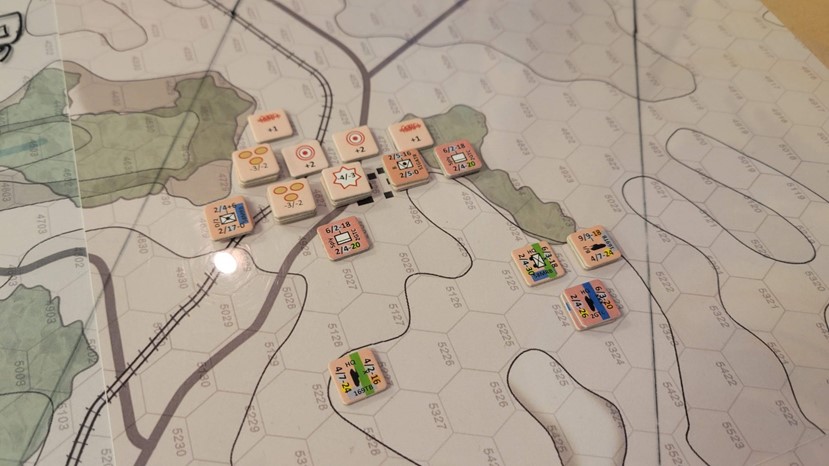
In any case we agree on a setup situation. I dig in heavy to avoid a frontal assault. Placing some dudes on right flank to cover the woods approach, and end around my right flank.
Mitch moves to attack where I ain’t! Makes sense.
We exchange a few shots on the approach. He places a meaty 88m I think or AT gun on OW and I slink away.
Mitch then drives through the woods!
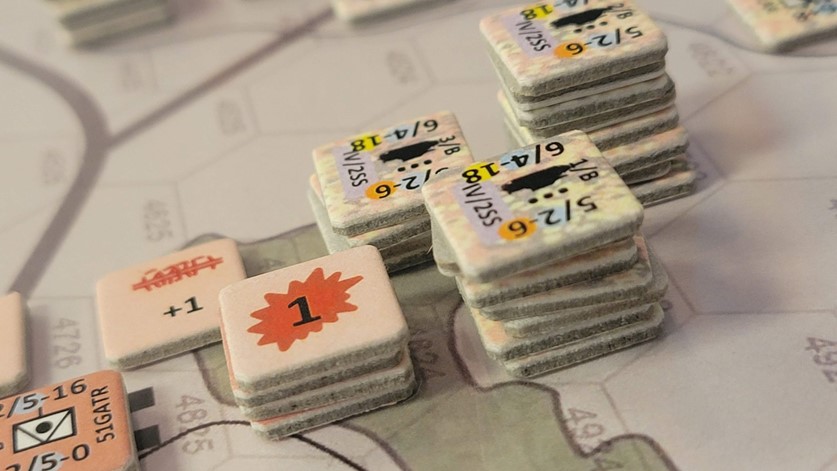
My guys fight valiantly as this flanking attack unfolds. Might have been an idea for me to place at least a wire in the woods!? Not sure if I recall that you can.
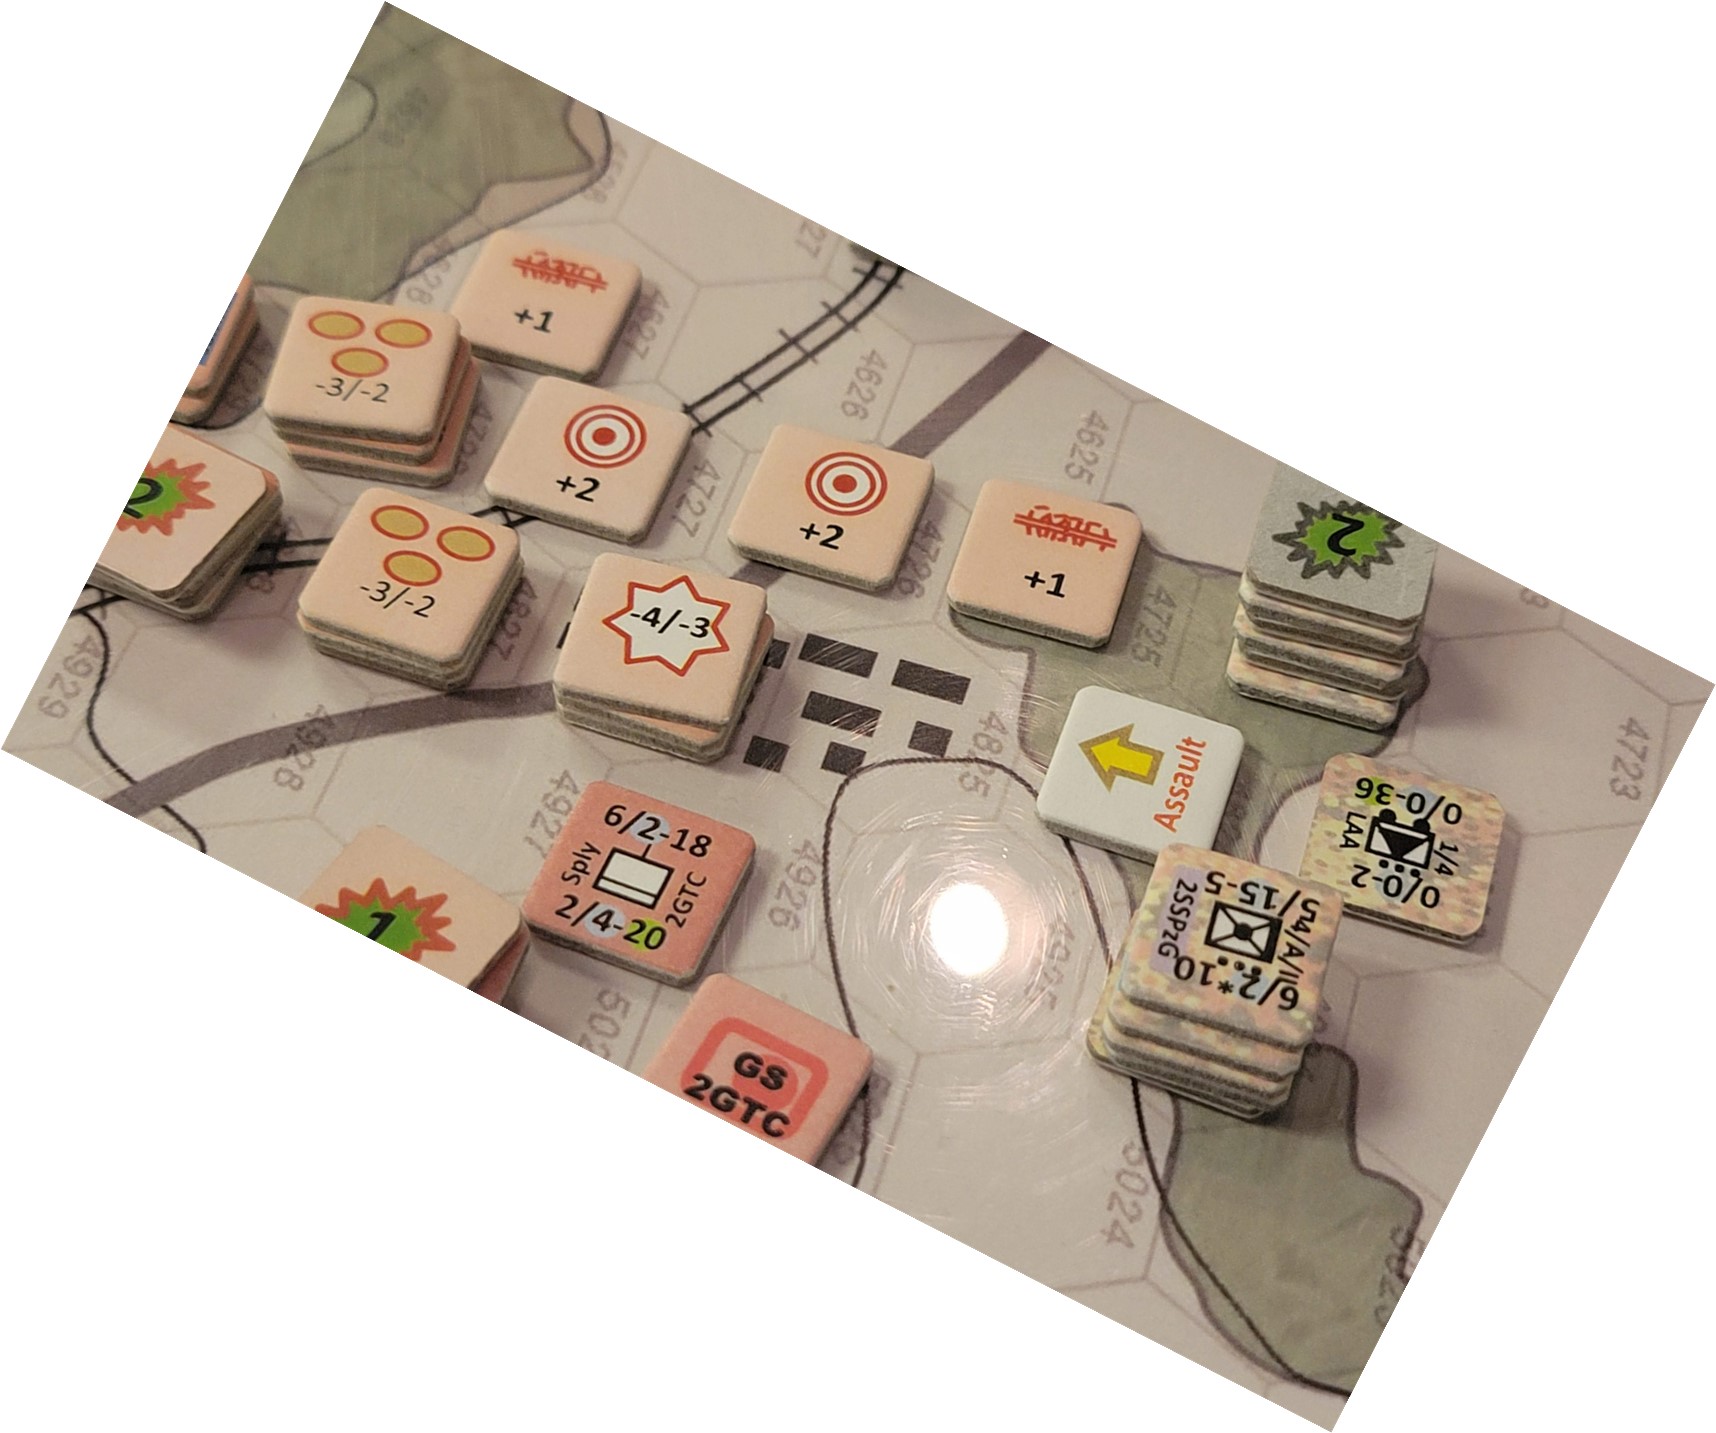
They clear the first farm/village hex. I drop arty and build up Suppressions on them, weakening their attack posture.
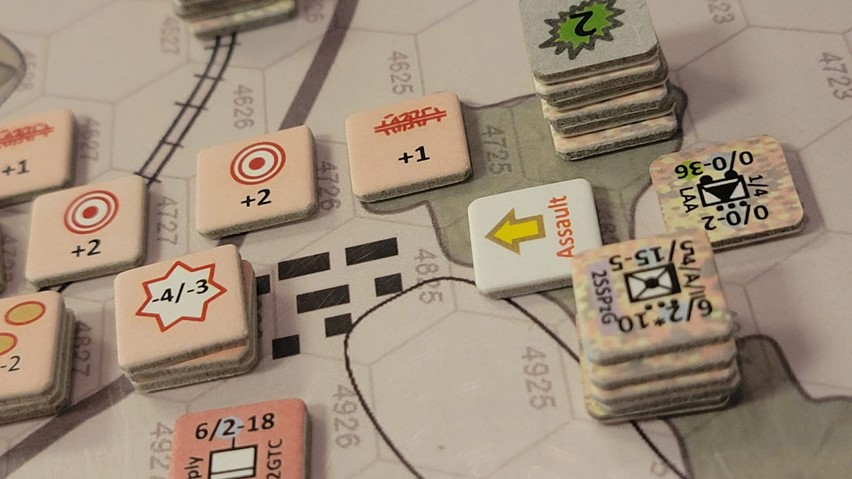
We do a bunch of sliding scale math 10% per suppression for Tanks, 20% per inf unit. Or is it the other way around? Its been a few months now.
Then run through a gamut of DRMs for terrain, etc. Forcing the Germans into some hard .75 to one and 1:1 attacks.
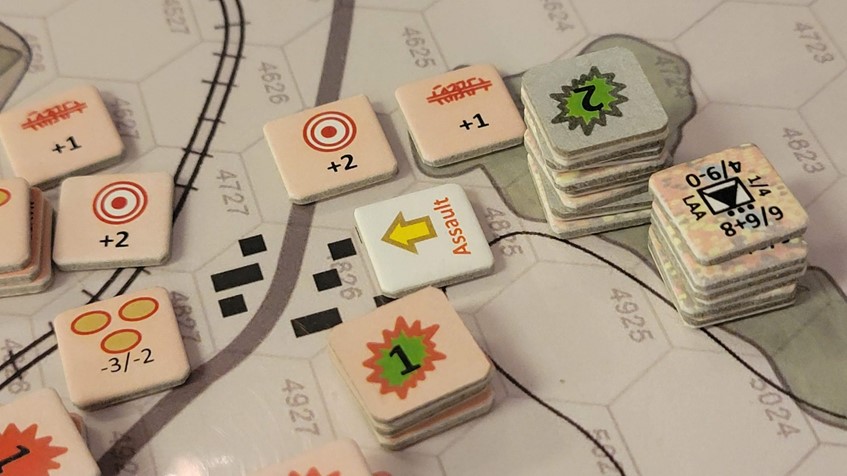
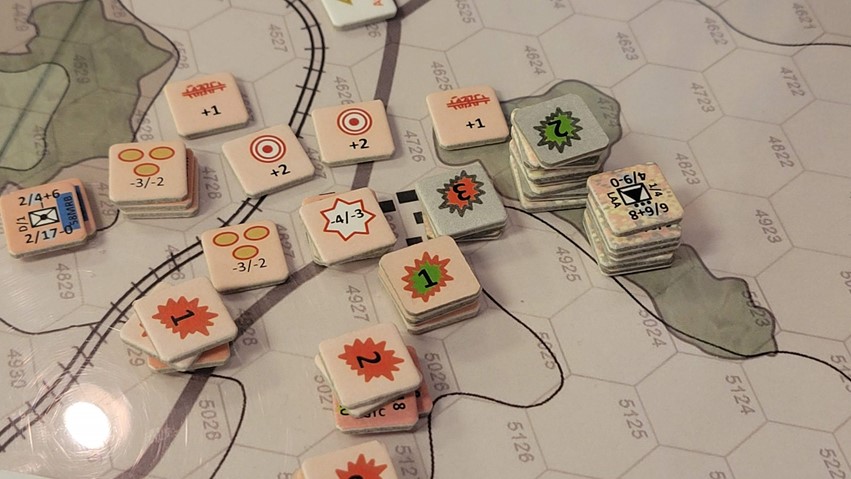
I pivot forces to the threatened areas, even sending in weak supply units to stiffen the line.
We place heavy ‘losses’ [really it’s a degradation of combat effectiveness which is cool, as it can be fully recovered, which on the face of it is odd, You have lose 40% of your combat effectiveness, come off the line and be back at full strength in two turns.] I suspect the game really requires some form of permanent loss, but I digress] on the German advance he however has the up gunned AT and AA units plinking on my tanks which are suffering badly. Mortars protect the defences. Its at this point we cease play. The Germans don’t have the punch to take out the fortified location.
The good news here is there are a LOT of tactical choices to be made. But the game is a slog, and just has a high level of overhead from setup to execution. Too much math. Too many inconsequential elements that feel like house rules made formal on the fly at a con.
Given all the space on the scenario cards, I do not understand why specific hex series or exact hexes are not given versus these lines drawn incorrectly on the map. Please state EXACTLY who is in the scenario. – Even stating the Entire Bn versus just showing a HQ unit. I have noticed that some newer modules now have unit Y x3 etc. But once again, how about stating Company, 1,2,3 with these assets etc. Take a look at MMPs, OCS and TCS scenario setups. EFFECTIVE! & CLEAR.
Well I shall write up the full scenario with further details on combat, overwatch and suppression effects shortly. In the mean time, Once I am moved the plan is to pull Sicily back out as we now have a much, much deeper understanding of the designers intent and potentially wheat he really means when writing on a scenario card.