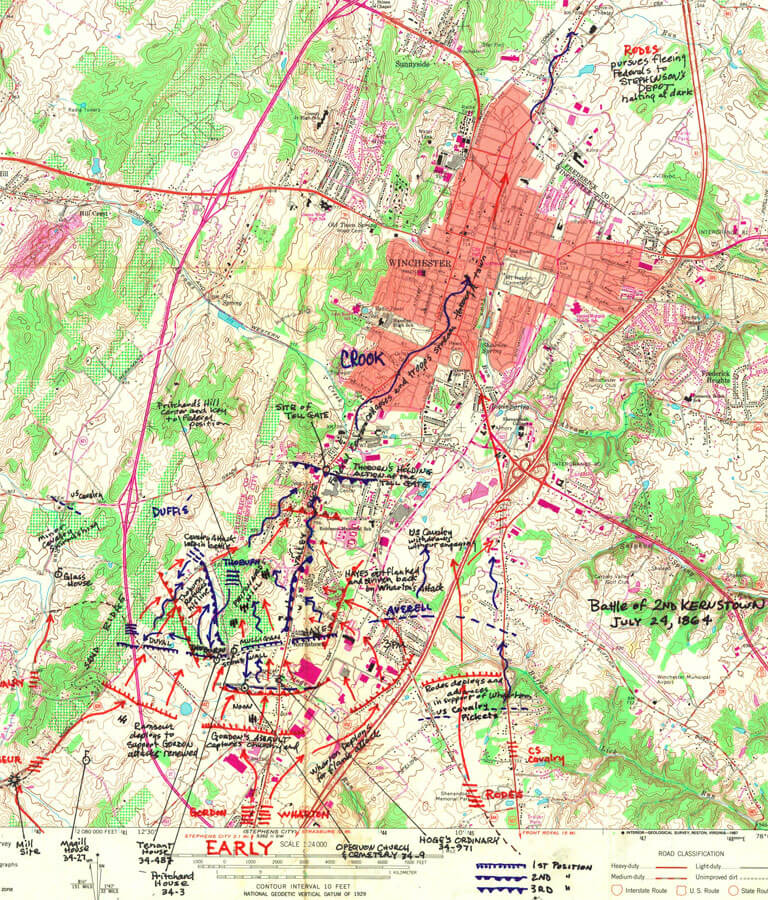
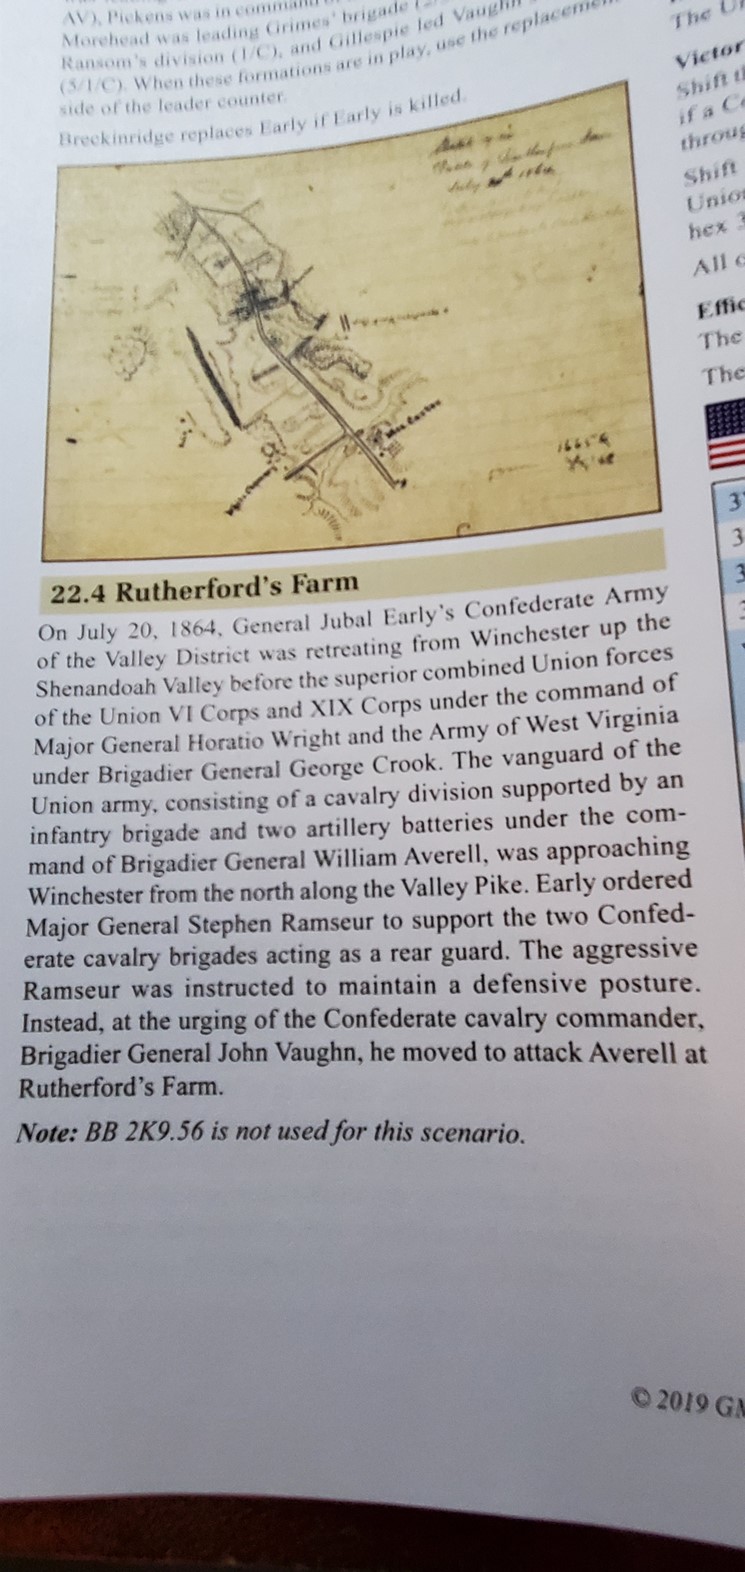
The Battle of Rutherford’s Farm is set in 1864 at the tail end of the American Civil War.
Lets see how this learning scenario unfolds for us. Both sides draw their efficiency markers which will determine how many activations they get. The Union receives 4 and Confederates 3.
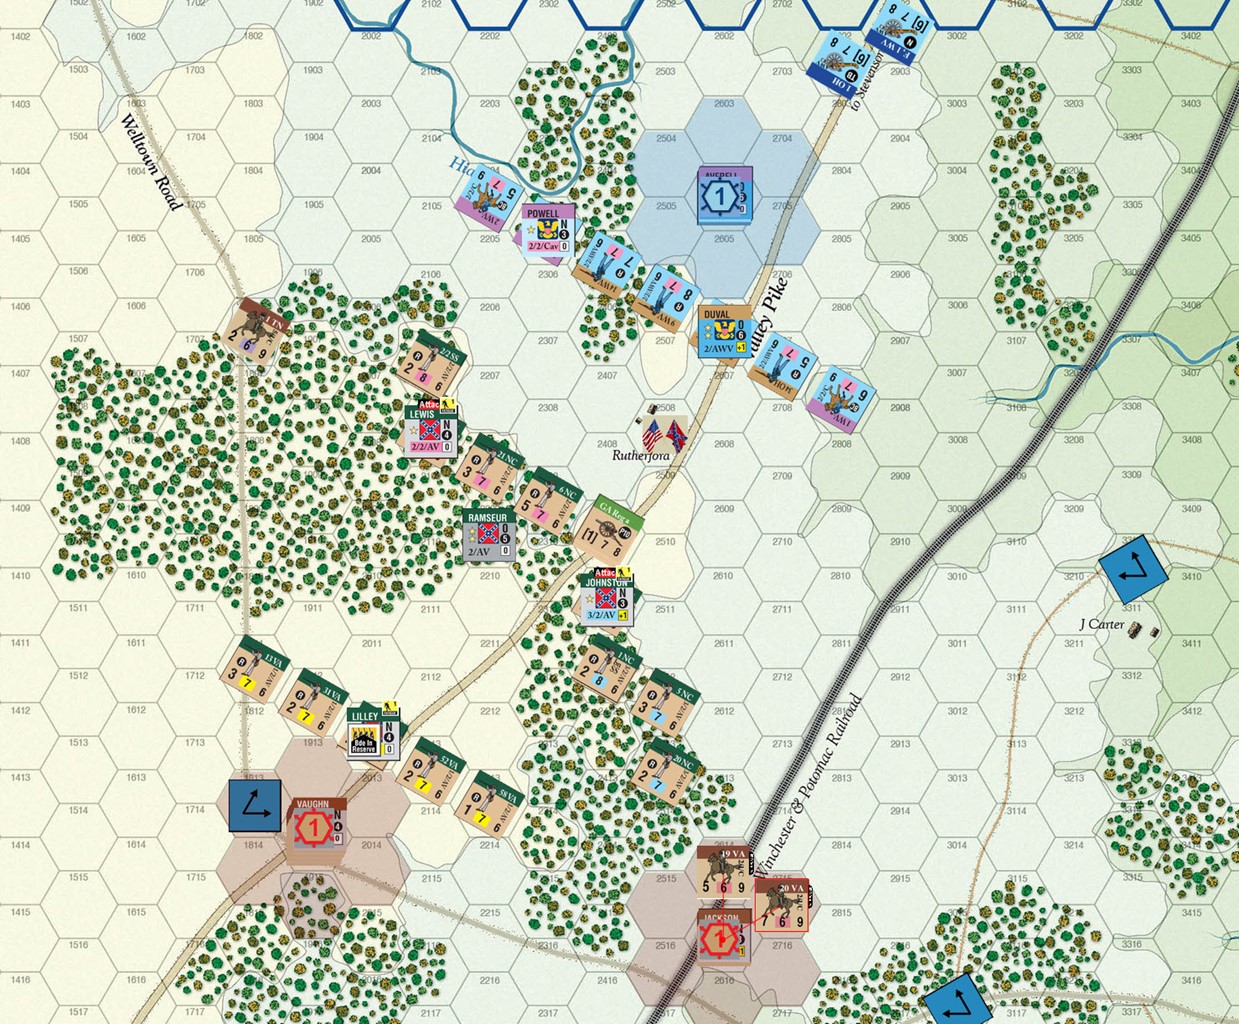
Opening positions
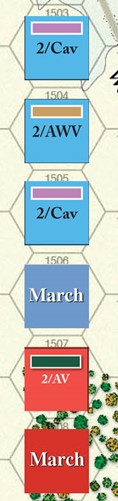
Sequence of chit pulls for the first half of the turn:
As the Union player I elect to press the Arty up and to the front, hoping to pop on his large arty stack then concentrate on advancing infantry.
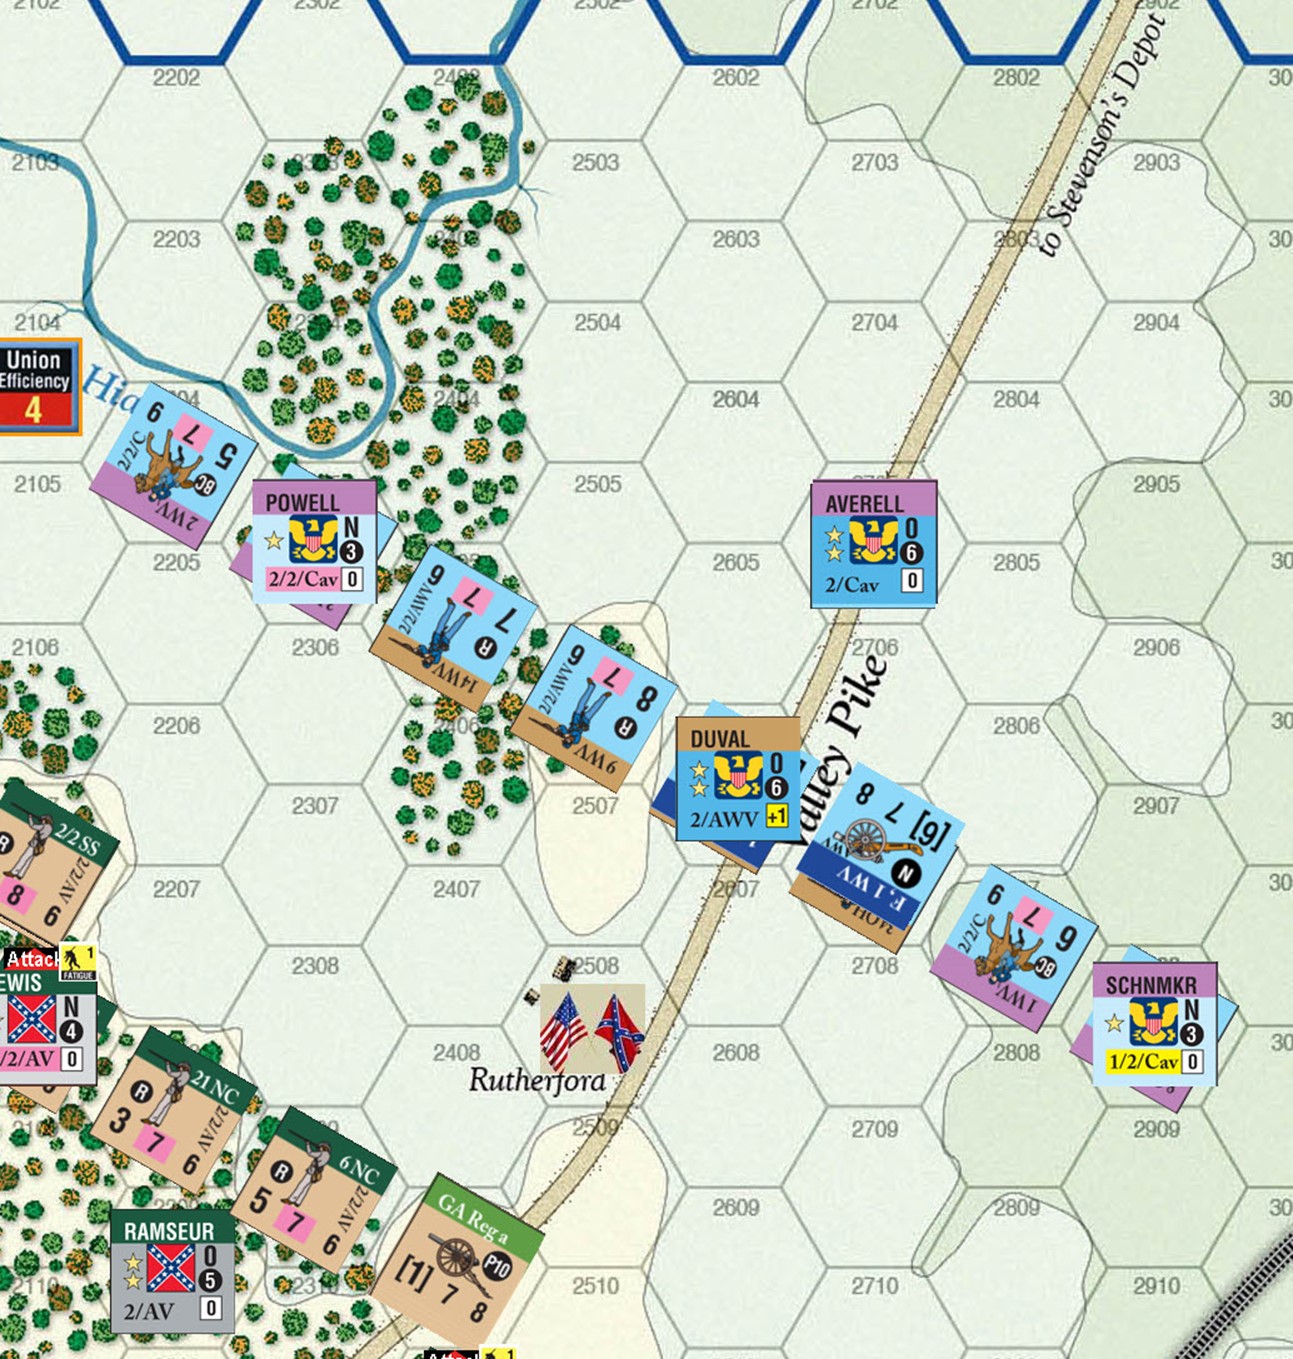
Arty moves up and Duval then rotate Arty to the front, or rather his men to the back.
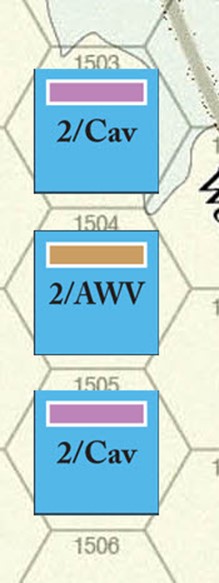
The 2/ Army of West Virginia –
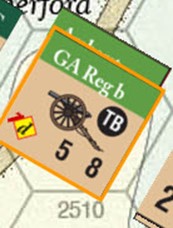
Their attached arty fire is effective, the Napoleonic guns and 3 inch guns generate a D [ disorder] result on all units and drop a step from the top unit.
A 2nd disordered [D] as we read it mean EACH unit that was in the hex loses one step. All the rest of the eligible Infantry in Duval’s brigade fire to no effect at range 3 [-2 DRM ]
Jackson changes orders to attack, which allows his Cav to move in and charge!
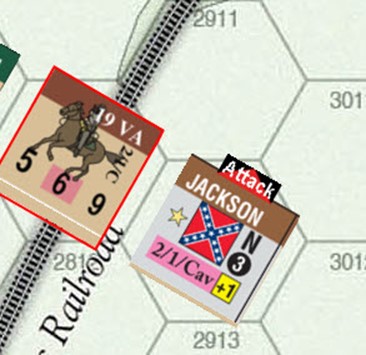
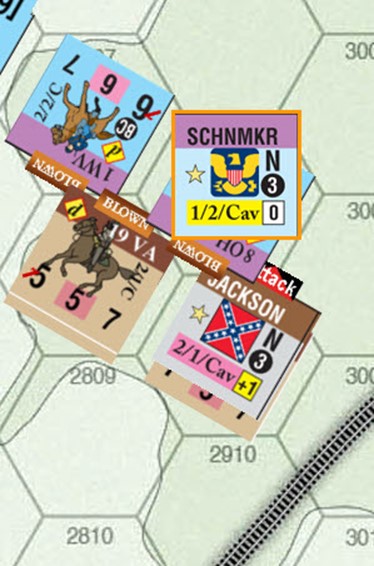
But Schoonmaker is having none of that. Despite being in a depression near the stream, he hears and sees the cavalry approach and gears his men up to counter charge.
Jackson’s effort ends up being 1:1 ½ and incurs a -1 on the shock tying up both units and disordering and blowing both.
The 19th Virginian attack aggressively in a bloody stalemate both sides lose a step AND are disordered and blown.
We pause here for balance of Vaughn’s forces yet to move.
Hey, Kev! First of all, I’m really glad you’re pitching into Death Valley: Battles for the Shenandoah, and secondly, I’m really glad that you’re using the Vassal module to play it!! If you end up taking a shine to this system, I’d love to play a game with you: your choice on game and side!
There were a couple of procedural details that may or may not have changed your strategies, and the outcomes as well. This is a very *detailed*, conditional system, and it’s all too easy to do things either out of order or incorrectly, which leads to “impossible results”. You don’t detail, step-by-step, or MP by movement point how you moved, or how you fired, but I did see a couple things I might raise an eyebrow at. Bear with me…
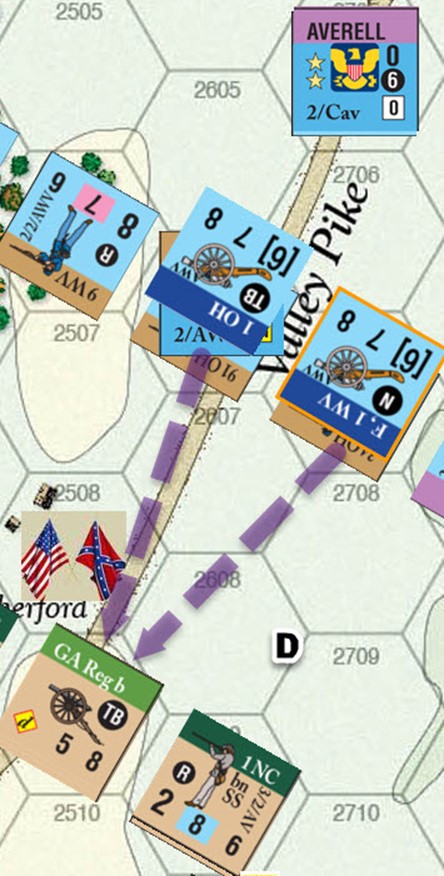
1) The Union artillery advance: You already figured out that the artillery have to be on top of a stack to be able to fire (a relatively new series rule, but an important one). Artillery have to pay a cost to “move through” other units in their hex to get to the front/top… but other units don’t have to do the same to move through/past artillery. The cost is 2MP. So moving down that road at 1MP/hex, then the lead artillery unit would have to spend 2MP to move into clear hex 2707, and then 2MP more to shoehorn the guns and caissons past 34th OH. So, the lead artillery battery would spend 4MP to get to the hex that says “Pike” in it, then 2MP to move to an ending hex and it’s last 2MP to deploy in firing position at the top of the stack. As you have it, the second unit in trail couldn’t make that. They would be the one to stay on the road until they get into the hex with Duvall’s men, then pay the “comin’ through” movement cost. But since both batteries have 6 guns, and pretty much the same effectiveness at firing range, we can call that “good”. Just something to remember as you go.
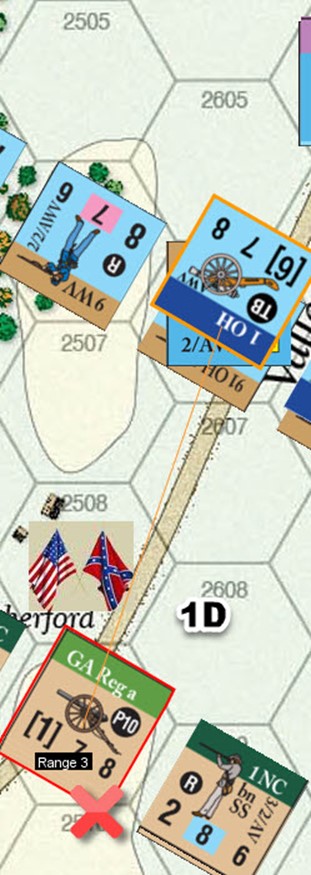
2) Artillery are not panzers, and they were *usually* not pushed forward in attack. Instead, they were placed on a knoll or mound behind the front lines, or off to one side where they could ply their trade in relative safety. In defense, they might be placed in the front lines as a very effective deterrent, but in that case, the enemy would be moving *towards them*. Thus, the rules are now set such that, if you want to move artillery closer than 4 hexes within LOS, you have to take risks in the form of UDDs; plus, you have to maintain adjacency to friendly infantry. When that lone (brave) CSA gun moved forward to within 3MP of the enemy, they would have to take a UDD with a +1 for every small-arms unit that could conceivably fire at them when they entered that hex. I count 4 units of Duval’s boys and the 1WV cavalry; I don’t think that gun crew and wagon drivers would make that risk, especially since, when artillery is disordered, it cannot fire. Also, if you were to brave that UDD anyway, and go hell bent for leather (which did happen a time or two during the war, hence the rules that allow you to risk it!), if the modified UDD roll is *a lot* higher than the artillery’s cohesion (7 in this case, and I don’t remember top-of-my-head what the penalty threshold is; maybe four more than cohesion? re-check the rules for Artillery movement), in addition to failing the UDD and becoming disordered, and hence ineligible to fire … they lose a *SP/gun* for each “pip” over that penalty threshold. Now, with the addition of 4 to the 1d10 roll for those enemy that would be taking potshots at the crews and horses… and with only one gun in the battery to lose…. you can see where I’m going.
3) The artillery exchange is at range 3, which is the outer edge of CANISTER range. Starting at range 4, artillery fires “bombardment” (relying partially on airbursts to cause damage); for bombardment, you use that rightmost table on the CRT; for CANISTER, use the same table the infantry and cavalry use for SMALL arms fire, on the left.
Then: small arms (and canister) fire only affects the top/frontmost unit in a stack. Bombardment fire, though, affects all units in the hex (with that airburst shrapnel raining DOWN on everyone, rather than grapeshot coming in from the front). The modifiers are different for canister fire than they are for bombardment, too. In bombardment, you get modifiers for being on a higher elevation than the target (plunging fire), and also bonuses for large targets (stacks bigger than 8SP, or negatives for those 2SP and smaller). So, in your case, if a stack receives small arms fire or artillery canister fire from range 3, only the top unit would be affected, and if they suffered a second disorder, the top unit would lose 1SP and have to retreat 1 or 2 hexes; the remaining units would then roll a UDD **because the unit in front of them disordered and retreated**. So, it’s *possible* that everyone in the hex might be disordered, but not automatic.
You didn’t detail the cavalry actions enough to throw darts at, but I hope you remembered that to *charge* ( as opposed to simply “move forward and then shock”), each unit has to commit to the attempt, then roll a UDD; if they pass, they charge, if they fail, they just sit there, doing the old, “I got it, no you take it” baseball outfielder goof-up.
Again, these are all things that are VERY EASY for a relative newcomer to miss among the nearly 40 pages of series rules; so don’t feel bad, and please don’t take these comments as anything like criticism; rather, I’m trying to help you learn this difficult system. Keep going, though; after a few turns, you do combat enough times that you begin to remember these little details and “special cases”. I’m very experienced with this system and yet, I constantly refer to the rules for things I always think I should be able to remember… but there are a lot of conditions to every specific situation, and the rules may be different, IF….
One other thing I hope you’ll remember as you go… The CSA infantry brigades are fatigued, so they will have +1 added to any UDD trial, and -1 to all fire attempts, -1 to their movement allowance (subtracted AFTER any halving for being under Attack orders).
Good points.
1, Arty went around the dudes on the road.
2. According to our read the fire was supposed to be executed at the 3 hex range on the rifle/pistol table. – But I will check with my opponent. Him moving up alone in a big arty stack! Good catch not sure either of us saw or caught that. – we had questions about LOS too as it seems counter intuitive.
3. Cav charge was decalred but I didnt capture chit placements. Youare supposed to place, then UDD then charge/ Counter charge [UDD]. Results were meh, Im the Union in this one.
Right, you name all hopeful participants in the charge. Then, each unit (stacked -a and -b battalions can roll once for the entire regiment) UDDs; if they pass, they charge as planned, if they don’t, they’re done for the activation (can’t even fire). And all the units that DO pass, have to carry through with the charge, even if having a unit or two not participate screws up their manpower ratio. The rules are really good at demonstrating that the age of the cavalry charge was OVER. Already they were relegated to scouting, raiding, and holding flank road junctures during operational maneuvers. In this system, if you charge with cavalry, you need to be sure you’re going to clean the enemy out… and have infantry behind you to cover for you when you’re Blown, and really vulnerable to counterattack.