Last Hundred Yards, Solomon Islands:
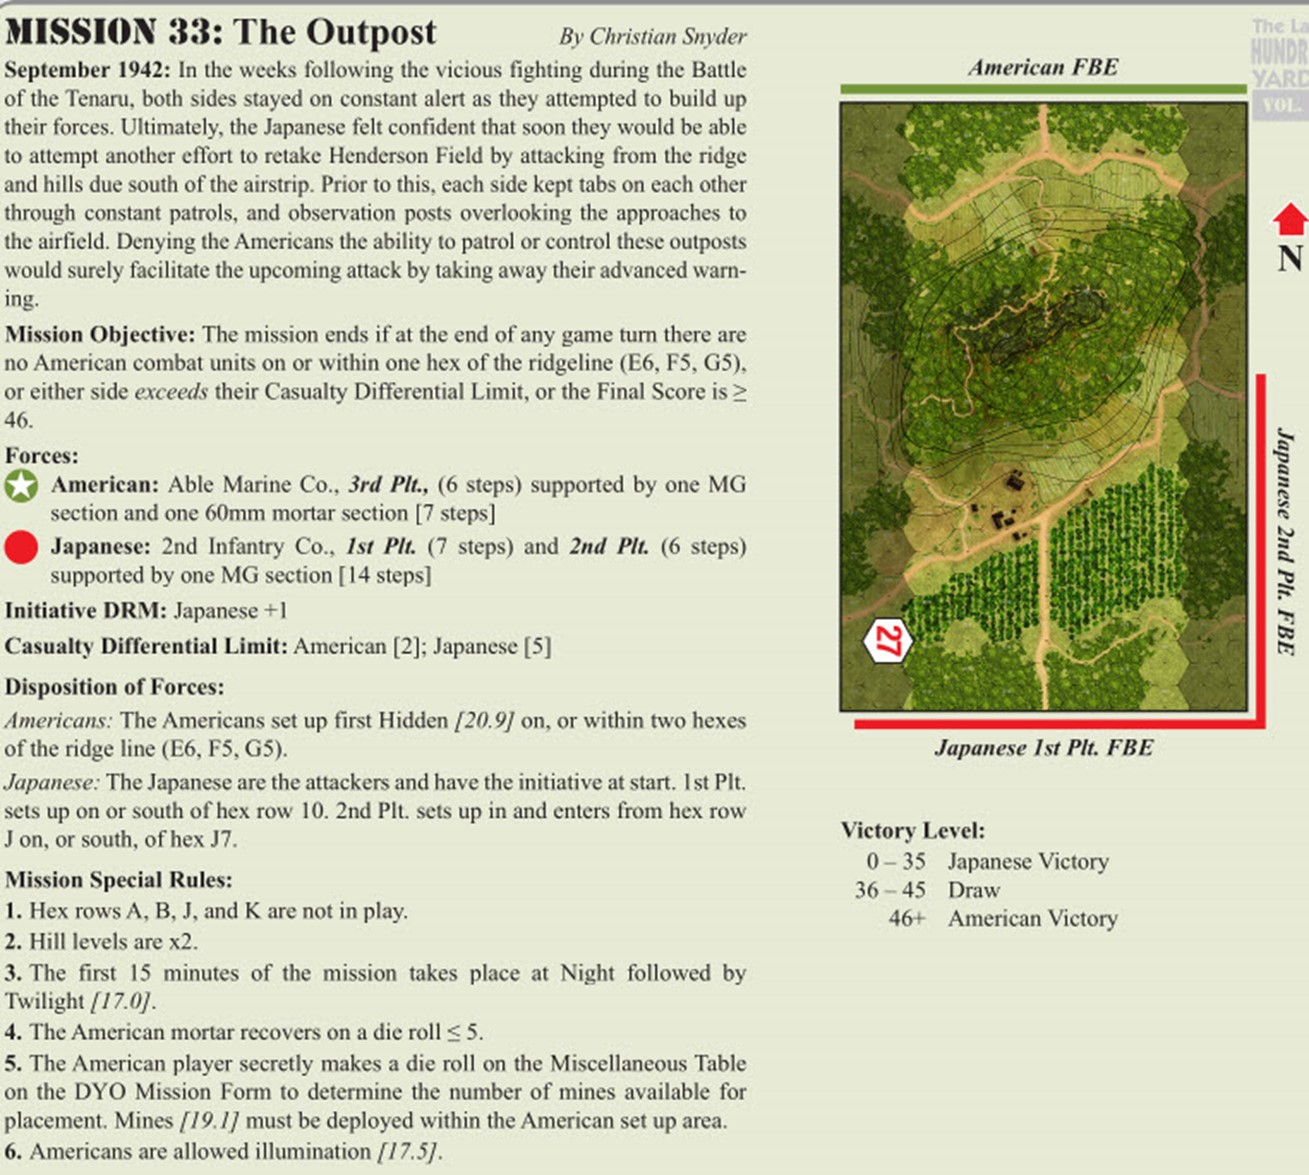
To me this scenario requires a lot of guts to play as the USMC. Massively outgunned, and outnumbered. 2:1! In fact I think Mike might have had an extra unit or two by accident we were jaw boning too much!
My approach was despite it being a learning game, I wanted to test out some defensive ideas that were exposed to me in my first solo play. Wherein the IJA smacked the snot out of the yank, ½ squads or sections and even single units took an ass kicking.
So at Mikes suggestion and my suspicion I decide to stack up and try and protect the VP hexes in the top of the ridge.
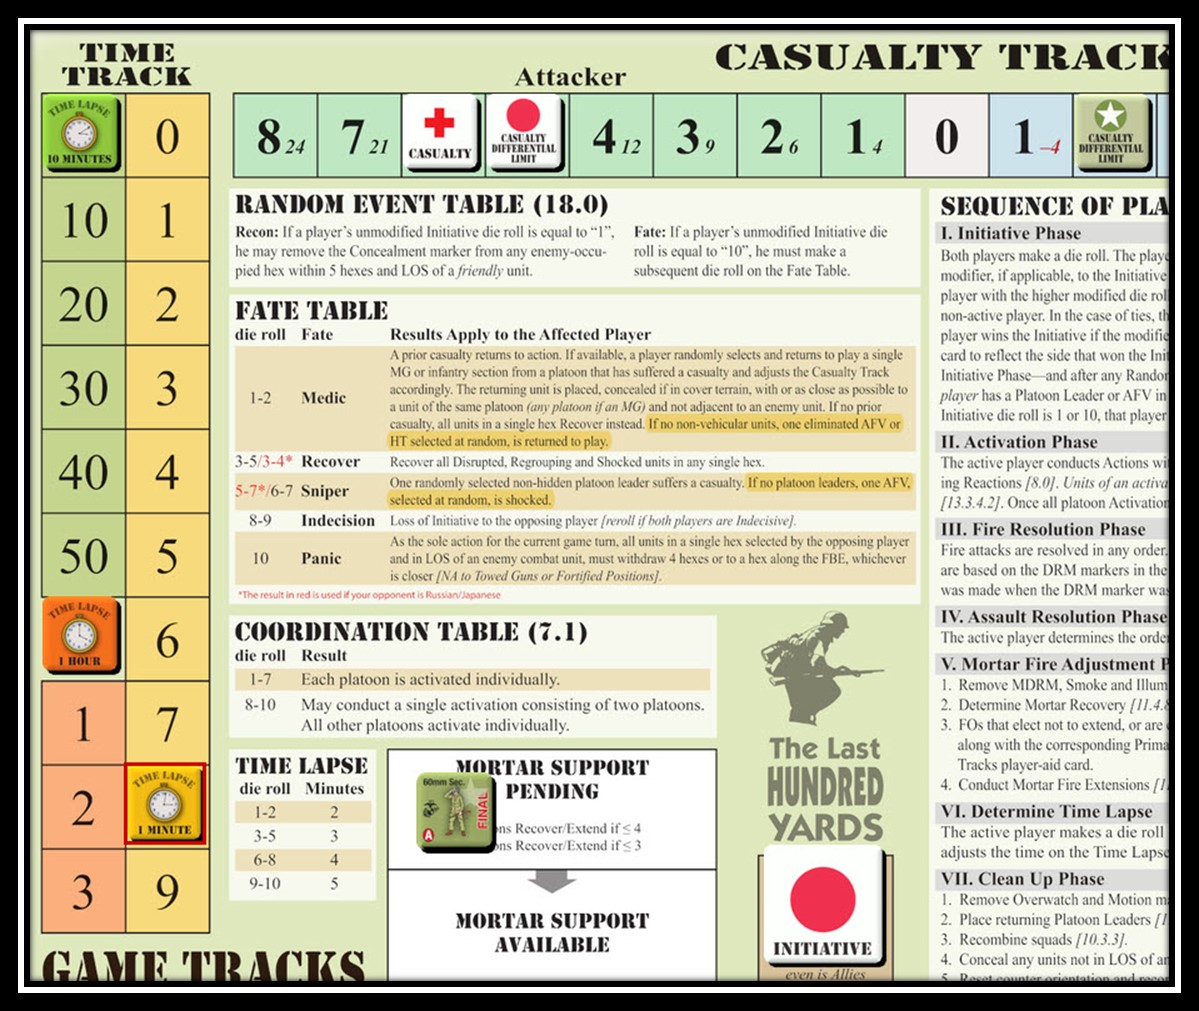
We rolled for mines and received two…not much! But 3 was the max anyway.
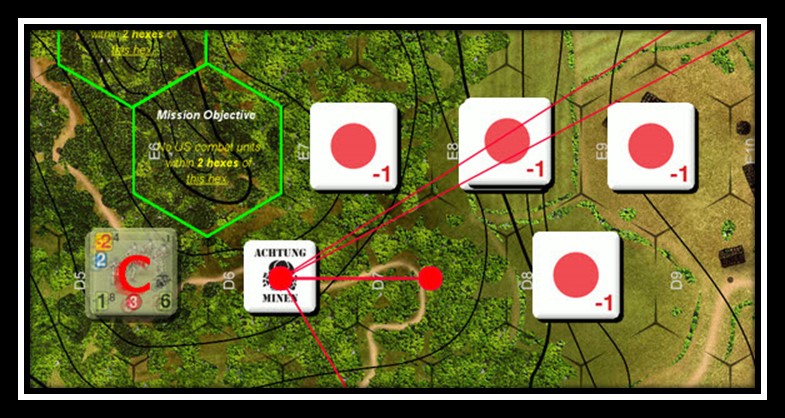
As a setup note all units begin in IP’s.
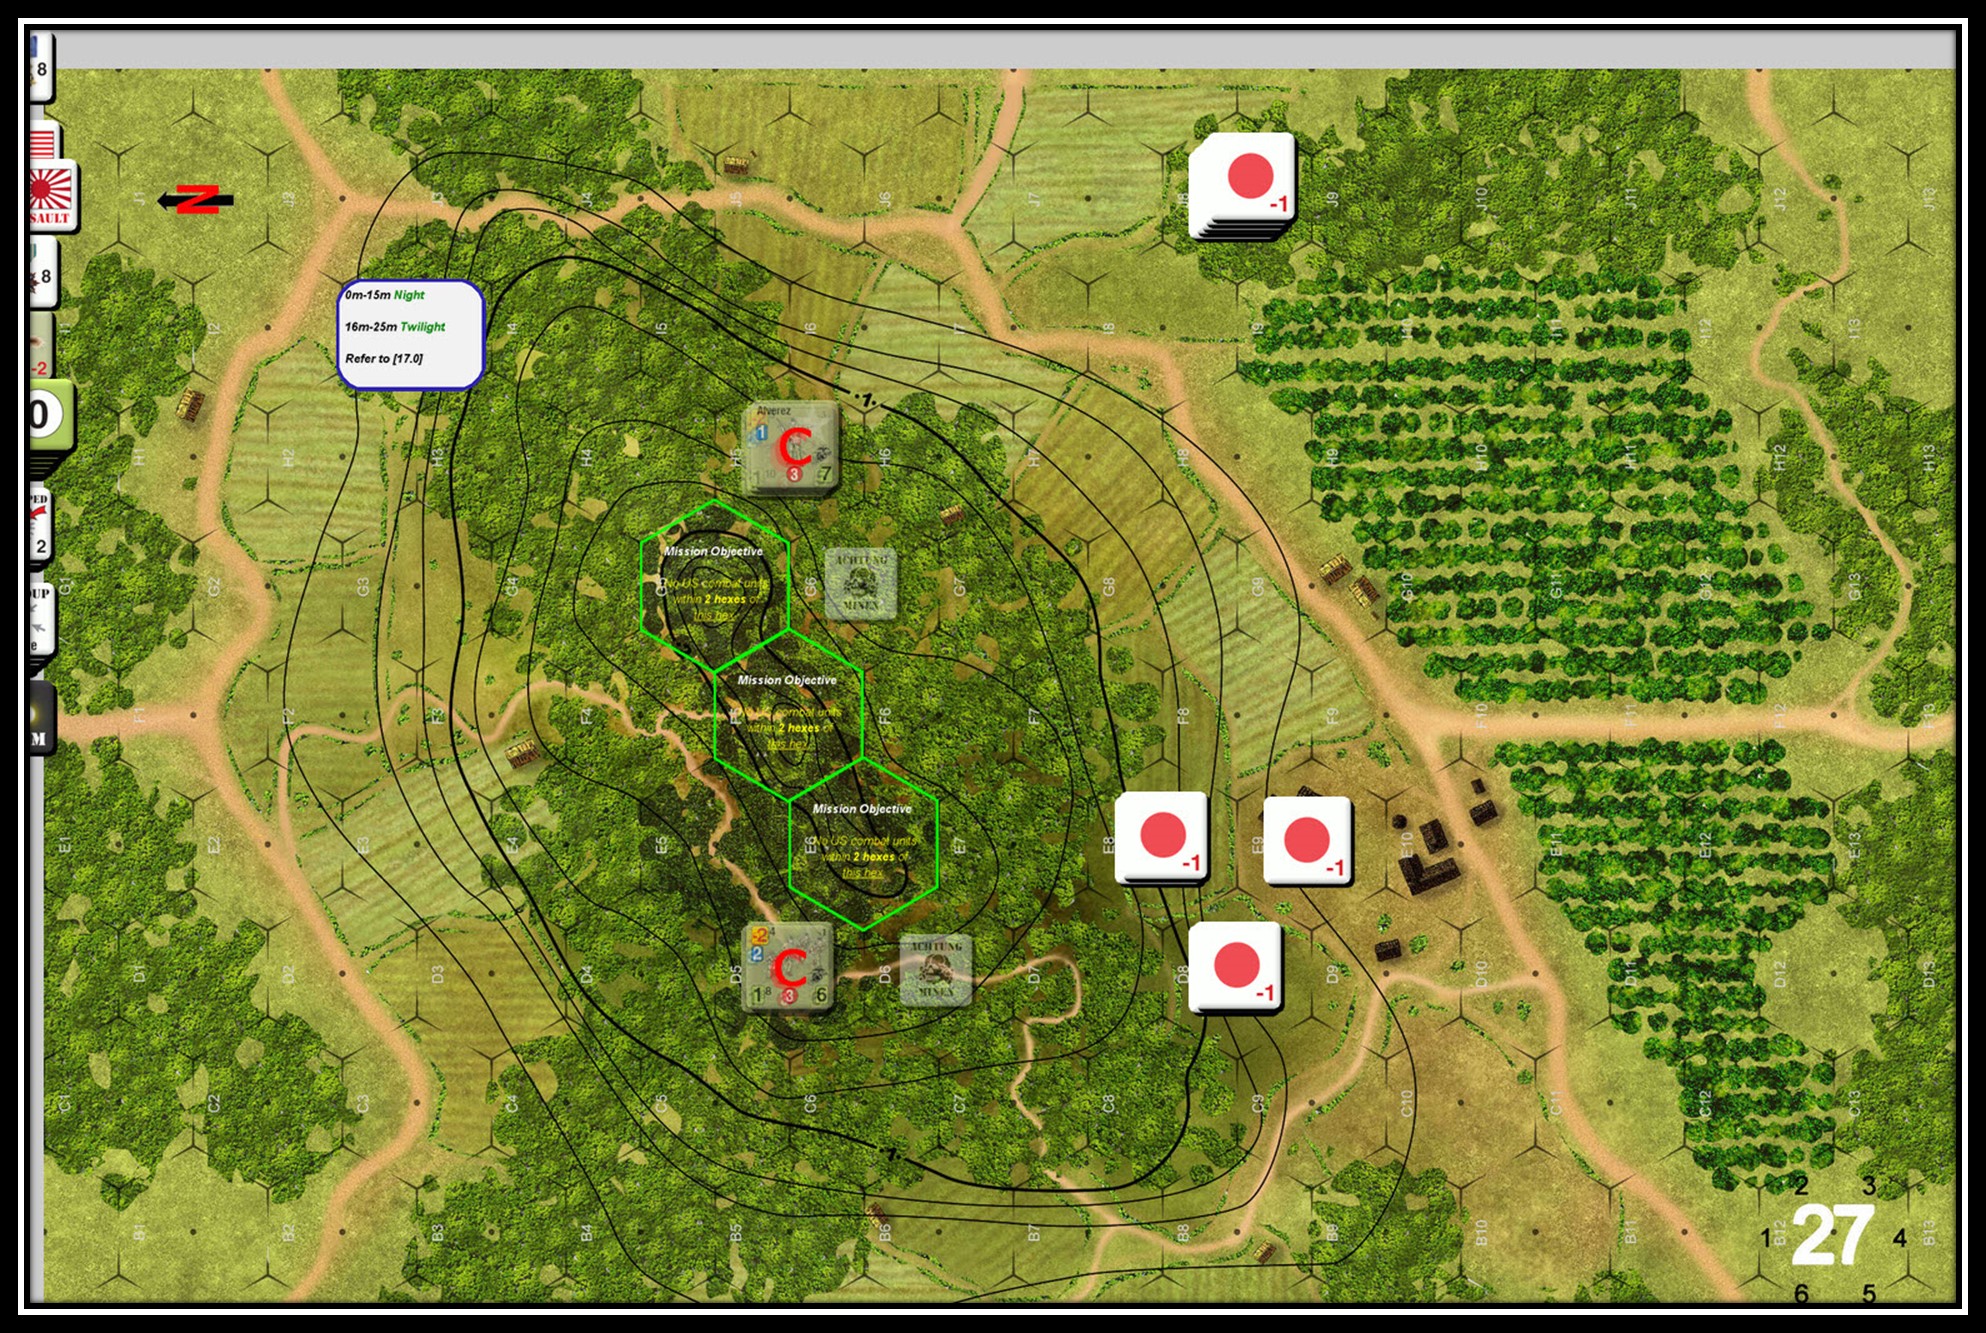
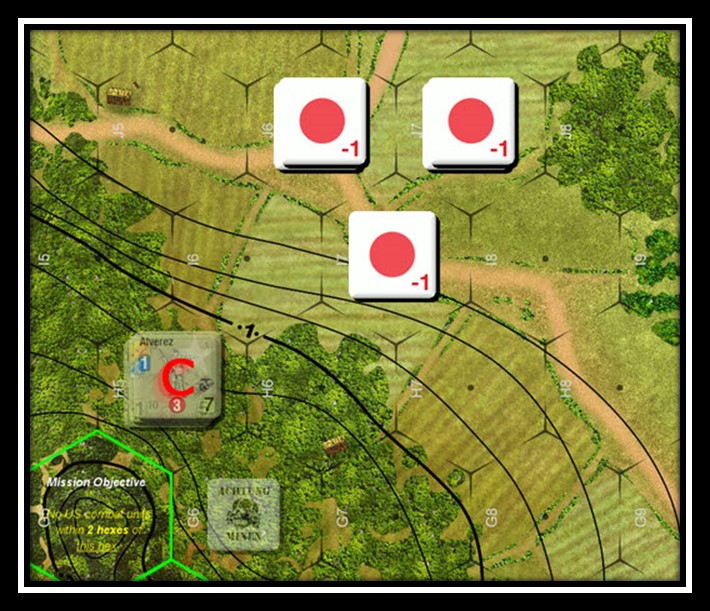
The first 15 minutes are night. So there is illumination for the US and mortar support. I suspected that Mike would try a flanking approach, and at the bottom of the map use the trail. At night all units get to move 2 hexes, so trails did not matter much. I wanted to be withing in shooting distance of the mines and allow them to guard one flank for me.
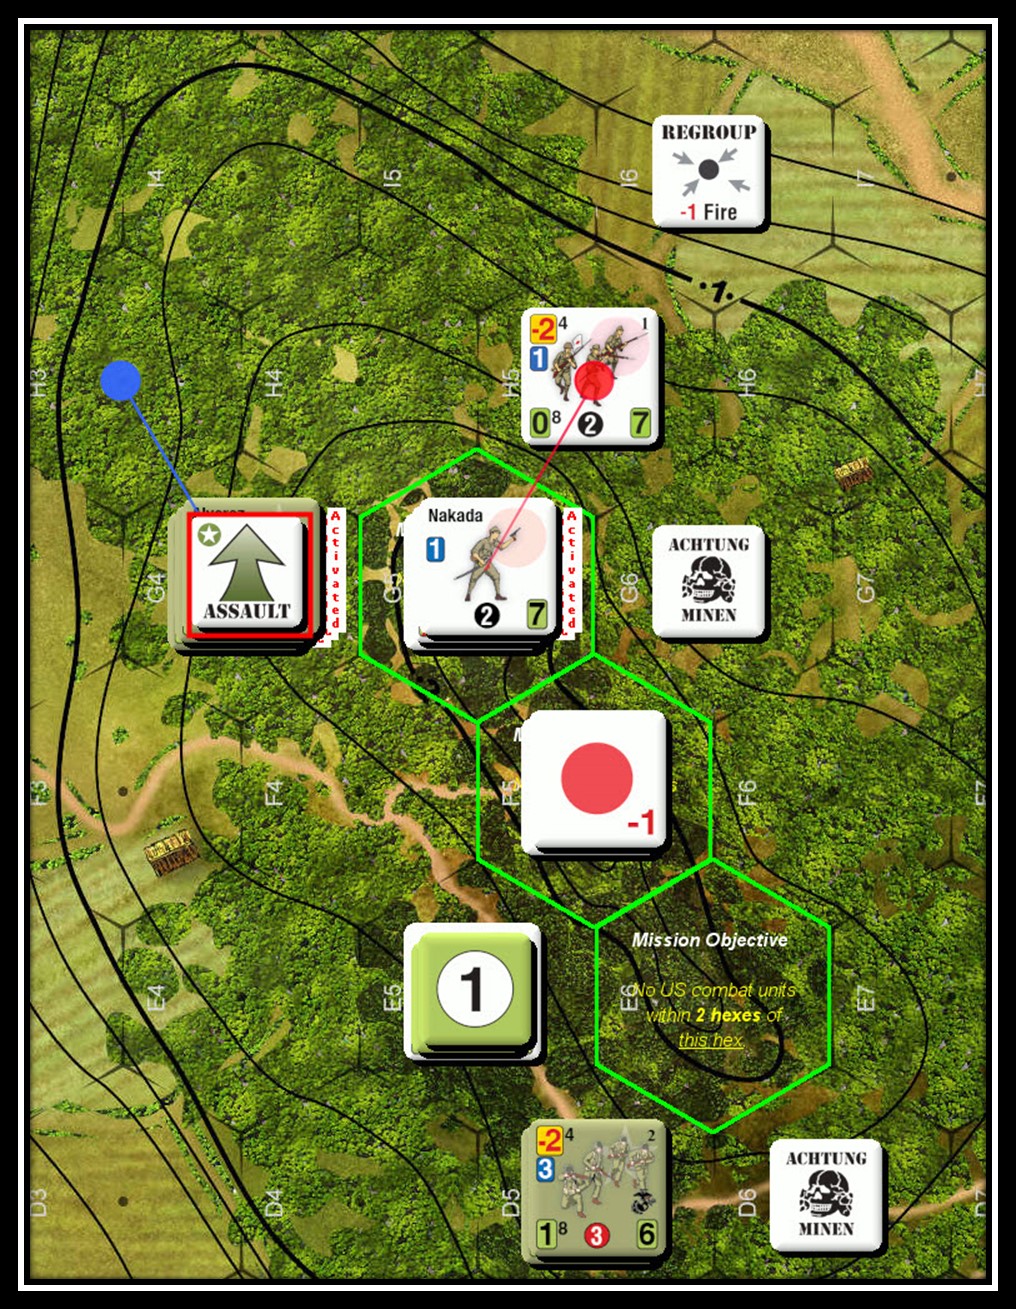
Opening up IJA forces advance aggressively in the open.
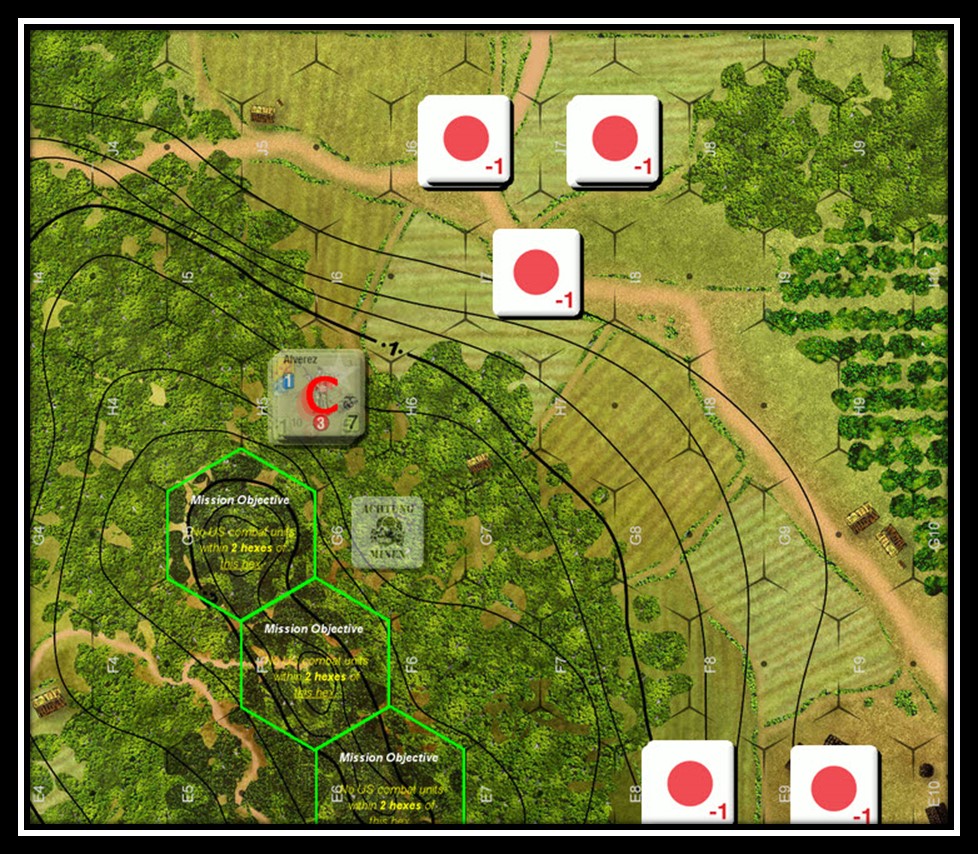
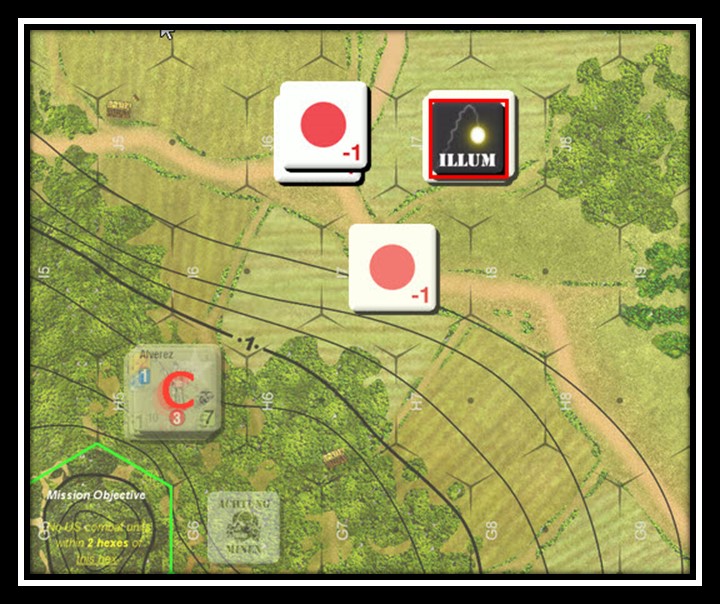
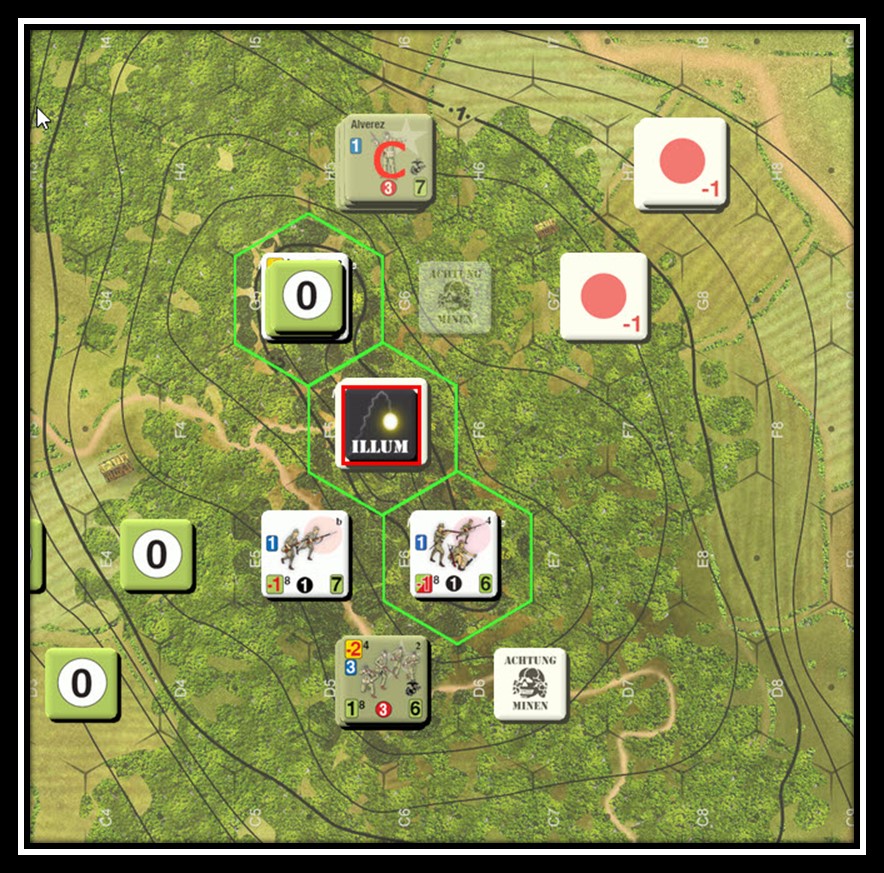
In my reaction phase I pop illum. It sitcks. We fire away!
With the daylight like conditions we spot the enemy advancing.
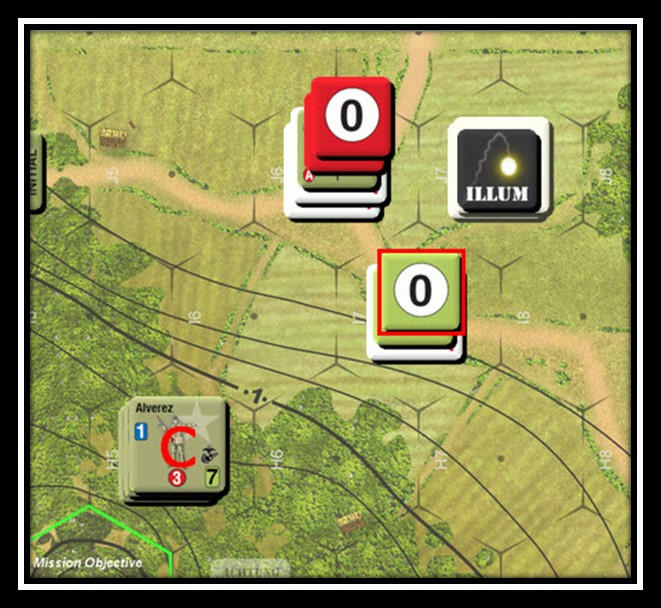
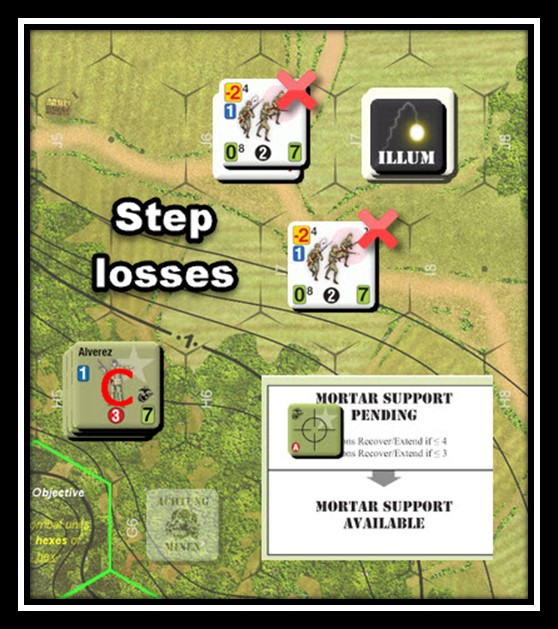
Both mortar ‘shots’ land on target. I also elect to fire with my squad and MG section. This places a step loss on both stacks. Japanese don’t disrupt they power on!
At the bottom of the outpost the first Japanese unit runs right into the mines. I roll a ten and they are eliminated. Another 2 steps. For 4 steps of the required 5.
So we have knock 4 steps in the opening 3 minutes of combat!
Turn 2
The bad news is mortars are pending now, and by the end of turn two we have only spent another 3 minutes. But lets look at what happens first –
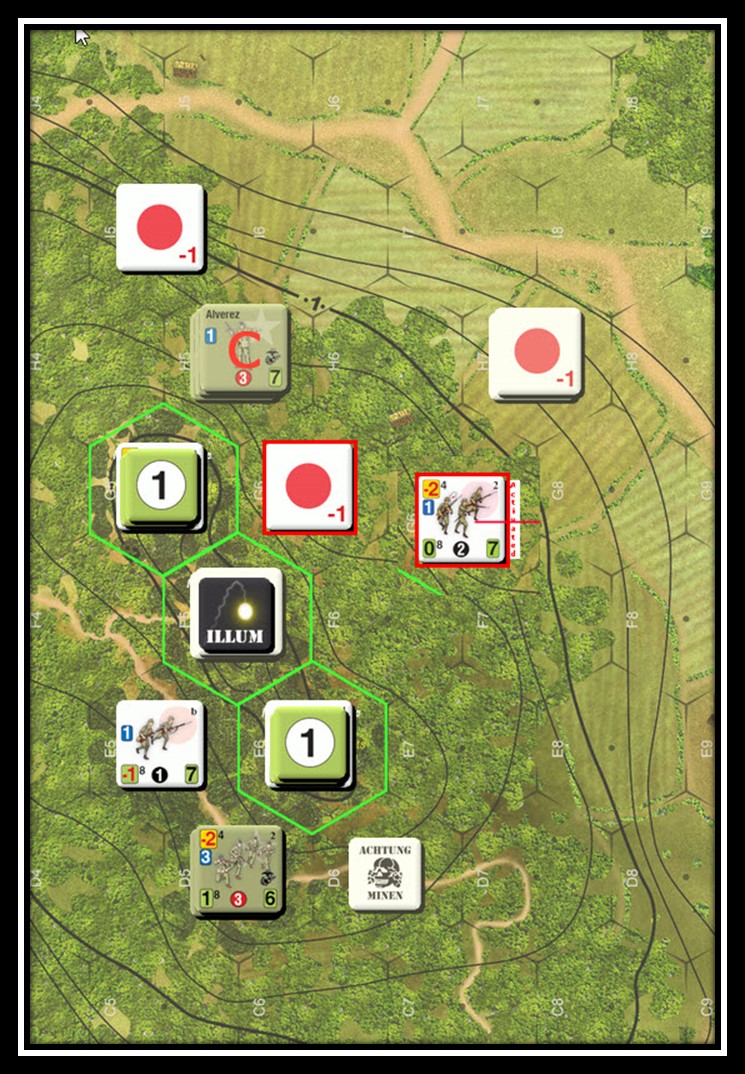
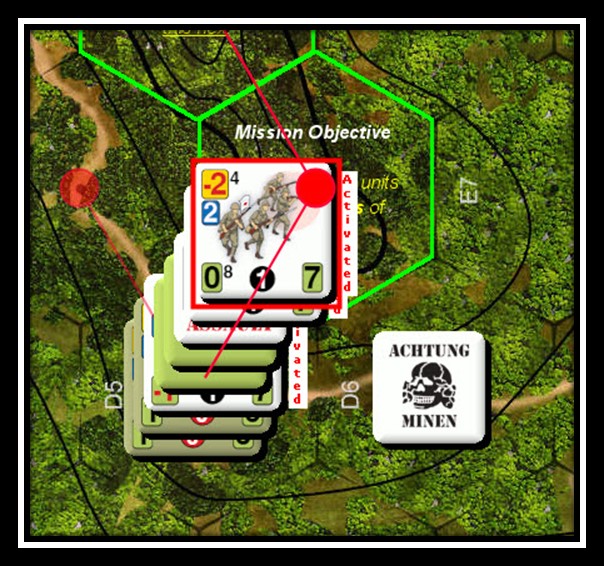
The Japanese close in on Lt Alveraz and the men. The circle to the VP location and on either side!
That flank protection now comes into play! The IJA squad hits it and a I roll another 10 – boom two more steps dead and that means 6 steps lost so the IJA lose the battle! Its game over when you exceed the casulaty marker limit.
Turn 3
We decide to keep playing to see what transpires in the following turn. As the intent was to explore the Japanese capbilities.
Just two more minutes pass.
I take initiative, declare an assault and attempt to also fire on the advancing IJA. In their reaction the Japs use their capabilities to move quickly and reinforce the VP hex Iam assaulting. I declare a feint and avoid that MESS! But fail the cohesion check and have to reatreat. This places me more than 2 hexes away from the VP hexes.
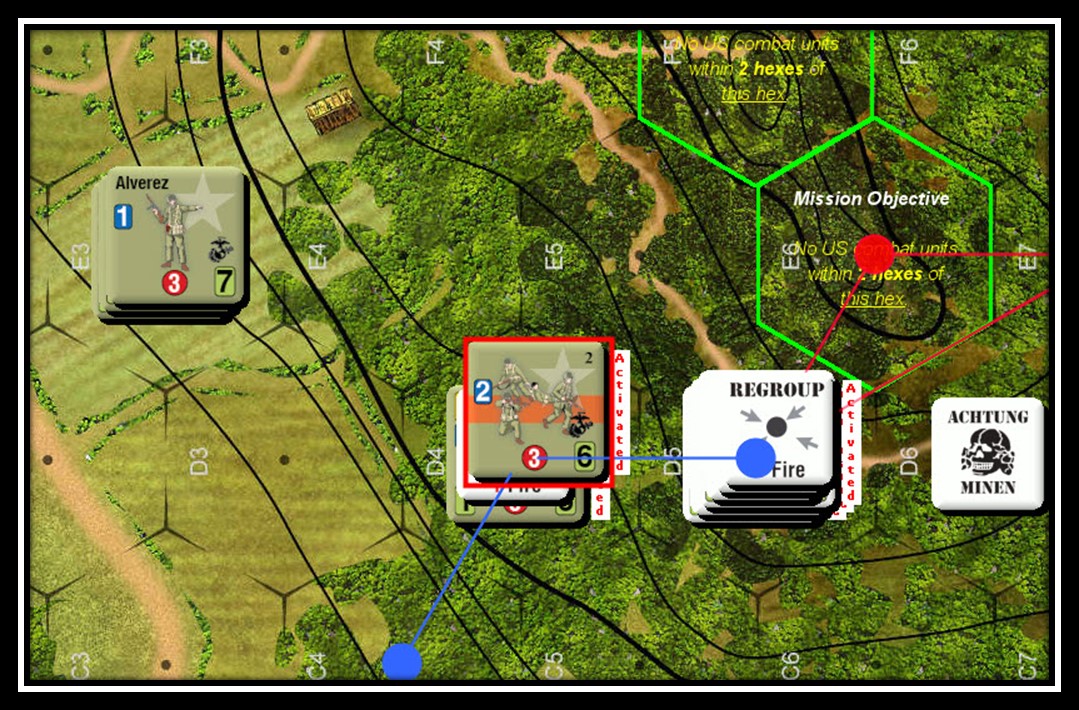
Similarly the Americans at bottom of map are assaulted and disrupted but take no losses.
So at the end of turn 3 the IJA have secure the VP locations but took nearly 50% casualties to do it. Or as I like the think the USMC kicked ass in the first 5 minutes and demolished the Japanese will to fight. Game over! The incremental turn was instructive as the devastation that can be wrought by allowing the IJA to close. NOT good. So lines of fire, mutual support are key. Both hard to do when the enemy has a 2:1 advantage. Makes for desperate decisions and nail biter die rolls.