Lionel Martinez from BGG has graciously allowed me to share hi dynamic and detailed after action report of Dogs of War.
After a long journey through the rulebook and charts and the first two scenarios, see my very short review here
https://www.boardgamegeek.com/thread/2596535/very-short-revi…
I set up the third scenario. This one is bigger than the preceding two. It is not a beginner’s scenario but still a learning one, not of introductory level, but sort of intermediate level scenario. You will be able to see all bits of the game system in a reduced map footprint, with a reduced number of counters, and a relatively straightforward situation. Here is the entire map, the playing area is delimited not by the boundary markers provided in the game but by countersheet remnants./pic5995585.jpg)
The reinforcements and markers on home-made displays./pic5995587.jpg)
A close-up on the Events Decks. The Soviet Player have at the beginning of the scenario some Action Cards available. He can use them when he wants, whereas the Event are drawn from the Deck. It is an easy and fine way to model some assets and some contingencies. Quoting the rulebook:
Event Cards represent unexpected or unpredictable circumstance, affecting a single unit or a whole operation theater. Players have no control on when an Event will happen. Action Cards represent strategic or operational options available to one side, from Special Forces Raids to Deep Air Strikes in enemy’s territory. Differently from Event Cards, Players have full control on when / how to play them./pic5995588.jpg)
On the following image, we can see the Close Air Support markers. Quoting the rulebook again:
Close Air Support areas must be planned and coordinated with Air Force and cannot be improvised. Air Points supporting ground troops outside a predefined CAS Area are less effective.
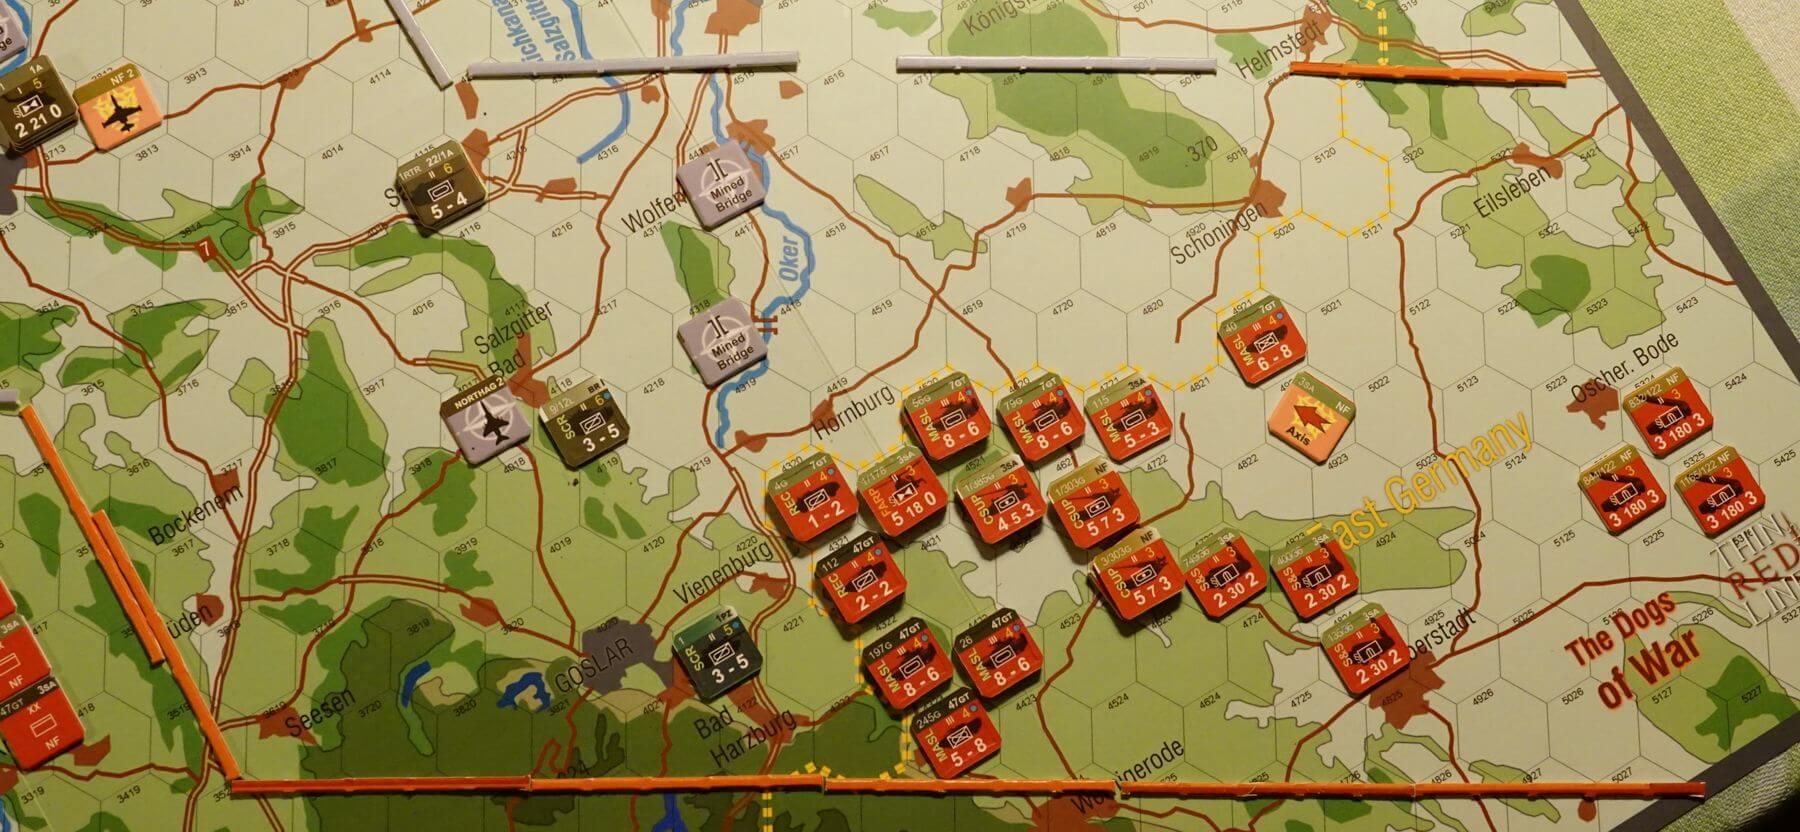
These markers will require an Order to be moved elsewhere when needed. The Soviet 3 Shock Army (3SA) of the Northern Front (NF) is massed at the frontier if we except a Guard Tank Division (GTD) off map. The NATO forces are dispersed and thin. The three units are set up in Screen Posture./pic5995589.jpg)
The intent of these forces is to slow down as much as possible the advance of the Soviet army. The objective of the Soviet army is to reach the Leine River and cross it. The NF Commander have given two days to the 3SA to accomplish this task: at the end of the second calendar day, the 3SA should have a bridgehead across the Leine. In game term, it is 14 turns of 3 hours each.
D+0 H06 – On a rainy day of July 1985
A pouring rain slow the advance of the Soviet army right from the start. The crossing of the frontier is impeded by the Iron Curtain rule, and civilian clogged the area and make the road less useful for both sides. The NATO units retreat slowly, their Screen Posture define a Screen Area of two hexes range from the unit hex in which the Soviet must pay additional movement cost. This movement cost is not paid if the hex entered contains another friendly unit, or is adjacent to a friendly unit closer to the screening unit. The rules as written is not much longer than what I just typed: all the rulebook is as concise and clear and full of details as this example illustrated./pic5995590.jpg)
D+0 H09 – Fighting Withdrawal
The rain stops and the Soviet manage to catch the 1 West German (WG) Recon Battalion before it disengage. There is two Interdiction markers placed on the map by NATO Helicopters: it is a rule mistake since Helo cannot perform Interdiction mission. The reinforcing 10GTD arrive at the right edge of the image. At the end of the Soviet phase, the Soviet are in close contact to the NATO unit./pic5995591.jpg)
The 47 GTD HQ gather Intelligence (an optional rule correctly inserted in the Detection section and perfectly integrated in the game system) to improve its chance of success during Bombardment. NATO miss all of Bombardment and the Soviet all but one. The NATO units retreat further again./pic5995592.jpg)
D+0 H12 – The destruction of the 1 Royal Tank Regiment
The weather is still clear and the NATO situation is difficult but reinforcements are on their way. Action Cards are given to the NATO Player/pic5995593.jpg)
And a huge stack of reinforcing units will enter the map during the Movement Phase: the British (BR) Corps HQ, some support units from the 1 BR Armoured Division (1AD) and two brigades from this division./pic5995594.jpg)
A much needed reinforcement. The BR 1 Royal Tank Regiment 1RTR – a battalion (Btl) in fact – fail to disengage. The Soviet mass a huge amount of Combat Support and roll well. The NATO try to emulate that but do not have enough assets and roll badly. A 0/2 cause two Attrition Points (AP) on the 1RTR. The NATO Btl try to retreat after combat but once again failed. A successful retreat can forfeit one AP of the Combat Result. A failed retreat cause one more AP on the poor BR Btl. It is now on the verge of collapse./pic5995595.jpg)
A new attack destroys it and the 7GTD advance rapidly./pic5995596.jpg)
On the south, NATO bad luck continues, the 1 WG Recon Btl is pushed and bruised./pic5995597.jpg)
The BR reinforcements arrive at last and rapidly build a line of defense just under the barrels of the Soviet tanks! Tomorrow will tell if the line is solid enough but I think it is. The SCR-MASL Posture game has come to an end. The BR could have put one brigade on the right flank of the 3SA but without much support and with the south sector in danger it was estimated wiser to adopt a purely defensive stance./pic5995599.jpg)
D+0 H15 – The defense of the Stichkanal
NATO receive another Action Card. Still not enough./pic5995600.jpg)
The Soviets roll high on the Air Point Table and receive 6 Air Points. Two Engineers Points are spent and two Engineer markers are placed on the map for two Prepared Crossing location on the Stichkanal. Another Engineer Point becomes a Sapper and is allocated to a Combat Unit. The Supply Hub is relocated closer to the front but the Artillery Resupply roll is too low. After failing their roll on Signal Intelligence, the Soviets use Recon Intelligence by spending 1 Command Point and 2 Air Points in order to increase the Detection Level of their target during the Bombardment. A second Air Strike Card is played, with much success: the 1 Welsh Guard Btl suffer one AP and is Half-Engaged./pic5995601.jpg)
The Intelligence markers could have been color-coded to differentiate them: I rotate them sideways to remember who places what and where. They normally stay on the map until the end of the current Player Phase but could be removed at the end of the Bombardment Phase./pic5995602.jpg)
The fighting begins. The first attack is detailed to give the reader a sense of how things are done. Mech defend with its Attack Strength (lower than its Defense Strength) against Armor in Plain or Hill1 terrain, except when in Defense Posture. Which is the case here. The Initial Combat Differential is +2 (+2). Combat Support, Artillery, Helo, Air, are assigned. Two Soviet Air Points are aborted. The Electronic Warfare gives a +2 (cumul.+4) and a secondary effect reduces further the NATO Air support. Both sides roll for Combat Support. Good roll for the Soviet +6 (+10). The defender support table is more favorable than the attack support table: with less Combat Support Point and a lesser roll, NATO achieve however a -3 (+7). The Soviets have committed a unit in Reconnaissance Posture +2 (+9) which suffer 1 AP. The Prepared Minor River against Deployed enemy causes -2 (+7). MASL and DEF Posture cause -2 and 0 (+5). Cadre Rating is favorable to the BR unit -2 (+3). The AP of both sides are taken into account +1 (+4). The attacker is Half-Engaged due the preceding Bombardment -2 (+2), as is the defender +1 (+3). The adjacent hexes with Combat Units friendly to the attacker and to the defender are counted +4 -3 (+4). The 7GTD HQ is in Front-Line Command +2 (+6). And NATO is still Disorganized by the sudden attack of the Soviet Forces +2 (+8). A high column. And a bad roll: 2. No AP to the attacker and 1 to the defender. The BR decides to stay. A second attack follows this one. Again on a high column but this time with a better roll. 1 AP to the attacker and 2 to the defender. This time, the BR Btl disengage with 3 Combat Support Point to ensure success. The 2 losses become a 1 loss. The Soviet have a bridgehead over the Kanal!/pic5995603.jpg)
NATO arrange its defensive line, wait for the next assault and hope for the coming night./pic5995604.jpg)
D+0 H18 – The Battle of Hildesheim
Rain ground a part of the Air Points. The 3SA HQ issue a Division Assault Order to the 7GTD. The MASL Posture is more adapted to the situation. This order consumes all available Command Points (CP), and for three turn no CP will be available. Division Order are costly. The 7GTD try to breach the BR line but despite huge amount of support do not succeed. In the south the 47GTD stop its attack since most unit are already used: an Armoured Regiment reach 5 AP after a disastrous assault. The two division take the city of Hildesheim after four successive attacks on the lonely WG motorized battalion defending the city, in city fight attacking armoured unit use their defense strength (lower than their attack strength)/pic5995605.jpg)
The NATO orders are revealed: the CAS area is redefined, some unit are given a needed refit./pic5995606.jpg)
Special Forces strike the 7GTD HQ who unwisely signaled itself by its Front-Line Command. 2 AP are scored./pic5995607.jpg)
NATO insert a newly arrived brigade on weak spot of the line. BR Engineers begin Defensive Works on three locations./pic5995608.jpg)
D+0 H21 – Give me the night – part I
The night has fallen. The rain has stopped. Both sides regain many operational aircrafts. The Soviet have no CP because the chain of command is still organizing the 7GTD assault. The intent is to fix the whole British line between Hildesheim and the Mittellandkanal while the reinforcing 10GTD replace the fatigued 47GTD and assault across the Leine in the southern sector. Two EW points will be deallocated from the 47GTD and given to the 10GTD. Prepared crossings and sappers will be arranged and allocated during the night. The supply situation is still difficult. The night and the rain make the movement of the 10GTD more difficult than anticipated, road movement is not impacted by the night and rain but the civilian panic rule is still in effect and the destination of the 10GTD have no road: one hex at a time is a frustrating pace of advance.
Meanwhile, the British send orders to refit two battalions. The engineers complete the Defensive Works in the northern sector and immediately start new ones in the south. Disengagement were done at some place and new units inserted there. We have a mixing of units from different brigades as we often see on operational maps and much less on wargame maps: the process of disengagement could be so difficult and hazardous that you initiate it only where it is really needed, on other wargames it is just a matter of MP, moving from one ZOC to ZOC just have a cost./pic5999498.jpg)
Two unusual BR units is reinforcing the sector (on the left side of the following image): no Barrage Strength! Those missiles have no conventional warhead, only nuclear ones./pic5999499.jpg)
D+1 H00 – Give me the night – part II
The rainy weather continues. Artillery resupply do not reach the frontline of both sides. Not much happens. The 10GTD advances slowly to its assigned – and already crowded – positions./pic5999500.jpg)
The Defensive Works are completed in the southern sector and the British engineers start immediately upgrading them: two turns of works, the upgrade will not be over at daylight.
D+1 H03 – Give me the night – part III
The Division Assault order is finally issued and start being deployed. Two turns are necessary but the 2 AP caused the Special Forces attack on the 7GTD HQ add another turn. The British recover AP from some combat unit by refitting and resting.
D+1 H06 – The 10GTD enters the dance
The 10GTD is not in its expected position to begin its assault. The 7GTD is in transition to up H12. The 3SA CO orders the resume the assault by the 47GTD and by the coming units of the 10GTD. Somehow a piecemeal attack but the area is so crowded that nothing better could be envisioned. The work of the British engineers is clearly heard and so there is no time for caution! Two assaults are launched by one unit of the 47GTD each with massive commitment of artillery tubes, helo, nearby recon unit, but do not even dent the British defending unit which suffer no losses and is still only Half-Engaged, a status already achieved by the preliminary Bombardment. A passage of line occurs. The recon unit of the 10 GTD replaces the recon unit of the 47 GTD. A mech unit of the 10GTD is displaced to make room for a coming armoured one of the same division. Assault goes on! With all assets committed: engineers to prepare the crossing, recon to assist, sappers to reduce the defensive works, artillery, helo, HQ in Front-Line command, all that could be done is done. But the result is a frustrating 0/0. The intense fire do not even enable the tanks to try crossing the river./pic5999501.jpg)
The British engineers complete their task./pic5999502.jpg)
In the Northern Front HQ some staff officers begins to suggest that the situation in the 3SA could not be improved without usage of unconventional weapons. Persistent agent could be used against rear zone to isolate an area of the frontline and some nuclear warheads could achieve rapidly what seems impossible to achieve in the southern sector.
D+1 H09 – Stalemate
The Northern Front CO gives approval for the usage of chemical agent, but rain will prevent its use for the moment. Nothing more is achieved but the artillery supply of the British is drained. A localized counterattack is launched in the southern sector by a battalion: the Active Defense Posture enables an immediate change to Assault Posture. The attack is launched without preparation to not alert the Soviets and to avoid any spoiling preventing Bombardment. The attack destroy the 153TR of the 47GTD. The British battalion do not advance but rather stay behind the defensive works build by the engineers./pic6004203.jpg)
D+1 H12 – The 7GTD assault
At H12 the AFV and IFV of the 7GTD are ready for the last tentative to reach and cross the Leine River. The last operational regiment of the 47GTD start the show from Hildesheim: it repeatedly pounded the NATO defense north of the city. Then the 79GTR begin the attack of the 7GTD, not towards the north but against the center of the British line, hitting again the battalion previously attrited by the regiment from Hildesheim. An hasty assault is launched with sappers on the front, chemical agent, recon support. The defenders are destroy and the attacker advance and follow by an other hasty assault and huge commitment of combat support. The defenders are shaken. Assault continue again. The defenders are on the verge of collapse. A last hasty assault destroy the defenders. On the left flank of the glorious 79GTR, the British 9/12L is repulsed./pic6004204.jpg)
All ammo is gone, all helo are used, few air assets remain./pic6004205.jpg)
Despite the huge losses suffered, the British are able to maintain a continuous – but thin – line of defense with two refitted battalions.
D+1 H15 – The last assault
Artillery resupply is sparse. The 79GTR attacks across the Leine, with prepared crossing and sappers, but do not collapse the defense of the WG 1.Auf.Abt of the 1.PD. On its right and left the Soviets advance./pic6004206.jpg)
The BR I Corps Commander orders an attack from south and north to destroy the Soviet tank regiments near the Leine River exhausted by their attempt to cross the River. Two battalions change from Active Defense to Assault Posture. The northern pincer goes first and is met with the remaining Soviet artillery and helicopters support. Assault is repeated but the Soviets held firmly their ground. So much so that the southern pincer attack is soon canceled./pic6004207.jpg)
D+1 H18 – A pouring rain on a muddy battlefield
The rain wet the region again. No artillery resupply is able to reach the artillery units on both sides of the frontline. A strange silence falls on the battlefield.
D+1 H21 – A rainy night
The night follows this weird silence. The exhausted regiments are disengaged and replaced by less fatigued ones. Artillery batteries stockpile ammo for the next push./pic6004208.jpg)
The scenario is over. Seven NATO units were eliminated (!) and only one Soviet Combat Units regiments. 31 AP are however scored on Soviet Combat Units. This amounts to a VP differential of +17: a Soviet Substantial Victory. Probably a fair assessment of the situation.