Mark Buetow [BGG User: Malcandra], agreed to share this fantastic and detail review of Combat Infantry with us from Columbia Games
INTRODUCTION
Combat Infantry is the first World War II tactical (squad level) offering from long time publisher Columbia games. Known for their block wargame system, they’ve adapted those same mechanics here to tackle the challenge of a small unit tactical combat game.
YOUR REVIEWER’S CLAIM TO AN OPINION
Maybe it’s because they tell stories like some great movies (Band of Brothers, Saving Private Ryan, the Longest Day, etc.) that my favorite games are WWII tactical games. Give me squad level where I can command my men to rush into buildings, blow up bridges, and lay down nasty fire lanes to shut down enemy movement. My absolute favorite game, bar none, of which I have more plays than any other game I own, is Chad Jensen and GMT Games’ Combat Commander Series. To me it represents the perfect balance of playability and complexity. I’ve got theAdvanced Squad Leader rulebook and Beyond Valor: ASL Module 1 sitting on my shelf. I’ve playedLock ‘n Load: Band of Heroes,Band of Brothers: Screaming Eagles, Conflict of Heroes: Awakening the Bear! – Russia 1941-42, Panzer Grenadier, and a bunch of others. Safe to say I’ve tried lots of tactical scale WWII wargames so hopefully my thoughts on Combat Infantry (CI from here on out) will be helpful if you have the same tastes in wargaming.
Also, before I get into the review, I want to thank my wife,
Susan Buetow


who has taken up gaming (including wargames!) with a vengeance over the past year and who played the game’s scenarios with me. Having played through all six, I submit this review for public consumption.
MY BRIEF HISTORY WITH COMBAT INFANTRY
Combat Infantry was a Kickstarter by Columbia. I don’t recall exactly when I became aware of it but of course I was intrigued and wanted to know more. I was hesitant about Kickstarting (as I generally don’t like the process and hate the wait) but the rules were available and I had the chance to play a game at GenCon this past summer of 2017. Sad to say, the game components were ready but the rules weren’t quite there. Coming from rules as concise and tight as Combat Commander, there were just too many unanswered questions as you tried to play the game. Tom Dalgliesh, owner of Columbia Games (and the game’s designer) spoke frankly at GenCon that they wanted to make sure to ship a well-tested game. When they called for last-minute Kickstarter-price orders I went back, ready the updated rules and was glad to see a much better game there. The rules that ship with the game, the 1.0 version are very clear and easy to follow, with just a few minor niggles that are being addressed in FAQs and the like. I jumped to get CI at the lower price and have now played through all six of the included scenarios.
WHAT DO YOU GET?
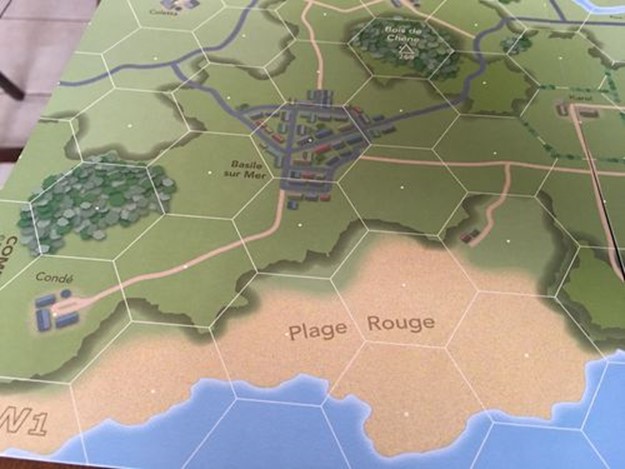
So what’s in the box? Lots of stuff! The typical Columbia box with sleeve includes two complete Infantry battalions. A battalion includes three companies. A company is made up of three platoons, each with three rifle squads as well as a selection of Company heavy weapons. Each company has a headquarters unit (CHQ) and each platoon has a platoon headquarters unit (PHQ). Each battalion has a host of battalion assets which may be assigned to companies during operations. There are blocks for all of these units as well as thinner marker blocks for such items as smoke, foxholes, barbed wire, wrecks, etc. Two geomorphic maps (typical heavy cardstock, three-fold Columbia style) are included and are filled with everything from towns, to farms, hedgerows, marshes, forests, and beaches. Rivers, bridges, fords, and even rail tunnels are scattered over the realistic (but not necessarily historical) French countryside. A rulebook and six scenarios (two per card) round out the gear.
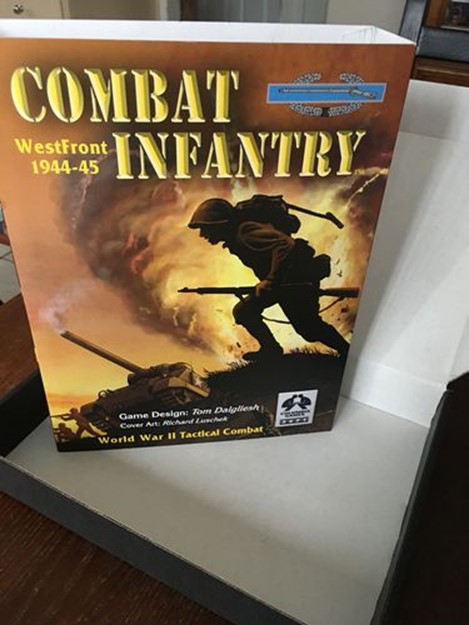
Box and sleeve
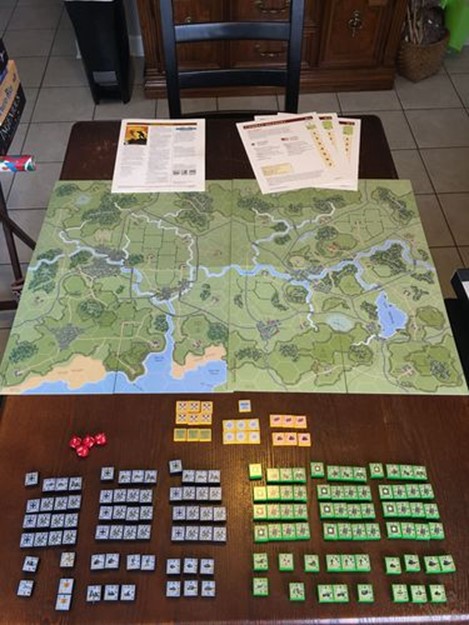
All the stuff!
BASIC TRAINING – HOW TO PLAY
All right, recruits, fall out! In order to fight a battle in Combat Infantry, you’re going to need some basic training as to how everything is organized and what everyone can do. That way when the s*** hits the fan, you’ll be ready to hold on and achieve your mission!
Mission Briefing
Combat Infantry includes six scenarios depicted as below.
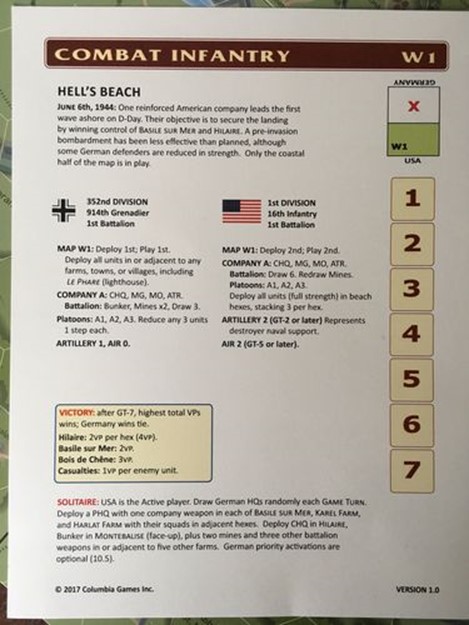
Scenario card (two per sheet; six total scenarios).
There are four scenarios in which the Americans are attacking German positions; one scenario in which the Germans (counter) attack American held areas, and a meeting engagement in which both sides are racing to secure (or possibly destroy) five bridges across a river. Scenarios give a brief historically plausible mission based on the actions around Normandy in 1944 (D-Day and following). Orders of battle include which units will be used, which battalion assets will be drawn, and where units will set up. Objectives which give victory points are listed, the map is referenced, and a Turn Track is provided as scenarios are played for a set number of Game Turns. Brief solitaire instructions are also given (expanding upon the solitaire suggestions in the rulebook). Any special rules are also noted. Scenarios are won based on getting Victory Points for having control of certain hexes and for eliminating enemy units. Victory conditions, including which side wins ties, are detailed on the scenario cards.
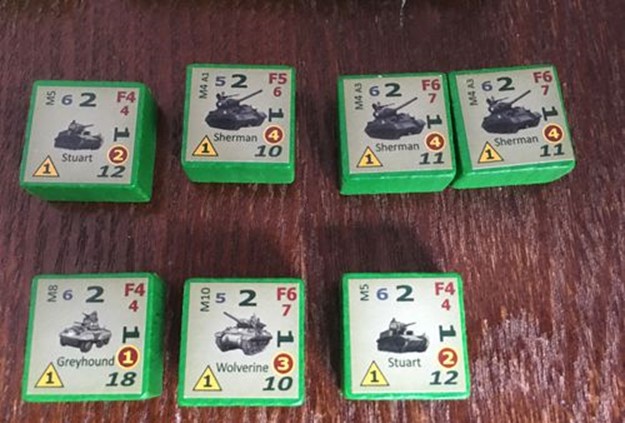
It’s worth noting that companies in the scenarios are provided with Battalion assets. Some of these assets may be pre-selected but others are drawn randomly. It’s the random draw that makes the games interesting and the scenarios replayable. Attacking a position with a couple of tanks is a bit different than when Battalion gives you engineers or an additional mortar to work with!
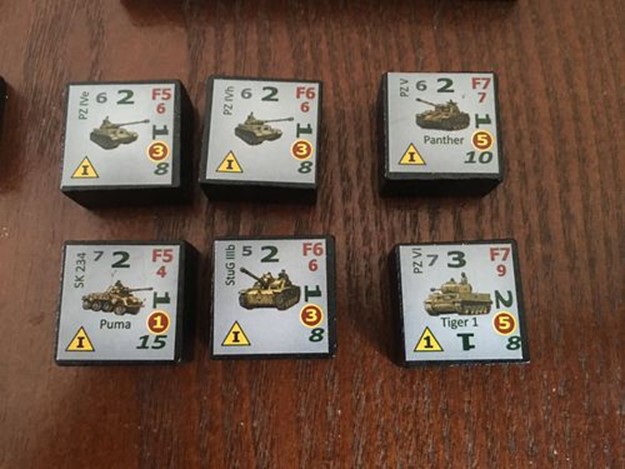
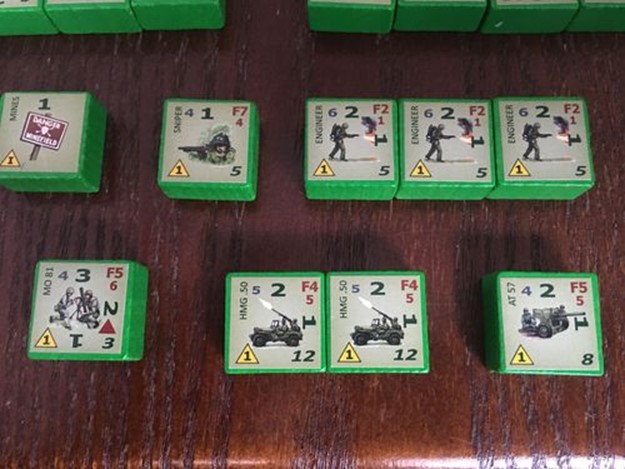
A section of battalion assets from both sides. German armor units that could be available; some American specialized units and weapons.
Ten Hut! – Leadership in CI
Scenarios are played over a certain number of Game Turns. Each Game Turn has two or more Player Turns. On a Player Turn, a player activates one HQ (either her company HQ or a platoon HQ). That HQ then orders units according to its ability: the CHQ can command three units anywhere on the map from its own company. Those might be battalion assets, company heavy weapons or even (rarely) platoon rifle squads. A Platoon HQ can command any of its units (squads and one platoon heavy weapons team OR one battalion asset) stacked with it or in the hexes immediately adjacent to it. PHQs are allowed to move by road or clear hexes one hex to “deploy” before activating and ordering units. A PHQ can alway orders its own platoon rifle squads even if they are beyond command range, but they are then subject to a Morale Check.
One a Player Turn, the player activates one HQ per Company. So if multiple Companies are in play, she will have more than one HQ activation on her turn. Since a full company contains a CHQ and three PHQs, a complete Game Turn will consist of Four Player turns. HQs can be activated in any order and that itself is an important decision involving how best to use your forces.
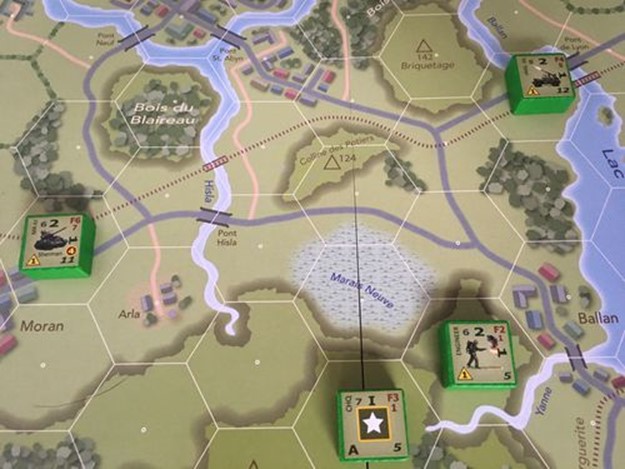
American Company A Company HQ (CHQ) is activated. It can give orders to three units, regardless of their location on the map.
A platoon HQ (PHQ) can order all three of its rifle squads and one battalion OR company heavy weapons unit in command range (adjacent).
In squad level games, leaders are important. They’re the ones who get the men moving and get them back in the action when they falter. Broken and suppressed units are rallied by leaders and you need leaders to maximize your orders and get your units to move and act effectively. In CI, leaders are represented by the CHQs and PHQs. These activate units and provide a morale number for units that wish to rally. In CI, suppression and broken units are represented by steps on the block. A block is rotated so its current steps are at the top when the block is standing up. The higher the strength block, the more dice it rolls when firing or in assault combat. Every unit may take one action per turn, so Rallying a unit is costly in terms of times but often necessary to keep it from being eliminated by enemy fire. That’s one of the “push your luck” aspects: do you rally to keep them from dying sooner or do you risk sending them in to fight and take the ground?
One of the neat mechanics is how HQ elimination is handled. When a Platoon HQ is eliminated, it is instead placed with (or adjacent to) one of its rifle squads. That squad then loses a step. Call it a field promotion on the spot, if you will. When all of a platoon’s rifle squads are gone, then the PHQ will be eliminated for good if hit. Company HQs work in a similar fashion, though they stack with or adjacent to one of their company’s PHQs, and one of that platoon’s rifle squads loses a step. It’s a simple way to keep the leadership in the game while still penalizing the forces and perhaps giving a positional penalty if the HQ has to be located somewhere less favorable.
This is my rifle! There are many like it but this one is mine! – Unit Details
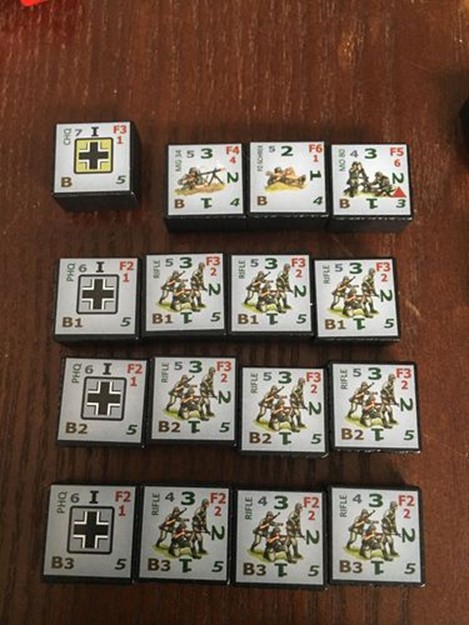
German Battalion, Company B; Company HQ and Company Heavy Weapons (MG, Anti-Tank (Panzerschrek), and Mortar); 1st, 2nd, and 3rd Platoons and their three Rifle Squads each. Second pic: American armor units.
It’s pretty cool how much information is contained on each block. The unit stats contain everything you need to know to move and fire with those units. In the lower left you see the Unit ID which tells which company and platoon a unit belongs to. Going clockwise, you’ll see the Unit Type which says what sort of unit it is. The lighter number in the top left is the Morale of the unit, used when the unit needs to self-rally to activate outside of command range. The large numbers on the outside of the block are the unit’s Strength and indicate how many hits the unit can take before being eliminated as well as how many dice the unit rolls when firing. The red numbers in the top right corner are the Firepower (given by the F) and the Range. Firepower indicates what roll is needed to hit an enemy hex or unit. Rolling equal to or less than the unit’s firepower will achieve a hit. Range is the number of hexes a unit may fire. Finally, in the bottom right is the unit’s Move number which indicates how many Movement Points the unit has available to traverse the map through various types of terrain.
The stats for all units are laid out the same. There are a few special cases. Note the mortar in the above picture. The red triangle indicates that it is a unit capable of bombardment. It can fire over terrain and attack hexes that are spotted by a friendly HQ. Numbers in a red circle (see the American armor units above) indicate a unit’s Armor Class. Units firing at armored units subtract the target’s armor class from their firepower, thus making it harder to hit.
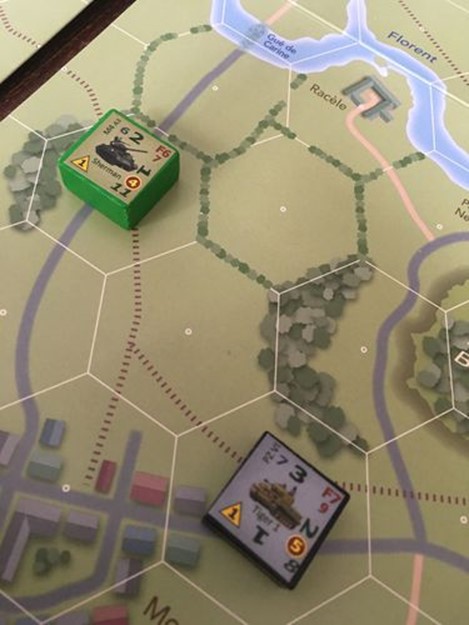
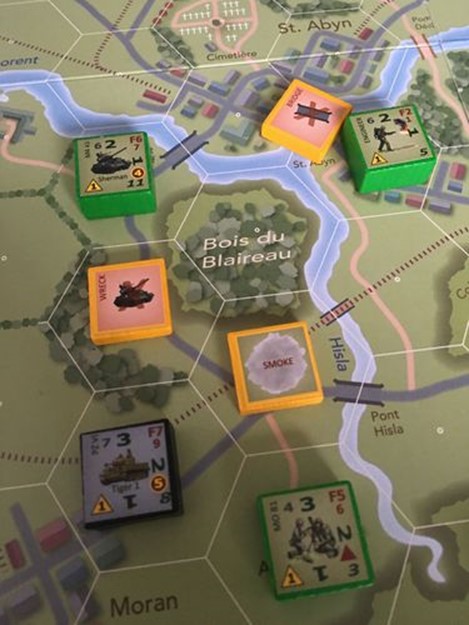
An example of armored combat. The Tigers hits on 7 or less. But firing at the Sherman, it hits on a 3 or less. (7 Firepower minus the Shermans 4 armor). If the Sherman returns fire, it will be a difficult shot. it will take a roll of 1 (6 firepower minus the Tiger’s 5 armor!) to damage that beast!
Fire combat is very simple. A unit is activated and turned face up (firing gives away its position) and rolls dice equal to its strength, hitting on it’s Firepower number or less. Terrain is taken into consideration for defensive purposes. A unit typically fires at an entire hex and hits are taken by strongest (most steps) units first. Face up units may be targeted to take all fire directly (and armor units must be targeted individually).
An example of fire combat is below.
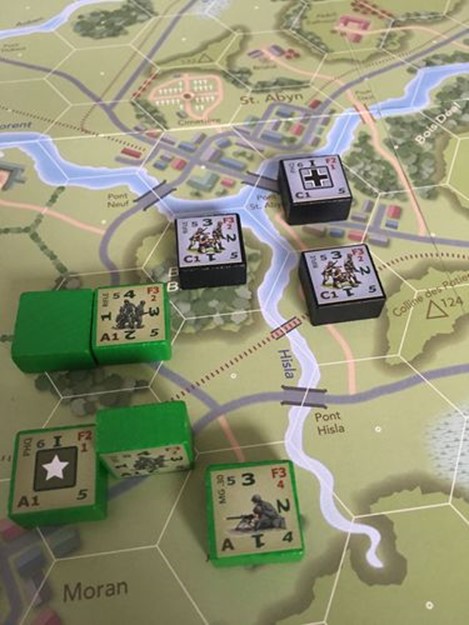
The German squad firing into the next with the face up and face down unit would roll hits on 3 or less. It could target the hex, in which case each hit would be inflicted on the higher strength unit (whether face up or down). Or it could target the face up unit in which case all hits are applied to that squad. The American unit could fire into the German squad’s hex although Woods terrain provides “D2” which means it takes two hit rolls on the dice to actually inflict one hit on the unit. Half-hits are cumulative for an activation (meaning you can use other units to try to get half-hits) but any half-hits left go away after the HQ activation is done. This is a nice way to deal with defensive terrain without having to modify firepower numbers.
Fix bayonets! – Assault Combat
At some point during a squad level battle, units will engage each other in Close Combat, Melee, or Assault Combat. Games like Advanced Squad Leader and Combat Commander use map scales that depict about 30-40 meters per hex. The scale in CI is 100 meters per hex. At this scale, when units move into Assault Combat it’s probably better to think of the battle depicted as a range of activity close in: close in exchanges of fire, some melee combat, firing and maneuvering in close proximity, units assaulting particular buildings, etc. In CI, units are not in buildings per se but rather a town or farm hex. So individual buildings aren’t selected for detail and moving into Assault Combat is less about “man-to-man” so much as it is intense, prolonged action between units that are fighting over the same piece of terrain.
When units move, they must stop in hexes disputed by (adjacent to) enemy units. Units that are already adjacent to enemy units or that move through friendly hexes may move into the same hex as an enemy unit. Units from both sides in the same hex engage in Assault Combat. Following all other unit activity and finally the activated HQ, Assault Combat is resolved.
Assault Combat happens over three rounds. On their turn, units may fire or retreat, with some exceptions. In the first round, the defending units may not retreat. In the third round, attacking units must retreat. This gives defending units the advantage as they have the potential to fire three times compared to the attacker’s two. Fire in Assault Combat is resolved the same as ranged firing, namely, rolling equal to or less than a unit’s firepower. There are some important exceptions, however. For instance, there is no Armor Class in Assault Combat. So, for example, while a tank may still be able to blast infantry with a high explosive round, the infantry can hit back because they needn’t bother with the tank’s armor class. Certain heavy weapons like mortars and large guns cannot move into assault. They defend the first round with their normal firepower but after that with an F1, representing the difficulty of defending once the enemy has gotten on top of them. As in fire combat, strongest units take hits. In an Assault, everything is vulnerable!
There is a nice mechanic for giving the advantage to more coherent units, too. Units that are down to just one step of strength must make a morale check before their turn. If they fail, they cannot fire or retreat and essentially panic. (Attacking units still automatically retreat at the end of round three; there is no morale check then). Here’s an example of a nasty fight.
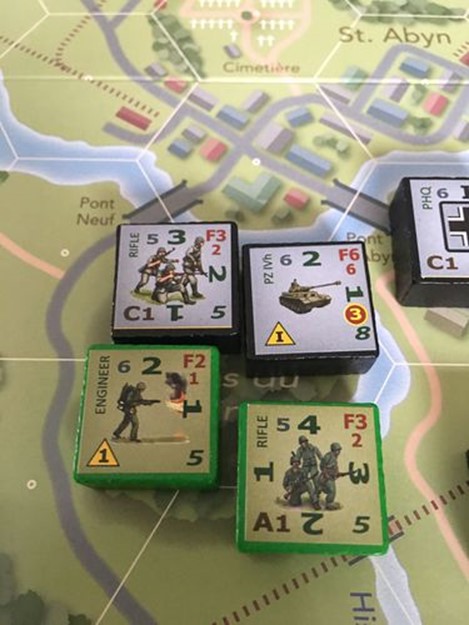
Assume the hex is clear (mistake: the tank could not actually be in a Woods hex without a road). The Americans have moved into the hex. The German tank fires and then the squad then fires. Then the American units fire. When the American units fire, the Engineer fires at F4 rather than F2 (an ability of the Engineer unit) and they ignore armor class. It will be tough on the Americans. The Germans have good odds to knock a few steps off before the Americans can even fire!
At this point it’s probably good to mention something that is completely lacking in Combat Infantry: Opportunity Fire. How can that be? This is a tactical game? You should be able to shoot at the enemy while they are running around! A sidebar in the rules entitled “What’s Not In This Game!” notes that Opportunity Fire was not really that common because of actual “fire and maneuver” tactics used in war. This is one point where grognards could spend endless threads arguing on whether that’s an accurate representation. I’ll say this: I think there is Op Fire but it’s represented most simply by the defender firing first in an Assault round. The Time Scale in the game of 10-30 minutes per turn may also negate the need for actual unit Op Fire at distance. Having played other tactical games, I’m going to say that this works fine in CI. I don’t miss Op Fire because the scale is slightly larger and so the deadly aspect of moving seems taken into account plenty when you have to assault a fixed position.
FALL OUT! – MOVEMENT, LOS, AND OTHER UNIQUE CI ELEMENTS
Your mileage may vary if you’ve had more experience with a wider range of tactical games than I but there are some things that CI does that make you slow down and try to digest what’s being said a little more slowly. It’s not that the rules are that difficult, but if you import rules or ideas from other tactical games, it may make CI’s way of doing things a little harder to grasp.
Movement is probably the greatest example of this. In Combat Infantry, movement points are expended across hexsides instead of moving into a hex itself. So the terrain of a hexside may differ from the actual terrain of the hex. If this seems a little odd, let me illustrate with some examples.
The hex just north of the “Conde” farm is a woods hex. That’s a Woods hex because it’s mostly woods terrain. However note that the two hexsides near the farm are clear, that is, the woods do not cover the hexside. Thus, to move into the woods from the farm would be crossing a clear hexside, a cost of 2 MP. Entering across one of the wooded hexsides would cost 3 MP.
Terrain Determination
If I had to point out my biggest gripe with the game, it’s the way terrain is handled. I dont’ mind the hexside versus the rest of the hex. I can learn that. It’s when it’s ambiguous that it gets frustrating. In many tactical games the terrain of the hex is determined by which type of terrain covers the center dot of the hex. That’s a simple rule to easily determine what sort of hex it is when there are multiple terrain types present. In Combat Commander, terrain is listed on a hierarchical terrain chart. The terrain type higher up the list is what a hex is considered when there are multiple terrain types.
Combat Infantry, however, gives this rule (3.2):
Quote:
Two or three types of terrain may appear in the same hex or hexside, but one will usually dominate; if ambiguous, always assume the most restrictive terrain.
That rule needs to be revised by calling hex terrain whatever covers the center dot. In the games we’ve played, this hasn’t usually been a problem but there were a few hexes where we had to stop, look closely and then make a decision as to how we will play it. Rules for a tactical game need to cover those sorts of situations and not leave anything for players to argue over.
Now, distinguishing between hex terrain and hexside terrain is fine. But that leads to perhaps my greatest frustration with the maps in CI: Bocage! Hedges are specifically called out as hexSIDE terrain, but note the following illustration:
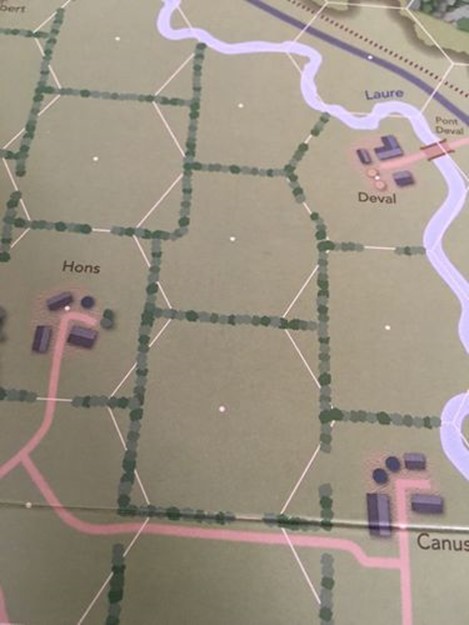
Hedges are hexSIDE terrain but they are not drawn to match the hexSIDES!!! And this is very important because units always have Line of Sight into adjacent hexes except when the hexside terrain is a hedge. So, I ask you, in the picture above, when units are in the two hexes north and northeast of Hons, can they see each other? The hexSIDE seems clear but there is also a hedge there, obviously. So is it blocked or not? Clearly, a string stretched between the two center points will cross that right angle hedge, but the rules specifically say to ignore terrain within the firing (or target) unit’s hex! This is an example where the maps needs to follow the rules. I get that hedges weren’t laid out in France in hex patterns, but if hedges are hexside terrain, they should be drawn so there’s nothing ambiguous about it. (For what it’s worth we assume that hedge in the example is blocking that hexside; otherwise it’s pointless being there.)
Line of Sight
Line of Sight rules are pretty simple. Stretch a string between center points and if the string touches anyblocking terrain, LOS is blocked. Even single trees are singled out as blocking. Ok, got it. It’s the terrain depiction that counts.
I had a bit of a learning curve, though, when it came to figuring out LOS with elevation involved. In my opinion, the rules could be clearer here. For one thing, a rulebook should always explicitly declare whether LOS is reciprocal. I haven’t found any examples where it wouldn’t be so far, and I hope I don’t. But the elevation rules threw me a little bit. I have to say, though, that my difficulty here is probably just because I’ve played so much Combat Commander where things work differently. In Combat Infantry units can see each other at varying elevations if the higher unit is closer to the blocking terrain. In CI a slope hexside is considered blocking terrain. So consider the following example:

According to a strict reading of the rules, the German unit just outside of town cannot see the hex with the American PHQ and squad. This is because the LOS hits the slope hex and the higher unit is farther away (1 hex away as opposed to 0 hexes away where the Americans are.) However, the German unit could see to the hex behind the American PHQ because that hex is equidistant to that slope hexside (though it would be out of range for the German rifle squad).
In Combat Commander, the German squad mentioned would not be able to see either of those beach hexes unless it were on that hex with the slope. So don’t misunderstand me to say that CI is wrong about how it does LOS, but it’s different enough I had to think a little harder about it. Again, your mileage may vary based on which tactical systems you have experience with.
Hexes, Hexsides, and Limits, Oh My!
I mentioned before that there is a distinction between hexes and hexsides when it comes to terrain. The terrain of the hex determines how many units can stack in that hex as well as whether the hex provides D2 defense (half hits, making units harder to reduce).
Hexside terrain determines not only movement costs to cross that hexside but also how many units may fire across or assault across. Normally, there is no limit to the number of units that can move across a hexside but when it comes to firing or assaulting, then there are limits. This is where paying close attention to hexside terrain, hex control, and movement avenues becomes quite important. For example, in order to assault with two units into a hex that has multiple Woods hexsides, you’ll need to maneuver so that you can bring in one unit per side. Assault limits on hexsides also apply to retreats so that you need to be careful that your troops have an escape route if need be.
CI’s system seems designed to concentrate fire together from the same platoon when possible. You can fire with multiple units into adjacent hexes but only one unit can ever fire beyond that range from a single hex.
Hex control is also an important concept. Units control (and thus make friendly) their own hex and all the hexes that are adjacent, unless the adjacent hex is disputed or has impassable terrain. Thus a rifle squad would exert control through a forest hexside but a tank could not (since the woods hexside is impassable to the tank). A very important rule that relates to hex control is that any moving unit must stop as soon as it enters a disputed hex. Usually that means adjacent to an enemy unit (because before the move it is a disputed hex). But, and this example is spelled out in the rules, once that unit has moved, its own hex is no friendly and other units could move through it. Here’s an example of how this works.
The Americans want to send a squad in to assault the German rifle squad northeast of the village. The hex between the American and German units is disputed since both can exert control.
The PHQ sends one unit up. This unit must stop as it is entering a disputed hex. Once it does, however, that hex is now friendly to the Americans.
By moving through the now American friendly hex, the other rifle squad does not have to stop when adjacent to the Germans…
…and can therefore move into the German unit’s hex (where it must stop and then Assault will be conducted at the end of the HQ activation.
THIS AND THAT
Offboard units
Combat Infantry includes lots of other little bits and pieces to make a satisfying tactical experience. Both sides may potentially have artillery and airpower available. These work a little differently than normal units. They are kept off map and their step strength indicates the number of times an air strike or artillery bombardment may be called in. The Firepower number is prefaced with a number which indicates how many dice are actually rolled. Thus, dice don’t decrease with steps. Artillery bombardments and air strikes can be called in by the Company HQ onto a spotted hex. (only one per turn and not both types). Scenarios indicate how many bombardments and air strikes will be available. Friendly fire from bombardments is also accounted for with an easy to remember mechanic: if you roll any 0s (zeroes) on the dice, friendly units in adjacent hexes take hits.
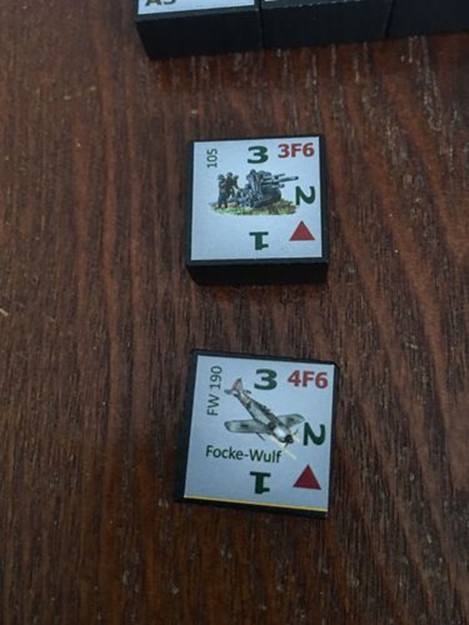
German artillery and air blocks.
Special Actions and Other Markers
There are a variety of special markers (on thinner blocks, still sticker) which account for such items as smoke and foxholes, demolished bridges and vehicle wrecks. The rules for these aspects are relatively simple and detailed in their own section.
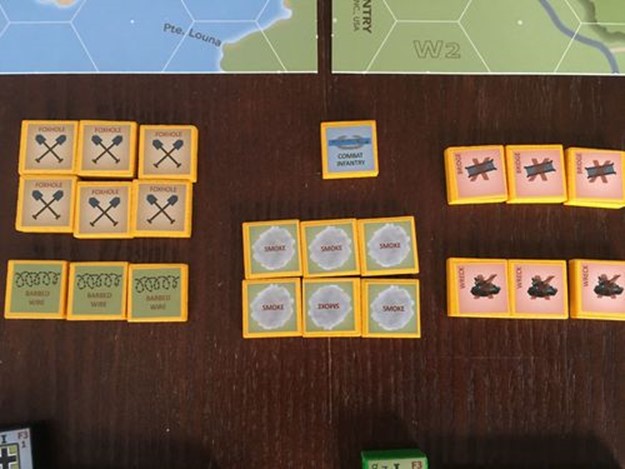
Markers for special actions and items.
Special markers in use.
All By Myself – Solitaire rules
I don’t play wargames solitaire but for those who do, the rules have some suggestions for solo play. The basic suggestion is to simply switch sides but this can be augmented with an HQ “chit pull” system and a little bit of charted prioritizing for enemy units. I have not tried it and probably won’t but it’s at least an option for those who would like to do so.
Last Bits and Pieces
A table is included which gives unit values so that scenarios could be designed. I hope that Columbia will put out some guidelines for doing so. The two maps included are sufficient for the scenario but who doesn’t want more maps? They can be arranged in various combinations as they’re geomorphic. The largest scenario in the game only contains two companies per side. To have all three companies and a full complement of battalion assets would probably require two maps!
The rulebook is well organized and indexed. It is easily referenced and graphically rich. There are several examples though some had errors spotted in them. These have been corrected in the published FAQ. The back of the rulebook contains a handy aid which shows the Sequence of Play and the Terrain Effects Chart for easy reference.
From what little I’ve heard, there will be more maps available at some point as well as further games covering different fronts in the War. I’m looking forward to where they will take this system!
THE ART OF (WWII SQUAD-LEVEL TACTICAL) WAR
The idea of bringing “fog of war” to a tactical game is not new. ASL uses Concealment counters to hide units and mislead opponents. But doing fog-of-war block style is a challenge. I had the opportunity to play War Stories, an innovative tactical block game. The two games in that series had some brilliant ideas and great components but the rules were, sadly, a disaster. I was privileged to work on helping revise the rules and saw my work picked up and improved upon. However, rights to the game shifted back to the original designer and there seems to be nothing but silence on that front. The fact is, the rules didn’t answer the many questions that come up in tactical games.
It’s just not easy to design a tactical World War II game. There are a ton of things to consider that you simply don’t need to think about in a larger scale game. Terrain effects on individual units and Line of Sight issues are a couple of important things that come to mind. As I wrote above, earlier versions of the rules simply left me with too many questions. Getting to playtest a game at GenCon left me with the same disappointment, namely, that the idea is solid but the rules weren’t good enough. But the 1.0 rules make this game totally ready for prime time. I think Columbia’s long history of game publication was an advantage in making a block system work for a tactical game. They’ve succeeded where War Stories was unable to. That means not only is it a good game, but they’ve got the street cred and rep to actually market the thing to gamers.
One of the trickiest things to put into the game was what to do with tanks. Do you target a tank or a hex? What if the tank isn’t revealed yet? The solution: Tanks may be optionally placed face up at any time (and are required to be face up when moving or firing). If a tank is not revealed, it will take hits from enemy fire with an Armor Class of 0! Face up, it’s Armor Class is in play and it can only be targeted individually (and then by a unit capable of hitting it after accounting for armor). Some would argue that it’s not a realistic solution but I’d counter that it works for the game. Combat Infantry is a game after all. It doesn’t claim to be a “simulation” (whatever people mean by that) but rather a system that is playable while still presenting “tactical puzzles” that those who are fans of these sorts of games enjoy. Perhaps it’s best to let the game designer’s speak for themselves:
Quote:
Combat Infantry is a fast-paced game with scenarios that run from 2-4 hours. There are no cards or combat tables; just hard-nosed tactical decisions and problems.
Do they succeed? My answer is yes they do. (And, for what it’s worth, I’d say two hours was the upper limit for any of the six included scenarios). There are some bits of the rules that are written with almost a “bite” on them, suggesting that features of other tactical games that are left out of Combat Infantry make CI a better game. While I don’t particularly care for the implied bravado of system comparisons, I do think the reasons are sound and the mechanics work. Put succinctly, Combat Infantry successfully presents a tactical game in which the rules and mechanics are streamlined enough to let players focus on the tactical situation while still including all the bits of chrome necessary to make the game fun.
I’ve mentioned my main gripes with the game up above, namely some of the terrain depictions, and a desire for tightened terrain identifying rules and LOS examples. Elevation can be especially tricky since different tactical games handle it differently. A little more clarity in those rules and some examples would have been helpful.
Another aspect of the game that may bother some (not me) is that the battles are physically dense. That is, in many tactical games you might say, “I’ve got to flank the building. I’ll send some men around the right side.” And that might involved several hexes of movement. Because of CI’s scale, flanking is more of a large scale effort, around a whole town or hill. All that to say when you are trying to tackle individual hexes, your flanking and maneuver options are dictated by the hexside fire and assault limits. So rather than necessarily going around a whole town via several hexes, you’re working on one target hex. This means a lot of battles have units close in together. For those who like their tactical games to be one of units spread way out over the map, this might be frustrating. Nothing bad here, just how the game works and a caveat.
Everyone has their favorite tactical game. My take is that Combat Infantry is an outstanding offering from Columbia Games and a worthy addition to any gamer’s WWII Tactical game collection. I look forward to further play of the system, further scenarios by the publisher and fans, and more nationalities and fronts to explore. Now, let’s move out and take that next objective!
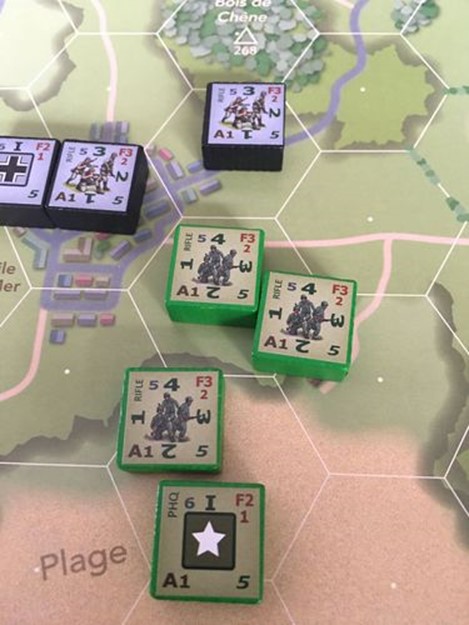
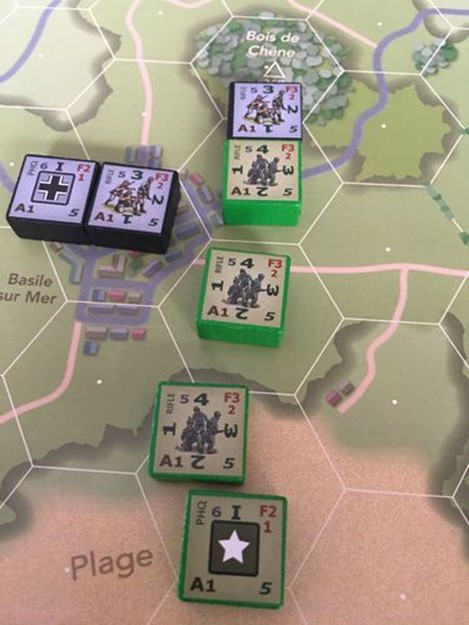
Sample scenes from the front…
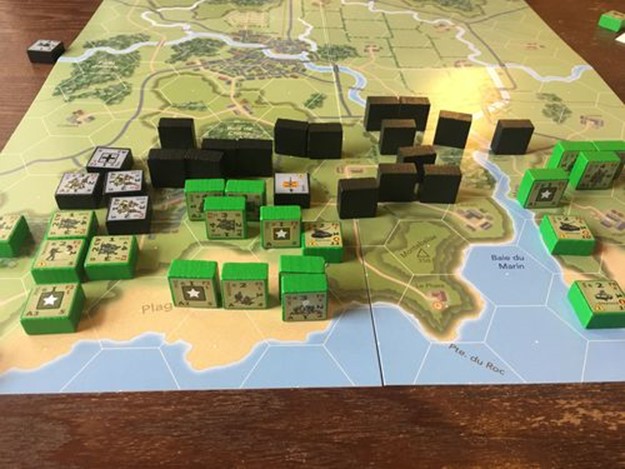
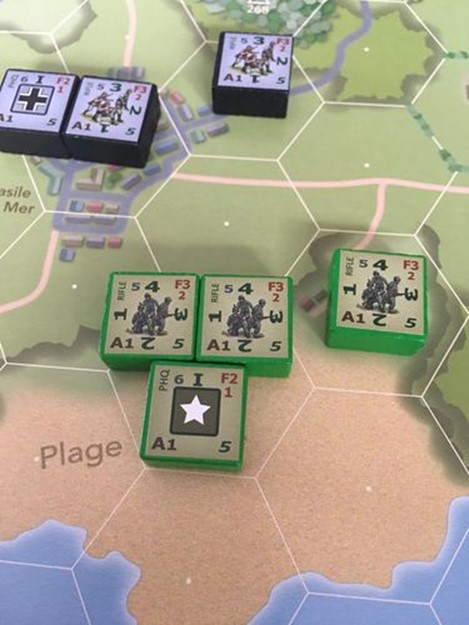
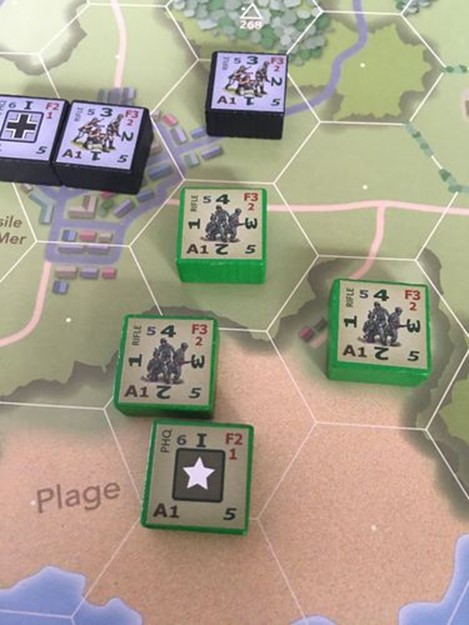
Scenario W1. Americans landing on the beaches on D-Day.
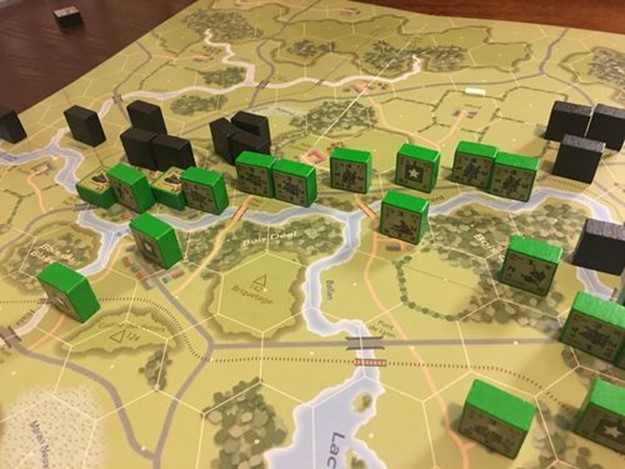
Scenario W5. A meeting engagement with a race to control bridges.