Jim Pyle, who’s been instrumental assembling the VASSAL modules for the BCS modules, tries his hand playing Scenario 5.3: Battle of Lunéville, a quick half-map, two turn scenario on the opening act of the German offensive using the playtest VASSAL module for Arracourt.
Battle of Luneville
I’m giving the 3rd scenario of Arracourt, The Battle of Luneville a solo try.
Battle of Luneville
German Forces
The 21 Pz Div in the south is, as Carl has mentioned, only a shell of itself. Just one Panzer Btn, four Motorized Infantry Btns and a Pioneer Btn. But it does have a company of 88s for support so will have some punching power. On the down side, they are already at Fatigue 2.
Next up going counter clockwise is the 111 Panzer Bde. It’s got some power with two Pz Btns and a StG Company. The StG is only Limited AV which is nice in defense but in this scenario the Germans need to be on the offensive. A couple of motorized infantry Btns and a Pioneer Company round out this force.
Up in the NE corner is the 111’s partner, the 113 Panzer Bde. Normally similar in strength to the 111 but for this scenario only part of the Bde is present.
Both Pz Bdes are Fresh so will probably be the most active of the German formations but odds are one of them will be recalled at the start of the second turn.
And then finally is the 15 PG Div. As with the 21 Pz Div only a portion of the division is present in this scenario. They are at Fatigue 1 so while not as bad as the 21st, may have problems getting full activations.
American Forces
Up north is the CCA/4 Bde with only a small portion of its force. One Armored Company and one Armored/Infantry Company. But with good Ars, 5 and 4 respectively.
To the NW of Luneville is the CCR/4 Bde, same companies as the CCA but it does have a TD Company, an Engineer company and and extra artillery asset.
Last is the 2 Cav Group. It’s got four Recon companies and one light tank company.
Overall the Yanks are outnumbered 22:10 in units. But Hey!!! They’re on the defensive, right?
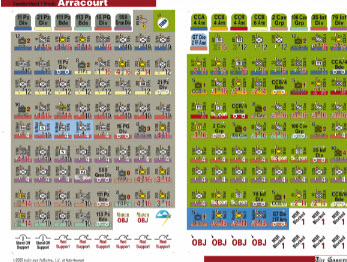
Shot of the scenario setup below
Battle of Luneville – Plans
Plans:
Only two turns so need to be quick. One objective hex, the center hex of Luneville. It’s a city so it’s Key Terrain which means whoever gets there first will have a good chance of holding it. Note that rivers are Prohibited terrain to truck and tac movement.
Germans:
See image below.
Germans get first activation. Everyone needs to run to Luneville. The 15 PG has the shortest path but the formation is “Used” so they only have a 33% chance of activating on the first turn. So will try to run the 21 Pz Div up and take Luneville.
Americans:
Pretty much stuck with reacting to the Germans’ first activation. If they take Luneville do all they can to retake it. If the Germans fail to take Luneville, then the Americans must get into the victory hex and hold it.
Battle of Luneville – German 1st Act
21 Pz Div activated but just missed getting a full activatiion. Started running up the road through Gerberviller and Xermamenil to Rehainviller. Failed to get a second activation so looking bad for the Germans at this point.
Battle of Luneville – US 1st Act
CCR/4 activated next. The Yanks got lucky and passed roll to get second activation and got a full activation. Two units moved in to help secure Luneville while the 35 Btn enaged 115/15 PG Recon unit inflicting a hit and a retreat.
Battle of Luneville – German 2nd Act
15PG: Time for a little luck for the Germans. 15PG needs to activate to block CCA/4’s access to Luneville and be able to reinforce the Yank defenses there. The Germans tried for 2nd act and got it but only a partial activation but were able to help seal off Luneville. The Pioneers were able to jump the 2 Cav’s HQ forcing a Coordination and CT to ghost thus making it a little harder for them to get a full activation.
Battle of Luneville – US 2nd Act
2 Cav is next up to try to move into positions slowing down the two Panzer Brigades with screening zones. Problem is since he was jumped it’s harder to keep all his units in command range and still in good screening locations. But the Yank luck continues. However the penalties for being jumped prevented them from getting full activation. The 2 Btn Cav was able to drop support on the 15PG’s Security Btn thus freeing him to move through the Security Btn’s ZOC. The 2 Cav decided their positions were good so didn’t try for 2nd Act and risk gaining fatigue.
Next up will be the two Panzer Brigades rushing to Luneville.
Battle of Luneville – Continued
113 Pz Bde was able to get a full activation. The screening by the 2 Cav Group was effective is slowing down the 113 Pz advance and they failed to get a 2nd act.
CCA/4 was able to get their 2nd act but only a partial. The A/37 Company drove off the FJ Longmeir Btn’s support but was unable to get a hit with an attack by fire. The B/53 Company then attached [sic] the FJ Btn and was able to get 2 hits on it and force it to retreat back to the 15 PG HQ. But this only partially opened the route to Luneville. Fortunately no fatigue was gained. Arracourt has a special rule enforcing some fatigue recovery. In the Assignment Phase, if a formation is at Fatigue 4, it goes to “Done” and recovers 1 fatigue step. If at Fatigue 3 unless doing a recovery activation the HQ is flipped to “Used” and must roll for a second activation when the formation is chosen for activation.
And last up is the 111 Pz Bde. The 2111 StG lead off by engaging the A/42 Recce and destroying him thus reducing some of the screening for the rest of the Bde. The I/16 Btn was then able to chase down the C/42 Recce screening unit and destroy him also but did suffer a step loss himself. The 211 Pz Btn then charge up the road getting a soft jump on the 2 Cav HQ driving it back into Lunefille and then destroying the light tank unit of the 2 Cav.
With those Yank units out of the way, the trucks carrying the 111Pz’s infantry was able to get up within striking distance of Luneville. And the German luck finally turned and the 111 Pz was able to get a full 2nd activation.
111 Pz’s StG then rushed up to Lunneville and dropped the support of the Engineers with the 2 Cav HQ east Lunneville hex. Feeling brave the StG then moved to the north side of Luneville to take on the C/10 Mech Inf’s support but his luck ran out and he was destroyed himself.
Next the 2111 Pz Btn skirted the south side of Luneville to take on the C/10’s support. He was able to destroy the support avenging the 2111 StGs. Next he barraged the VP hex with an Attack by Fire but missed.
Time to try to dislodge the Engineers in east Luneville again, this time with infantry. Will have to be lucky since it is key terrain but the unit only has 2 steps. Didn’t take the city hex but was able to inflict a step loss.
And last the I/16 Pzs came up and hit the VP hex with 2 AbF and was able to get 1 hit.
At the end of September 18, while the Brits were wasting away in Arnhem, this is what the situation looked like at Luneville. The Germans look in good shape to be able to take the VP hex. But… the 111 Pz Bde has a 33% chance of getting called away at the start of September 19 so nothing is assured yet.
[COLOR=#0000FF]The battle now continues
19SEP
111 Pz recalled and the situation now looks like this. Instead of what might have been an easier win for the Germans it’s now uncertain who will win with a lot riding on who gets the first initiative.
Weather is Good and the Allies get 3 air points and Bazooka Charlie.
Allies got a good Repl dr getting 2 AV and 1 non-AV while the Germans only got 1 AV. Yellow outline show steps increased units, blue outline show rebuilt units.
No formations affected by the the specail fatigue recovery rules. Axis won the initiative and will start with the 21 Pz Div which was able to get a full activation for their first act at least.
The 2112 btn was able to blow away the B/42/2 Cav company and enter west Luneville. Then used 2nd fire event to attack by file Luneville but missed. The II/125 Btn was then able to get adjacent to Luneville and into position to attack. Checking probability I get it as about a 20% chance of success if I use 2 destructive barrages and 27% if 1 suppressive attack so we’ll go with that.
Was only able to get a D Situational so only 1 hit on Luneville VP hex
The 2112 Inf regiment then move around to the east of Luneville to attack the CCR Engineers destroying them and getting a soft jump on the 2 Cav. The rest of the division then moved up to what would be good positions if a 2nd act was available. But alas the 2 Pz failed in that attempt. But the Yank units in Luneville no longer have a safe path so will suffer destruction due to isolation and only 1 step left unless a safe path can be re-established.
CCR activated next and was able to get a full activation greatly improving it’s chance of establishing a safe path to the defenders in Luneville. First the 35 Btn tried and succeeded in driving the German 115 Btn out of the way.
The 35th then moved down the road to take on the 2112 Pz Btn in west Luneville but was rebuffed, taking a loss and failing to re-establish a safe path for the defenders of Luneville since rivers are prohibited terrain for trucks and tac move units. And again a lot will hang on getting a 2nd act. But even wit a 50/50 chance they failed. But if the 2 Cav can get very lucky, maybe they can drive out that Panzer Btn holding the bridges in west Luneville.
Forgot about Bazooka Charlie. Used him and he got a hit on the Pz Btn holding the bridges bringing it down so just 1 step left.
113 Pz Bde up next and got a full activation. Sent up the StG first to drive to destroy those two 2 Cav Recce companies. He was able to take out the first one but suffered a loss himself destroying him.
The I/130 Btn then moved up to try to take the VP hex. He’ll be able to get two engagements at 8 to 4 so a very good chance. He was able to get it on the first try and then took out the other 2 Cav Recce unit. Couldn’t really get into the VP hex due to EZOCs.
The two motorized infantry Btns of the 113 Pz can not get into the VP hex due to the 2 Cav screening company which means currently neither side controls the VP hex as control is defined as having a unit in the hex at the end of the game. But can the 113 Pz get a 2nd act? First, moving up those motorized infantry to at least make it more difficult for the 2nd Cav’s last unit to get to Luneville. But again, a formation was unable to get a 2nd act.
But there’s still hope. If the CCA can drop support with their first fire event on the infantry blocking their path to Luneville, they’ll be able to run up and get a second fire event on the 1 step 21 Pz unit hold the bridge. The A/37 was able to accomplish both!
The B/53 then runs down the road to Luneville and captures the VP hex. And since the Germans don’t have an AV ZOC in west Luneville bridges hex there is a safe path to the VP hex which means no loss during isolation. And as has been par for the course in this game, the CCA did not get a 2nd act.
Last up for the Germans is the 15 PG Div and they have a shot albeit very slim of retaking the VP hex. But they failed their first SNAFU so really needed a 2nd act and failed that too.
Overall a much more exciting scenario than I thought it would be when I started with the chance for victory swinging back and forth the whole game. I think both sides had about even luck so that wasn’t a big factor that can happen in these very short scenarios.
Really looking forward to being able to play this game with an opponent.