BGG: Black Swan: The Rock of Chickamauga
|
Black Swan: THE ROCK OF CHICKAMAUGA Battle of Chickamauga, September 1863 After Action Report BigBoard Gaming · @war_gamer |
GAME DETAILS
|
Game Series -Black Swan |
The Rock of Chickamauga |
|
Publisher |
Flying Pig Games |
|
Designer |
Hermann Luttmann |
|
Scale |
Brigade-level; 600m/hex |
|
Battle/Scenario |
The Rock of Chickamauga (Scenario MacDonald had a farm) |
|
Players |
Solo play |
|
Session Date |
August 4, 2025 |
|
Status |
Complete |
|
BGG Reference |
https://boardgamegeek.com/boardgame/428288/the-rock-of-chickamauga |
HISTORICAL OVERVIEW
The Battle of Chickamauga, fought from September 18-20, 1863, stands as one of the bloodiest engagements of the American Civil War and the final significant Confederate victory in the Western Theater. Named for the creek that wound through the verdant Georgia landscape—its Cherokee name translating roughly to “river of blood”—Chickamauga was fought as Rosecrans’s Union Army of the Cumberland sought to pursue the retreating Confederates southward and secure East Tennessee. What appeared to be a retreating force under Braxton Bragg suddenly turned and struck with concentrated fury, nearly destroying the Union force and driving it back into Chattanooga.
General William Starke Rosecrans, commanding some 58,000 men of the Army of the Cumberland, believed he was pursuing a demoralized Confederate army. However, General Braxton Bragg had skillfully consolidated his forces and received reinforcements, including Longstreet’s corps rushed west from Virginia. With approximately 66,000 men, Bragg positioned his army along the West Chickamauga Creek to block the Union advance and destroy Rosecrans’s separated forces in detail. The Confederate concentration of force was masterfully executed, with corps striking at different points along the extended Union line.
The battle raged across two days of desperate fighting. On September 19, initial Union probing encountered stiffening Confederate resistance that solidified into pitched combat along the creek bottoms and woods. Units became intermingled; regiments fought at close quarters in brutal melees. By nightfall, neither side had achieved decisive advantage, though Confederate coordination improved throughout the day. On September 20, Bragg renewed his assault with fresh determination. A critical Union miscommunication—Wood’s Division moved to cover what it mistakenly believed was a gap in the line—opened a genuine gap through which Longstreet’s attack plunged. The Union right flank collapsed under the impact.
The stand of Maj. Gen. George H. Thomas and the Union left wing prevented complete catastrophe. His steady presence and resolute leadership earned him the nom de guerre “The Rock of Chickamauga,” the very title of this scenario. While Rosecrans withdrew to Chattanooga with heavy losses, Thomas’s skillful rearguard actions and the fighting tenacity of his corps prevented the annihilation that seemed imminent. Chickamauga tested the limits of command and control in Civil War battles and stands as a testament to both Confederate tactical skill and Union capacity for recovery in the face of near-defeat.
THE SYSTEM — Black Swan in Brief
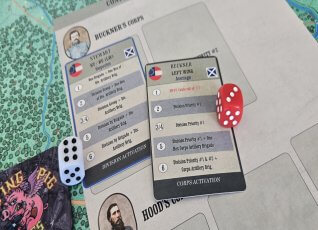
Black Swan system is a brigade-level tactical system designed for American Civil War battles. The game smartly abstracts the fog of battle through a “blind” command system where divisions activate via cards drawn from a deck, creating uncertain initiative that mirrors the historical friction commanders most often faced. Rather than precise, simultaneous mechanical turns, Black Swan series forces players manage uncertainty—not knowing when (or if) their units will activate, the order they activate in AND how much of a given Division might activate. The player selects his priorities for activation before each turn but has no control over when they activate unless of course an Overall Commander card is drawn or played from their hand. This forces difficult allocation of leadership resources and creating dramatic moments, and rich narrative.
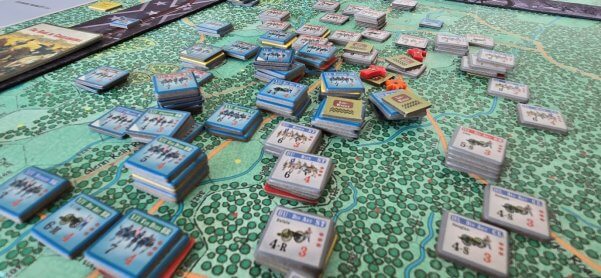
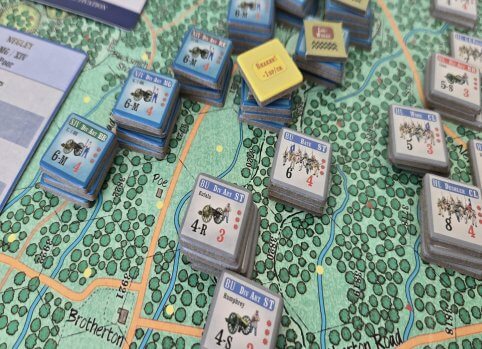
The system uses classic but colorfully done brigade counters with painstakingly accurate uniforms per brigade, on a period-appropriate terrain map, with terrain heavily influencing both movement and combat.
Morale, leadership, and fatigue are central mechanics—fresh brigades fight with greater discipline, while worn units can break and scatter or rout. Artillery plays a role also, with placement being key. The activation system creates natural pauses where tactical decisions crystallize: Do you push forward while you have momentum, or conserve strength for the inevitable Confederate counterattack?
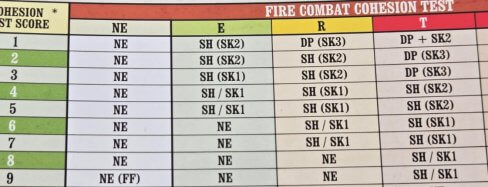
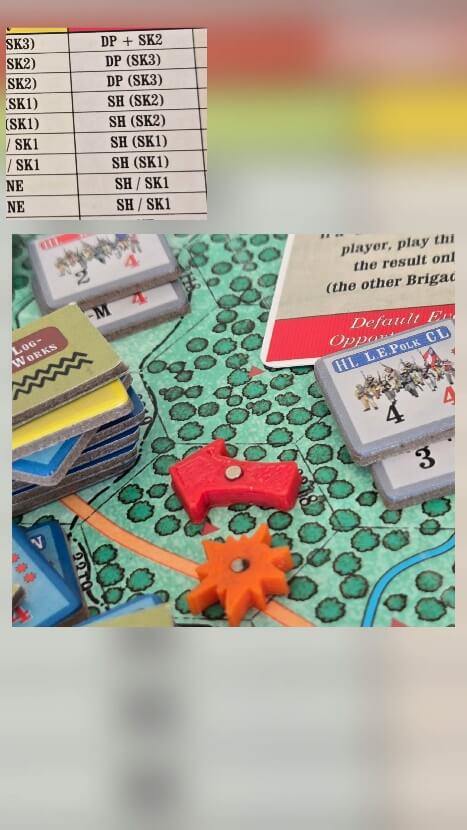
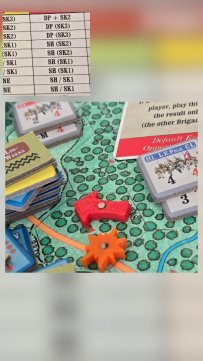
What makes the system particularly appealing for solo play is precisely this mechanical structure. The blind draw system reduces the advantage of the Grognards planning and creates emergent narrative. Each session becomes less about executing a perfect plan and more about reacting to chaotic battlefield conditions—very much the experience of Civil War commanders who made decisions with incomplete information and watched their orders executed (or mis executed) through the smoke and confusion of combat. The combat systems are layered with chaos or disorder as well. No Effect, Easy, Routine, or worse results can sway a combat assault or fire action. But then see the defender stay strong as their morale saves the day or in the opposite way, the result does significant damage and special events may occur.
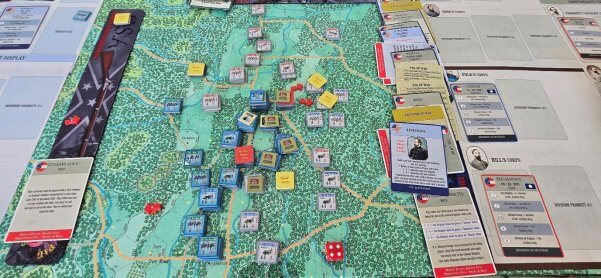
SETUP & INITIAL DEPLOYMENT
The scenario positions us on the final day of battle, September 20, 1863, as dawn breaks over Chickamauga Creek in the Northern sector. The terrain is a series of wooded ridges, creek bottoms, and open fields that heavily favor defensive positions.
SESSION RECORD & HIGHLIGHTS
Breckinridge gets Adams, Stoval and Helm moving in a ‘pre turn advantage move’. Adams seeking perhaps a smack of glory or sensing an opportunity advances on the rear of the La Fayette road, hoping the rest of the Division will do likewise. They end up in a spot of bother and chaos ensues.
The rapid success has caused the rebel forces to be dispersed and they quickly need to reform!
Helm attacks into challenging terrain for no effect but paves the way for Stoval assault without too much trouble. This forces the Union to Skedaddle[sk] [retreat], setting up a breakthrough attack on the following hex! Which also Shakes and SK’s. Stoval and Adams end the activation shaken for their efforts.
By 9am Beatty’s forces have taken a shelling. Adams uses this result to press home the attack Crushing the resistance and follow on attacking through to the Union Div arty!
But end up in disarray again by 10AM
10AM
The XXI Corps and XIV Corps arrive to bolster the Union positions. Rebels attack the XIV and force them to seek cover. Thomas from the Union rallies Baird, Crittenden of the XXI move Van Cleeve to support the ridgeline and Orders Palmer to hold his ground on the defense.
11AM
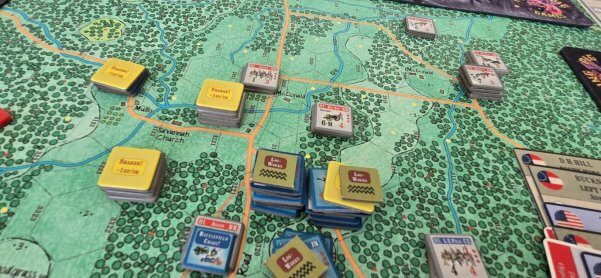
Now the height affects both sides, and Brown sees an opening, forces the XIV off the ridge. Bragg seeing a possible mismatch encouraged Clebourne and L.E. Polk into the fray, but low ammunition meant the lads were caught flat footed and took significant casualties. The Union pushed the Rebels back into heavy woods. Baird and Brannan of the XIX Corp swing into action and steady the line. Somewhere a church chimed 11 am.
Brown attacks, Wood’s attack and all are rebuffed from the log work entrenched Union forces.
Polk and Deshler try to clear the log worked defenders on the road up on the ridgeline
Regrouping near the Savannah Church Stoval and hi men charge into the woods, attempting to dislodge the XXI Div arty [a hot headed rebs card is played that forces this action!]
More union reinforcements trickle in. The Confederates seek a way to gain the heights, Union lines begin to falter. AS units are shaken by the fleeing forces.
A bugle sounds and the Union counter attacks! Brown holds on, and is reinforced.
Polk and co renewed assaults all fail and they retreat in disarray.
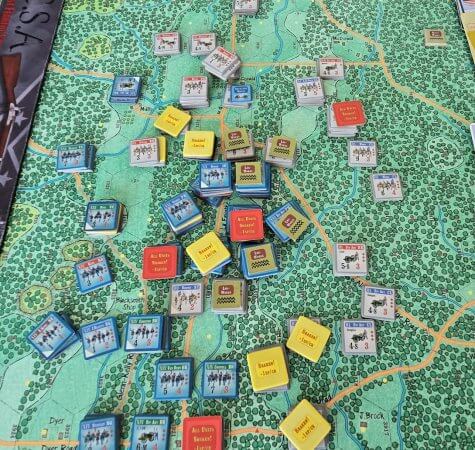
Noon
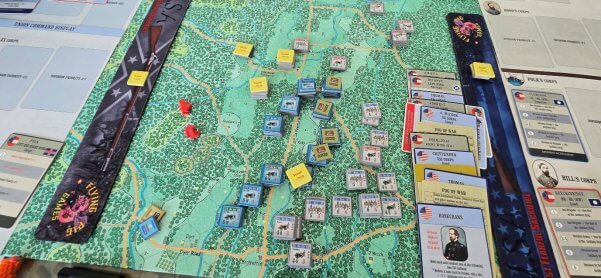
In a last ditch effort the cards fall late in the hour for the Rebels, allowing them to assault with no reply/ Polk finally gains the hill! But the Union now have forces everywhere!
Attack and counterattack rage across the hill line vying for control of the road. The Union keep the majority of the road clear and the Rebels look weary and spent.
ASSESSMENT & OUTLOOK
The session demonstrates the brutal attritional warfare that characterized the latter Civil War. Early Confederate coordination yielded tactical gains, but Union resilience—particularly under Thomas’s steady command—prevented the breakthrough from becoming envelopment. The card activation system forced difficult choices about when to commit reserves and when to consolidate defensive positions.
The critical decision point looms in the greater battle: Can the Confederate attacks sustain momentum with depleting reserves, or will Union artillery and entrenched positions grind the assault to a halt? The game captures the historical tension beautifully—Bragg had the opportunity for decisive victory but could not convert tactical advantage into strategic breakthroughs. It might be time to play the full battle!