A Guest post from BGG user Wayne Hansen!
The Battle of Lautulae was fought in 315 BC during the Second Samnite War, between the Roman Republic and the Samnites. This isn’t the late Republic Rome that ruled unchallenged over the Italian Peninsula, they were still a regional power. Around this time-frame Rome had allies but also many local enemies they had to contend with, the Samnites being one of them. Historically what probably happened (gotta love Ancient history/warfare) was the Romans lost this battle after their leader, Quintus Aulius (with the sweet title of Master of the Horse), was slain and they became demoralized and fled the battle.
Important Notes: I’m playing SPQR using the Simple GBoH rules. Rules mistakes are possible if not likely. I am attempting to play them as written other than I do not use the Turn Seizure mechanic playing solo. I will use a green cube on or next to the currently activated leaders from that turn. That helps me as I’m playing, and it should also help identify what leader(s) I’m talking about in the pictures. In this particular battle, the Samnites lose if they reach 60 rout points, Romans lose if they reach 85 rout points. Now let’s get to it!
Before we begin, there is what I believe is very minor setup errata:
Under Roman Army -> Cohorts
AS/V listed a-h, however a-b already used in Van, seems it should be c-h as it asks to put 6 units in three different hexes.
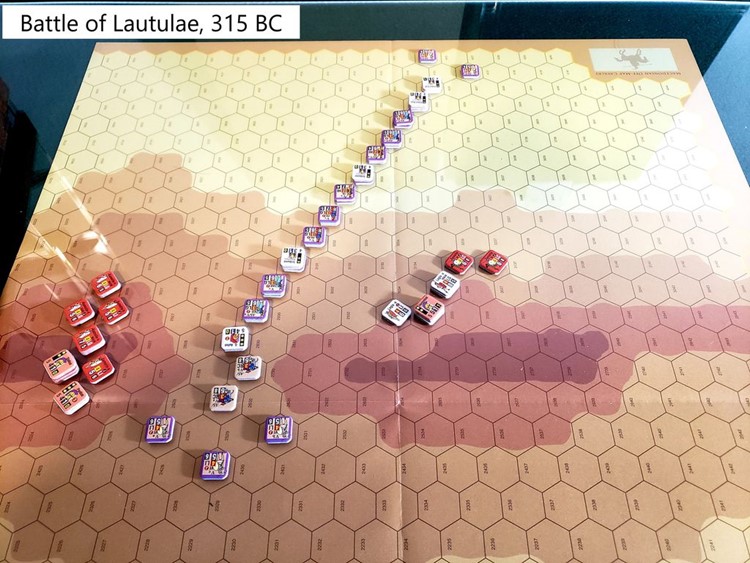
Scenario Setup
Turn 1 – Romans
The Romans automatically start off with the initiative in Turn 1, however as they were surprised by the Samnites, the activated Roman units are considered “Out of Command”.
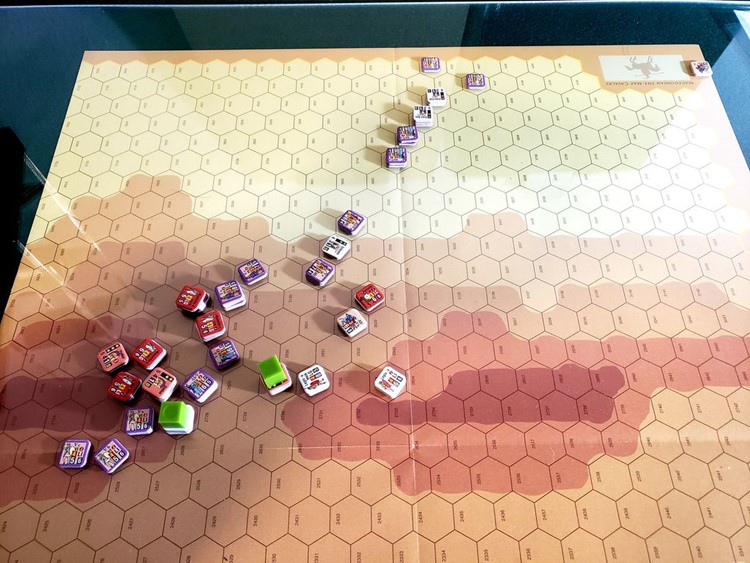
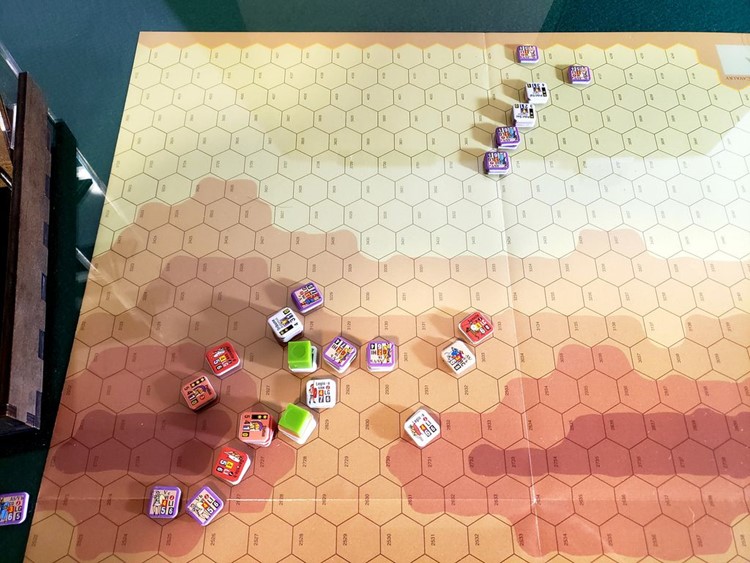
Tribune Antonius activates. He is commanding the Hastati and Principes of Legion V. Realizing the danger that Aulius (the Roman Overall Commander) and indeed the entire Roman army is in, Tribune Antonius maneuvers his men to face the western Samnite forces, and advances towards them.
Turn 1 – Samnites
Statius activates. He is commanding the western foot forces made up of van and main LG’s and light infantry. He maneuvers his forces to attack Tribune Antonius and his men, and is able to flank several units. The Samnites rout Roman LG units.
Turn 1 Ends with the Romans at 18 Rout points and the Samnites at 0.
Turn 1 picture note: There is no green cube for the Romans as the stack containing Tribune Antonius was routed. He is removed from play until the next time his formation is activated.
Turn 2 – Romans
Tribune Cassius activates. He commands the Triarii of Legion V and AS/V (AS = Alae Sociorum, and were the non-citizen allies of Rome who were organized similar to and attached to the legions). Not wanting the Samnite eastern forces to attack the rear and flanks of the Roman van, he attempts to move his units south to cut them off. Unfortunately they are slower moving Heavy Infantry, and lack the speed and maneuverability of true legion soldiers.
Turn 2 – Samnites
Herennius activates. He sends his Light Cavalry to screen the Triarri. At the next opportunity, he’ll begin moving his Legio LG and LI towards the flank of the Roman van.
Turn 2 Ends with the Romans at 18 Rout points and the Samnites at 0.
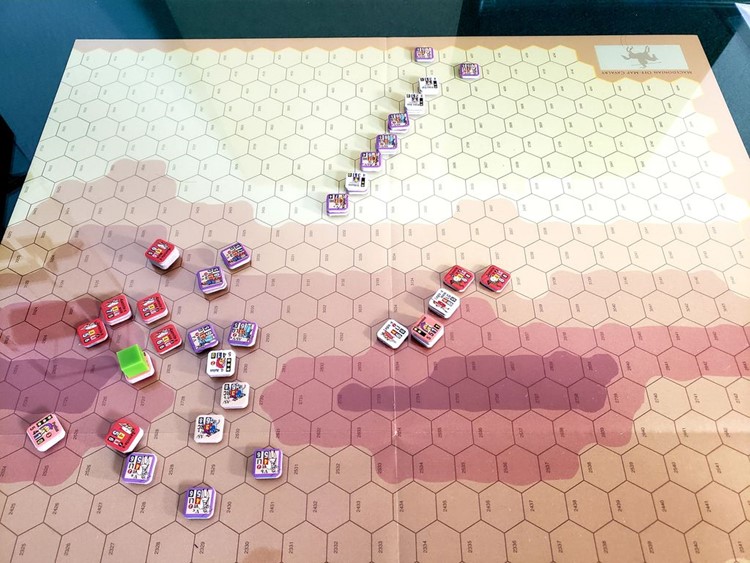
Turn 3 – Romans
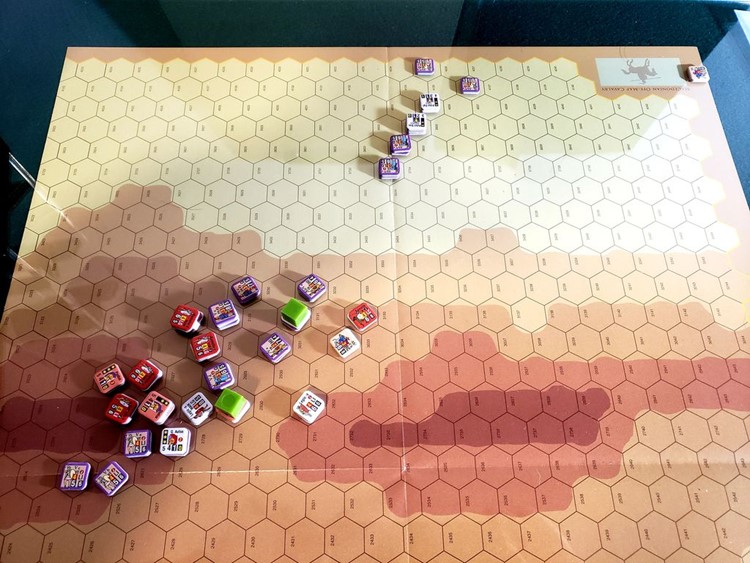
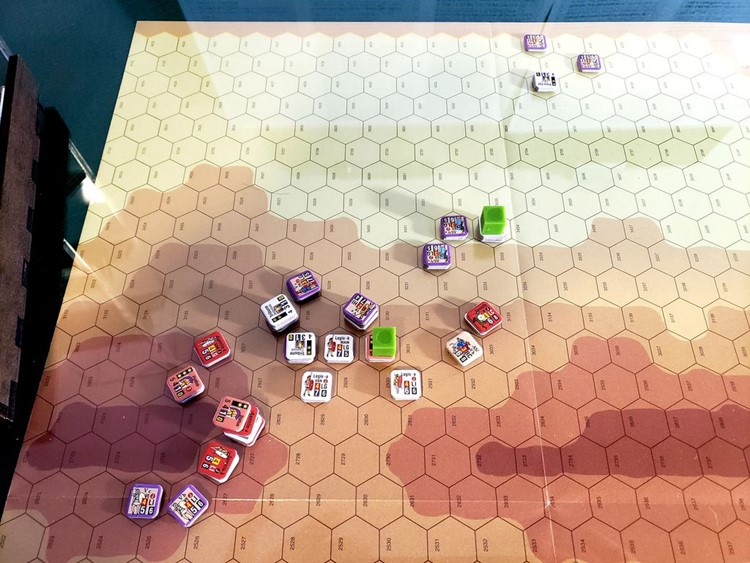
Quintus Aulius (OC) activates. He commands the van of the Roman forces, which is made up of Legion V’s Velites (Light Infantry), AS/V’s LG units, and the AS/V Roman Cavalry. He sends the Roman Cavalry to flank the Samnite’s LC. He maneuvers the Velite units around to the west, to engage the southernmost forces of the Samnites. And he brings the AS/V LG units to the western side of the Roman line to engage the Samnites. One of the Samnite LC is routed, with a Roman Cavalry in hot pursuit (removed from the map until given the opportunity to return to the battle). The Velites engage a Samnite Light Infantry, and force a retreat. With nowhere to go he suffers extra hits, and is routed. Aulius himself, along with a LG unit he is stacked with, engage the flank of the stack containing the Samnite leader Statius and a Samnite LG. Rolling high, the Samnites are routed, and Statius is removed from play until his next activation.
Turn 3 – Samnites
Statius activates. Commanding the western foot forces, they are heavily engaged with the Roman van, and he maneuvers them as best he can for the attack. While inflicting casualties on the Romans, they aren’t able to rout any units.
Turn 3 Ends with the Romans at 18 Rout points and the Samnites at 16 Rout points
Turn 4 – Romans
Q. Aulius activates. Having maneuvered to form a strong defensive line, and with the tide possibly turning, Aulius feels the time is ripe to press the counter-attack on the Samnites. He sends the last RC against the last Samnite LC. He also swings the Velite units around and attacks the Samnite Overall Commander, Pontius, and his supporting Heavy Cavalry. Several hits are inflicted on the Samnite defenders, however none are routed.
Turn 4 – Samnites
Herennius activates. The Samnites know they need to bring their Legio units, commanded by Herennius, into play. If they can move them in time they will be able to hit the Roman van in the rear. They spend this turn moving towards the Romans. Next time they are activated, they should be able to strike the Roman van.
Turn 4 Ends with the Romans at 18 Rout points and the Samnites at 16 Rout points.
Turn 5 – Romans
Tribune Cassius activates. Seeing the Samnite Legio units approaching the Roman van from behind, he attempts to move his Heavy Infantry to intercept.
Turn 5 – Samnites
Herennius activates. His Legio units smash into the Romans from the rear. Chaos engulfs the Roman line! Two Roman LG units are routed.
Turn 5 Ends with the Romans at 30 Rout points and the Samnites at 16 Rout points.
Turn 6 – Romans
Tribune Cassius activates. His Triarii are finally close enough to jump into the fray! They rout one Samnite unit, and inflict hits on another.
Turn 6 – Samnites
Statius activates. Heavily engaged with every unit, the Samnite forces push back against the Romans in the middle of what is turning into a brawl. A Roman LI and Histasti LG are routed.
Turn 6 Ends with the Romans at 41 Rout points and the Samnites at 21 Rout points.
Turn 7 – Romans
Tribune Antonius activates. He is placed back on the map with a stack of Principes. They immediately attack the Samnites. This attack comes as a surprise to the Samnites, and two Samnite units are routed!
Turn 7 – Samnites
Herennius activates. His Legio units attack the Roman overall commander’s stack, and cause them to rout! The Roman LG is eliminated and the Roman OC Q. Aulius is removed from the map.
Turn 7 Ends with the Romans at 48 Rout points and the Samnites at 33 Rout points.
Turn 8 – Romans
Tribune Cassius activates. Knowing the Roman Army doesn’t have much fight left in them, he rallies what soldiers he can and engages the Samnites nearby. After some back and forth fighting, a Samnite LG is routed!
Turn 8 – Samnites
Herennius activates. He commands the Legio units to swing around, and hit a nearby stack of Roman HI from the flank. The Samnites hit them hard, and cause several hits, but the Romans retreat before they are routed.
Turn 8 Ends with the Romans at 48 Rout points and the Samnites at 39 Rout points.
Turn 9 – Romans
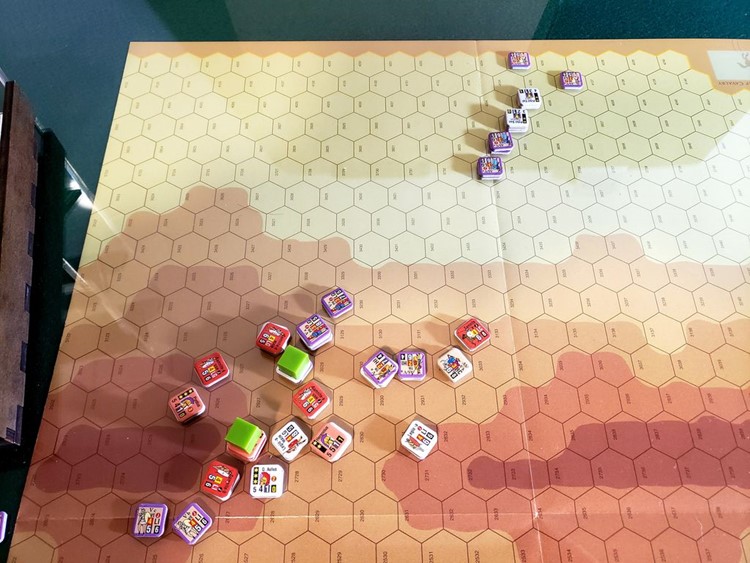
Prefect Soc Plautius activates. Seeing the brawl up ahead, Plautius knows he needs to move his Cohorts up to get involved. They spend their turn moving closer to the battle.
Turn 9 – Samnites
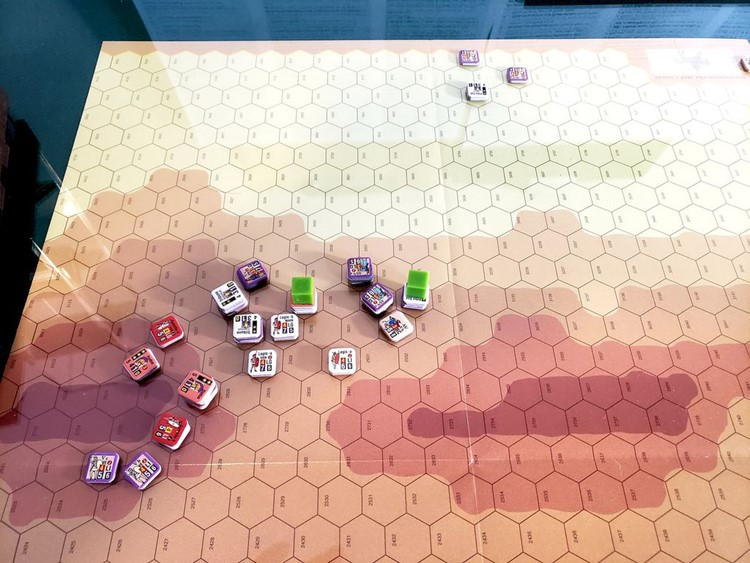
Herennius activates. With most of the Roman van routed, his Legio swing around to meet the threat coming from the north. They engage the Roman Triarii. Two Roman Triarii HI are routed by the ferocious attack!
Turn 9 Ends with the Romans at 60 Rout points and the Samnites at 39 Rout points.
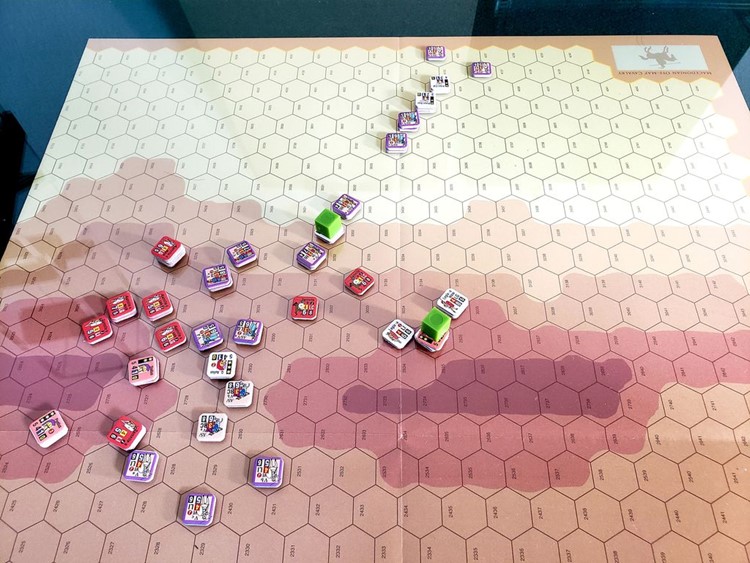
Turn 10 – Romans
Prefect Soc Plautius activates. His men are able to close with the Samnite leader Herennius and the Legio he is stacked with, along with the Samnite LC that was deployed earlier to screen against them. The Light Cavalry attempts to retreat, however as it was pinned down by the Roman Cavalry (in its ZoC), it can’t escape! He is routed! However the Cohorts attacking Herennius and his well-trained Legio are repulsed and forced to retreat one hex.
Turn 10 – Samnites
Herennius activates. His Legio are heavily engaged with the Romans in the middle of the pass, at this point. The Legio Light Infantry conduct a hit-and-run javelin attack on the Romans causing minor casualties. The Legio LG clash with the Romans and rout two Roman Triarii HI!
Turn 10 Ends with the Romans at 74 Rout points and the Samnites at 45 Rout points.
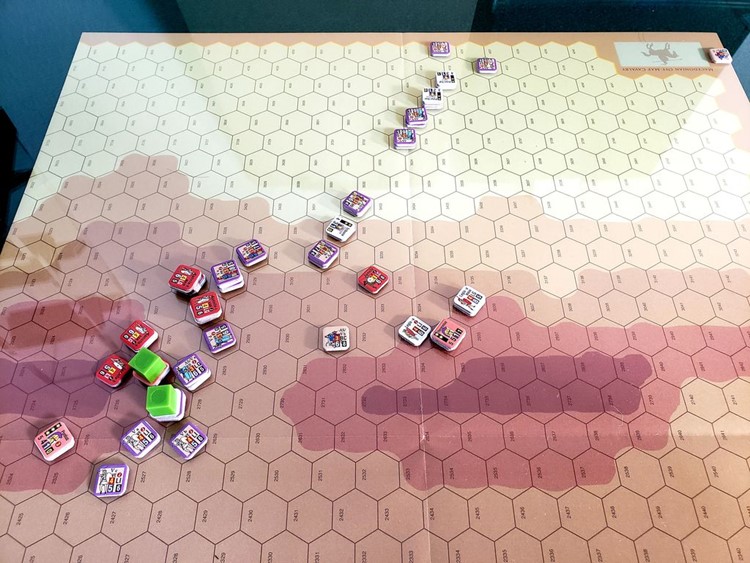
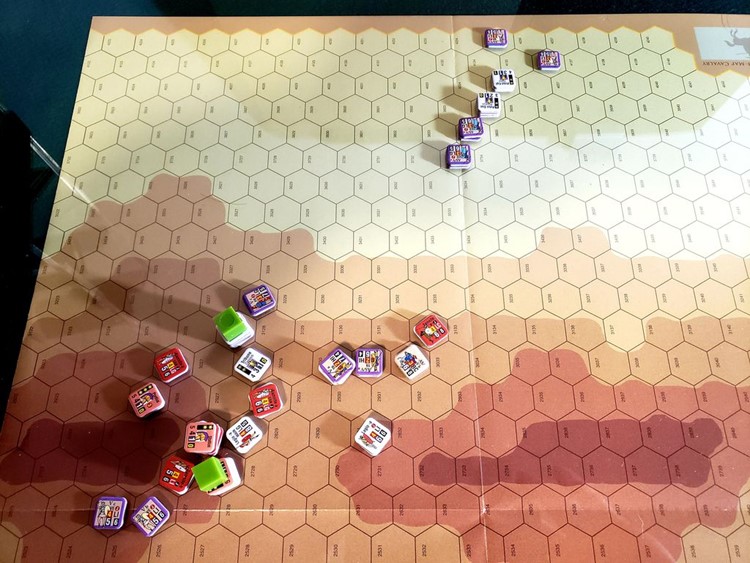
Turn 11 – Romans
Prefect Soc Plautius activates. He moves up and engages the Samnites in the pass. His Cohorts surround Herennius! Herennius attempts to slip away, but a sharp-eyed Roman soldier spots him and runs him through with his Gladius (rolled a 0 and then a 1 for Leader Casualties). Herennius is slain in battle!
Turn 11 – Samnites
Statius activates. Watching one of their leaders fall in battle has demoralized the Samnites, but they give one last push against the Romans. A Samnite LG falls after assaulting a superior Roman stack.

Turn 11 Ends with the Romans at 74 Rout points and the Samnites at 75 Rout points. The Samnites have had enough, and withdraw from the battle. Their ambush has failed.
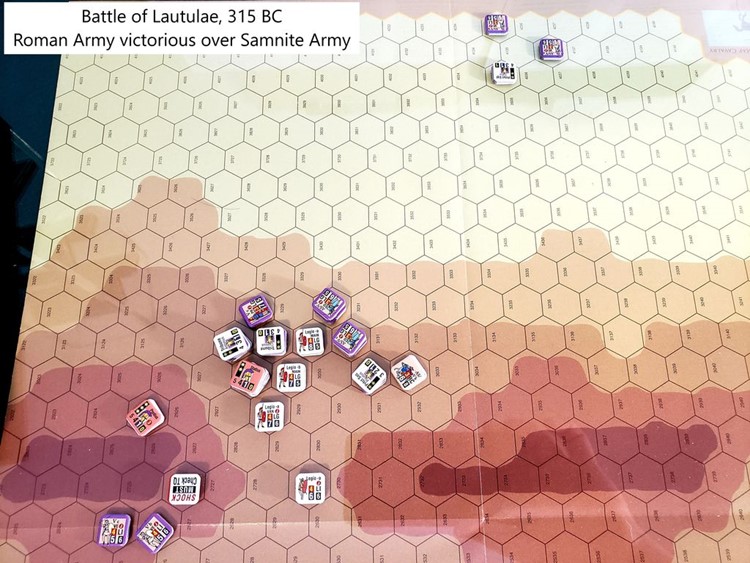
The Roman Army is Victorious!
Final Thoughts: A fun, very tactical battle. It’s a great battle to learn the system, or in my case, get back into it after having not played Simple GBoH in a while. There aren’t a lot of moving parts (few unit counters), however the unique situation and setup definitely creates some unique tacticals and makes it play a bit slower than I expected. The terrain is also a factor, something not common in most GBoH battles. In my game you could say the opposite of history happened. Instead of the Roman leader being slain in battle and causing the Romans to withdraw/lose, it was one of the Samnite leaders who was slain causing the Samnites to lose. Overall I really enjoyed playing it out and seeing how different tacticals worked.