Continuing Chris Buhl’s article on Table Air Combat [Find Part 1 here]
Rules
The base rules are 17 pages long, with lots of graphics. They are very simple and easy to learn. I was playing the game about 15 minutes after finishing the first set of components. If the plane is a bomber then there are additional rules for bombing, flexible gunfire and flak (about 8 pages), if it’s a torpedo bomber an additional page for how to do that. This review is going to go into quite a bit of detail about the rules, I hope I don’t make them seem complicated. I think the game has a lot of depth, but it is super easy to learn.
SEQUENCE OF PLAY
I wrote an AAR specifically focusing on game rules and concepts, so I’m going to use excerpts from that for a major portion of this review. If you want to read it beginning to end, you can use this link to see all of my AAR’s if you have a BGG account.
https://www.boardgamegeek.com/thread/1597606/aar-subscription-thread-fatgreta-aars
The Scenario
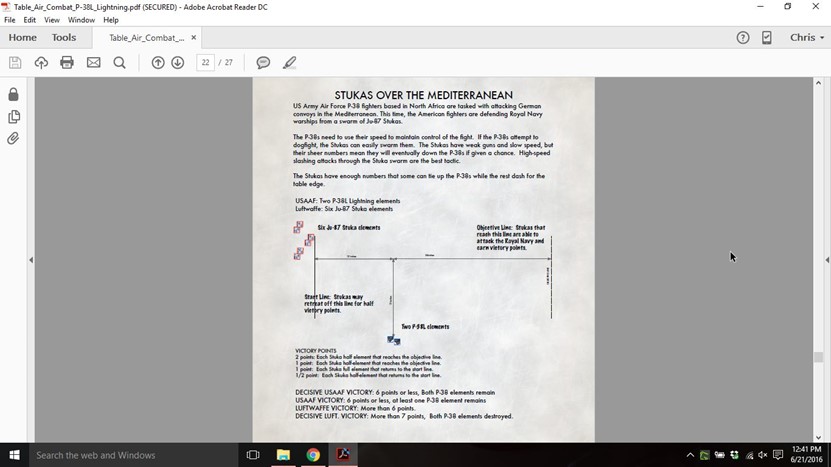
Can you do as well as the Americans did in the real war?
Movement
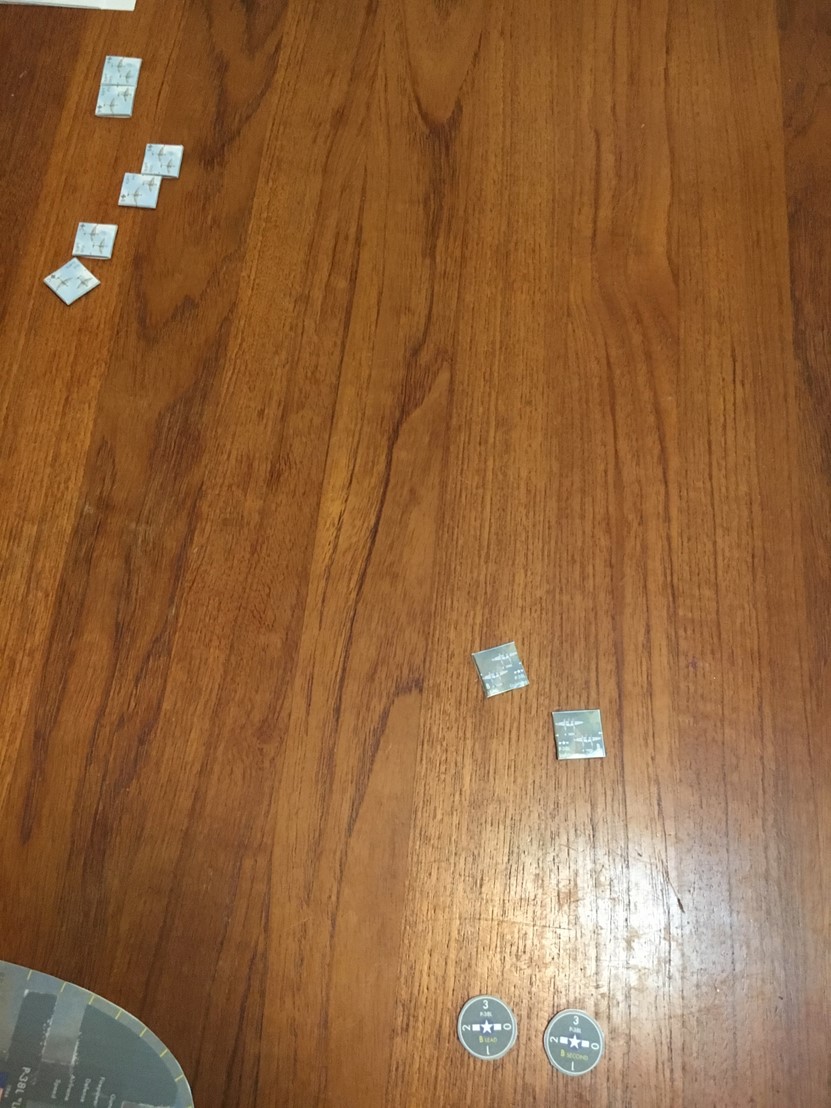
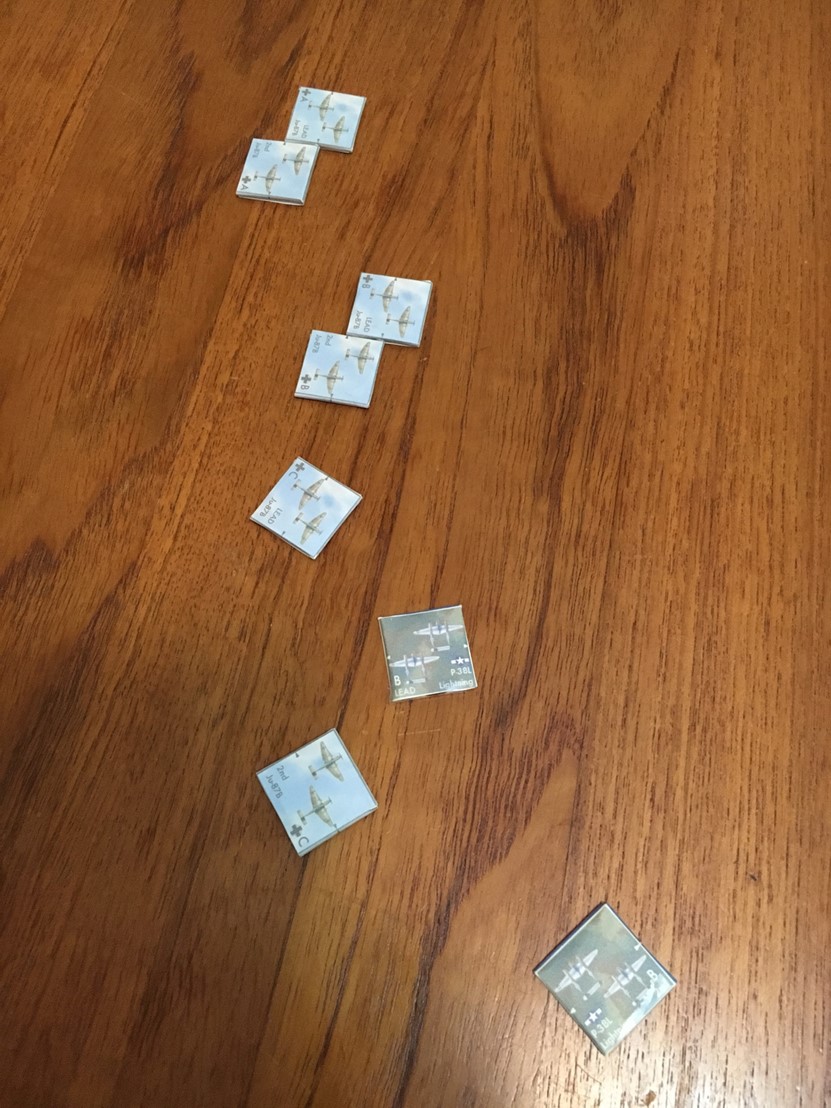
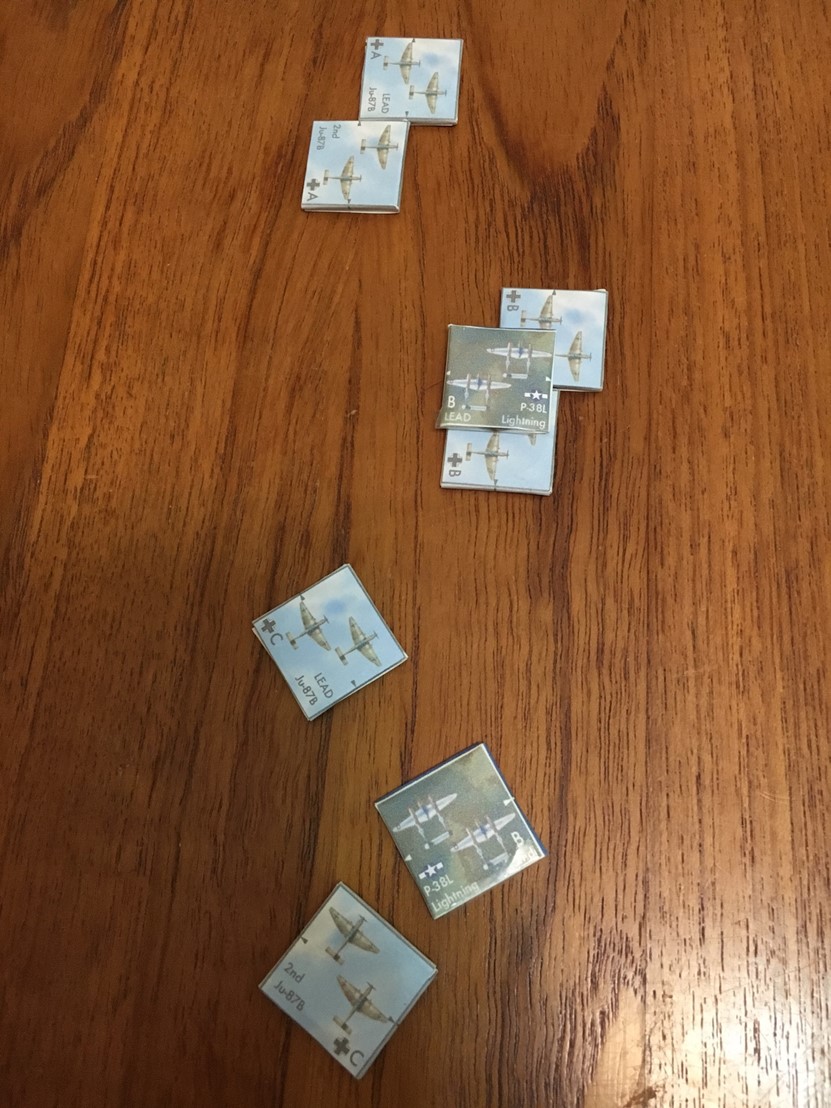
The sequence of play in Table Air Combat is very simple. Movement, then combat. All elements complete their desired movement, one element at a time. Movement order is determined by initiative [NOTE: The game rules don’t use the term initiative, I use that instead of the bulkier “determining who moves first and who moves last.”], which we’ll get to later. For now realize that the side listed next to each turn number won the initiative roll for that turn. Once all planes have moved, any planes that have valid targets may shoot. You’ll see in this picture that one of the P-38’s has moved farther than the other. That element spent one energy to move one extra tick. Those pilots are eager to get into the fray.
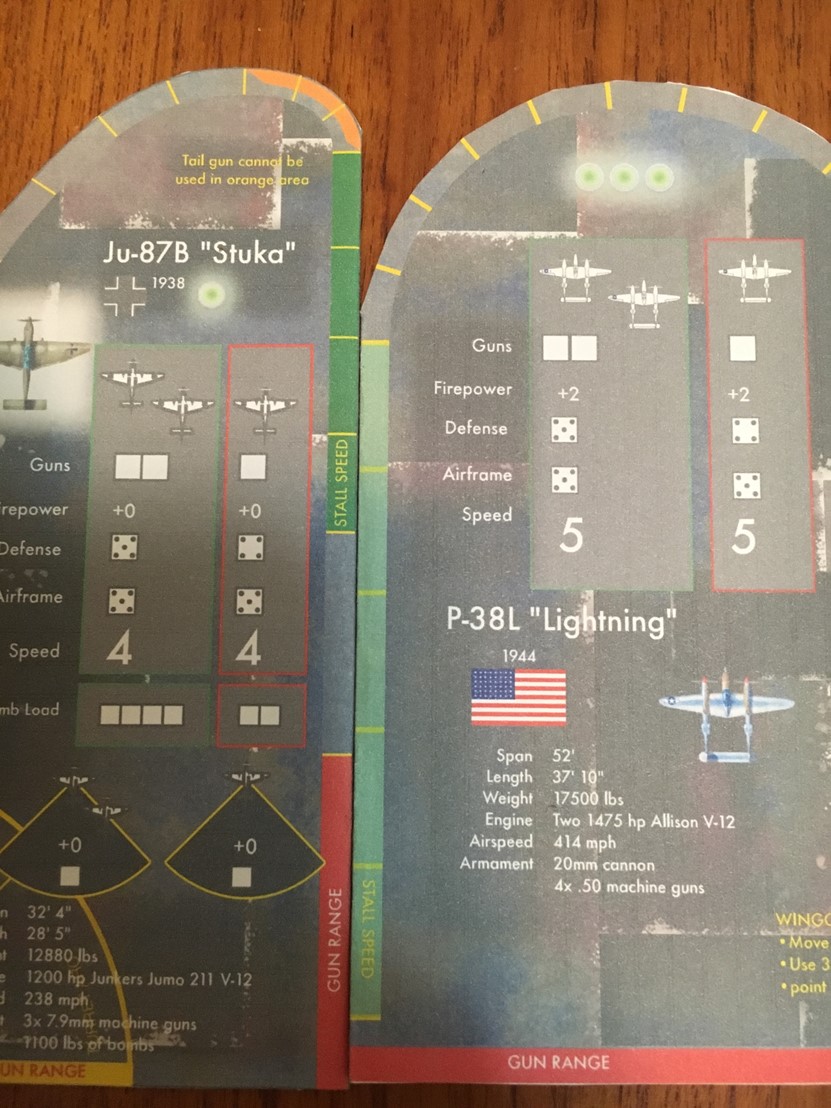
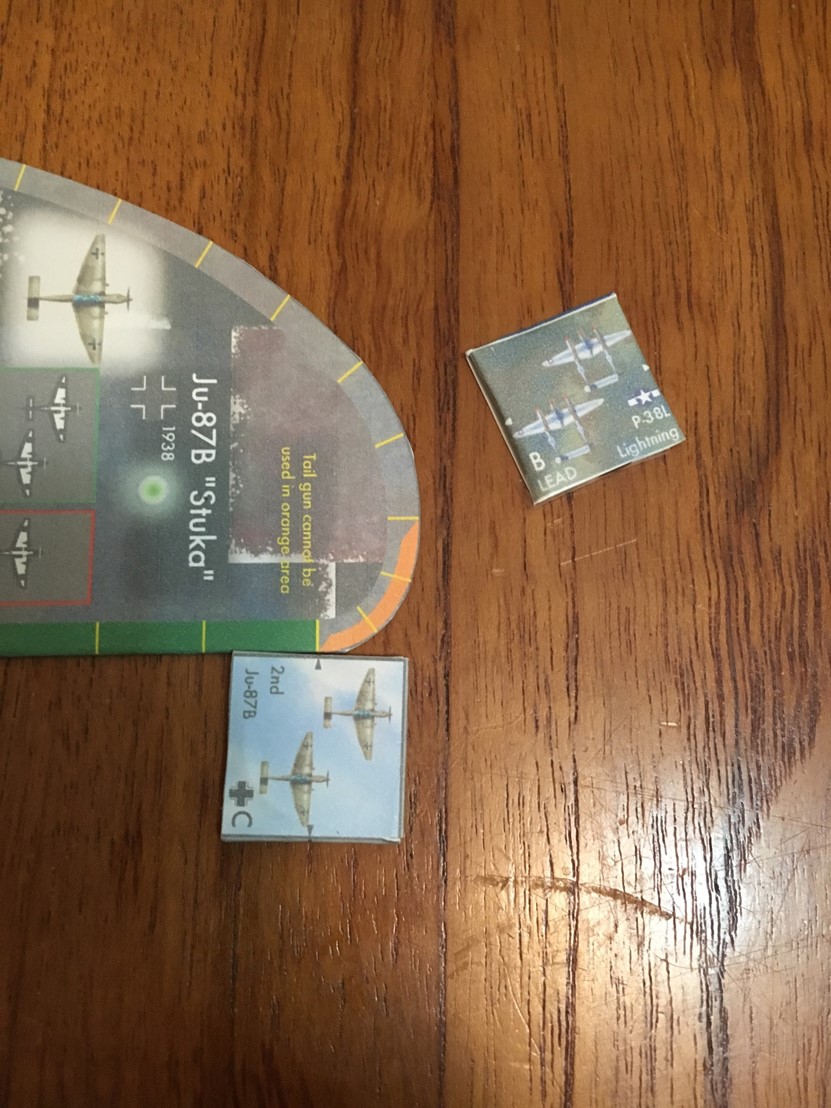
Performance Rulers
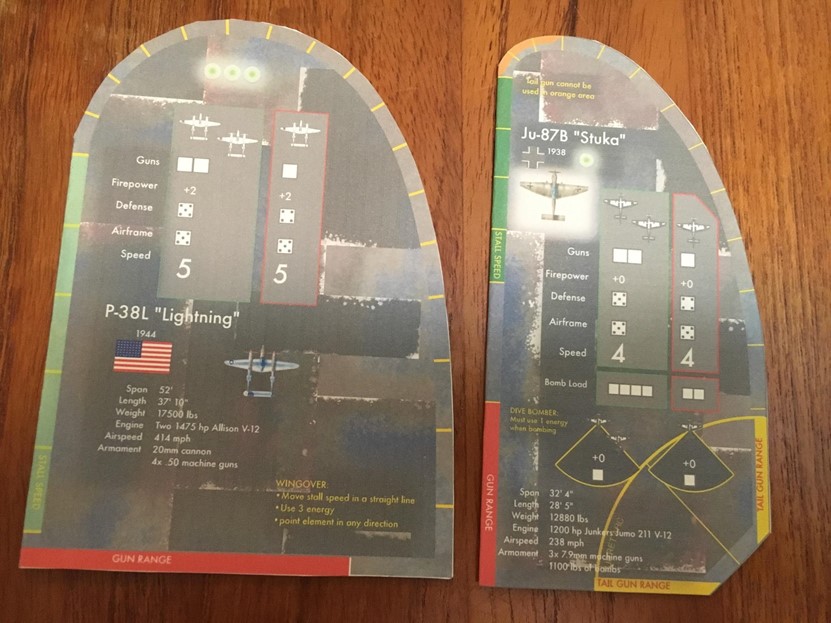
These are the performance rulers for the P-38L Lighting and the Ju-87 Stuka. Everything you need to know about the planes is shown here. First, you can see at a glance what the plane’s relative turning radius is. In this case the Stuka is much more maneuverable than the Lightning. That doesn’t mean it’s a better plane, but it turns more tightly.
You can also see how fast each plane is. There are two depictions of speed on the performance ruler. Each plane has a number indicating its speed, 5 for the P-38 and 4 for the Stuka. That doesn’t mean that the P-38 is exactly 20% faster though. Each ruler has a straight side and a curved edge. Note the tick marks along the outside of each ruler. The speed number is the number of those tick marks the plane can travel each turn. If the plane is turning, then the space the plane moves is less. If the plane moves in a straight line, then each tick mark covers more ground. The green area indicates the maximum distance the plan can fly in a straight line. The tick marks for the P-38 are much farther apart than the Ju-87. Even if the Lightning moves only 4 ticks in a straight line, it’s basically moving at the Stuka’s stop speed.
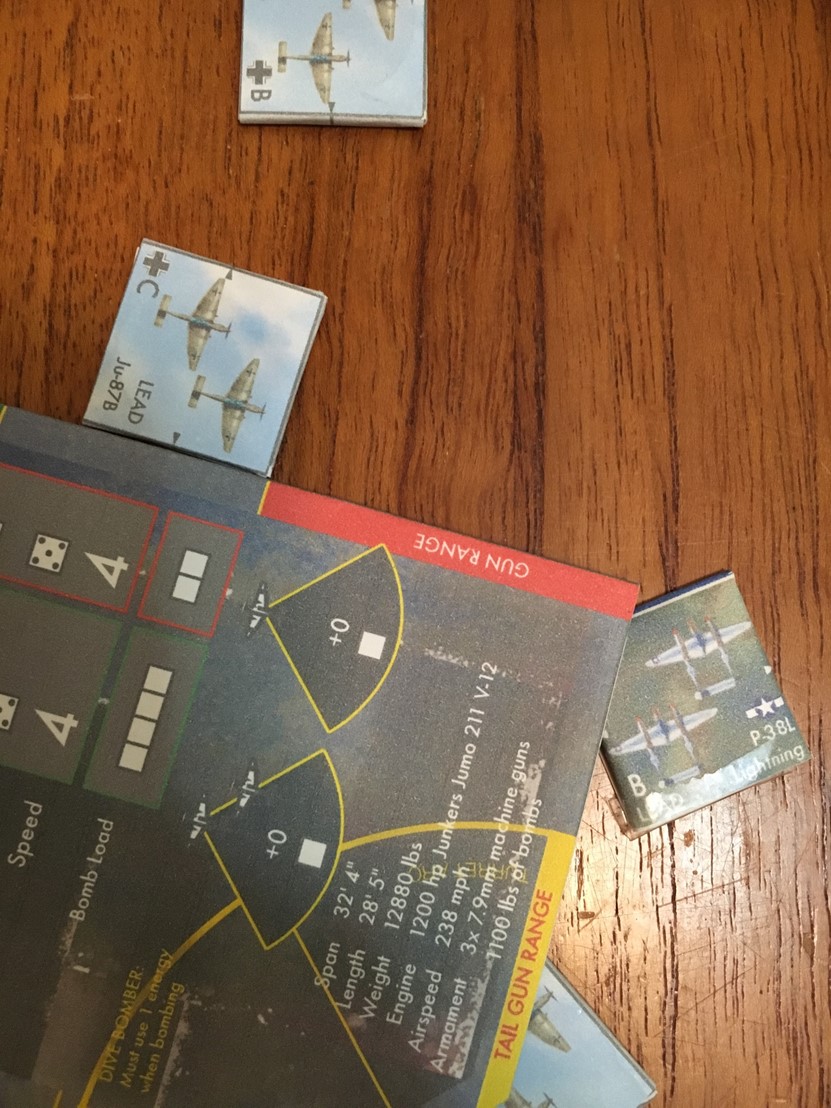
Note the orange shaded portion of the Stuka’s performance ruler. That area encompasses the tightest turn the plane is able to make. Since the Stuka has a tail gun, that orange shading means that in any turn that the aircraft moves through any of that area, the tail gun is not able to fire.
There are green spheres along the top of each plane’s performance ruler. Those indicate the amount of energy each plane has. the role of energy will come up later, but your plane is better off with more of it. It basically represents altitude, and to some extent how much speed the plane maintains after complex maneuvers. Greater maximum energy indicates a plane with better performance, so it’s no surprise that the P-38 has three times the amount that the Ju-87 has, knowing as we do how much faster the American fighters are than the German dive bombers. Energy can be used in two ways. Most commonly, a plane will expend one energy to move one extra tick (it’s diving and going faster that if it stayed in a straight line). Some, but not all, fighters have the ability to perform certain advanced maneuvers. The P-38 can perform the most common one, a wing over. If that happens during this fight, I’ll explain it then.
The Stuka, while not a fighter, is a highly maneuverable airplane. Here we see a Stuka trying to get onto the P-38’s tail so it can shoot. It has moved 3 of its allowed 4 ticks at this point, and can’t line up a shot.
A very hard bank gets the German on the Lightning’s six. Note the tail gun won’t be able to fire this turn.

Being in position doesn’t always mean you get a shot. You have to be in effective range for your guns. The Stuka with its poor armament is just put off range. Wanting to draw blood, it spends it’s only energy to close.
Initiative
Initiative is crucial in Table Air Combat, as it determines who moves first and who moves last. Moving last is nearly always a BIG advantage. If there are an unequal number of elements on one side (such as 6 Stukas vs. 2 P-38s), then the side with the most units moves enough elements to have an equal number of unmoved elements, then an initiative roll is made. The side that wins initiative moves last, but not all of its planes wait until the very end. With two elements per side, the side winning the roll moves one element, then the losing side moves both elements, then the winning side moves its final element last.
The US won initiative this turn. It’s lead P-38 raced toward the enemy planes that are trying to make their bomb run, using 1 energy to close the gap. That element now has two targets to close from.

This allowed the Germans to close for a tail shot, but because the US moved last the 2nd element was able to draw a bead on that Stuka.
Stall Speed and Stacking
Stall speed is an important concept also.

This Stuka expects the American planes it just shoot at to fly past and make a high speed run at the other bombers. It wants to make a right and slow turn in hopes of ending up on the enemy’s twin tail. It must move the minimum indicated stall speed. Since each ruler tick in a sharp turn is less than stall speed, it has to move a little farther. We will eyeball this.
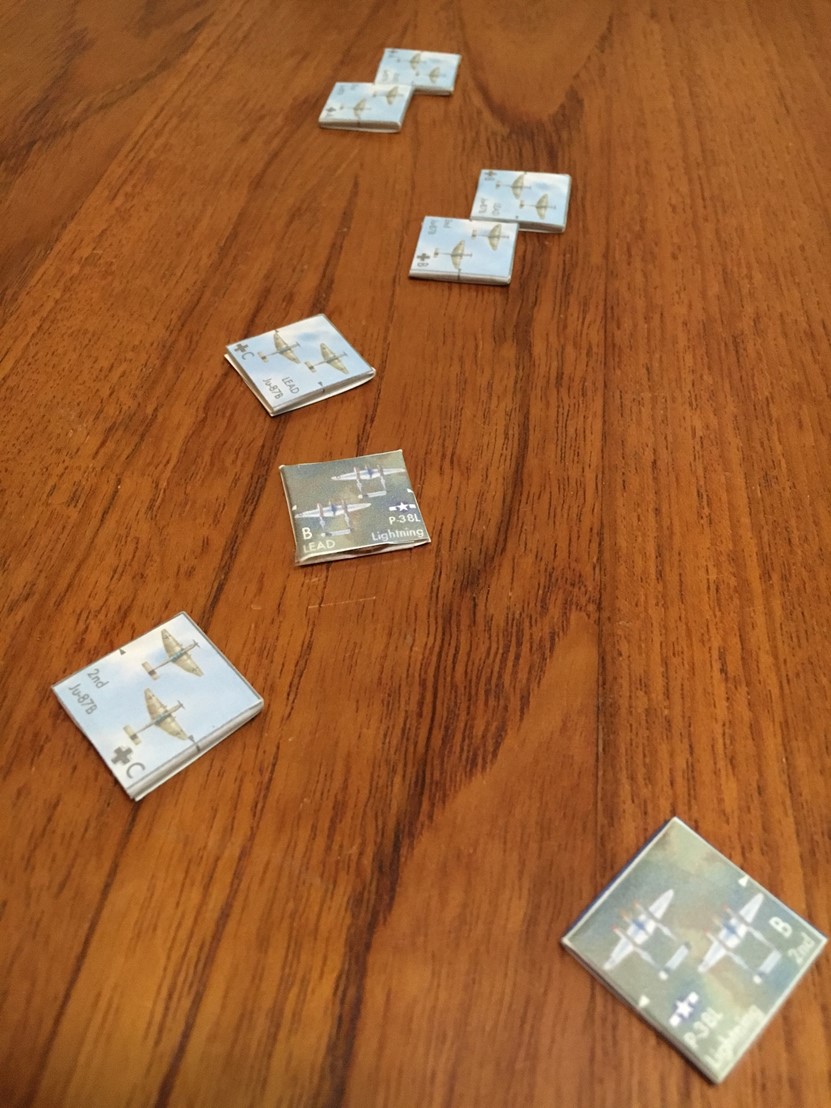
Now both US elements have to move, then the Stuka closest to the bottom will finish the turn, hopefully with an unopposed shot from behind.
Moving slowly the last German element did close.
It is possible to stack elements on top of each other. Elements can complete their move stacked on one or more elements as long as the underneath elements have finished their move(s). Planes stacked on top of other elements must move before those elements move, which might impact turn order. Also, an element cannot attack on an element yet to move, which can ( and often does) affected the way you are able to move your planes.
…NEXT COMBAT
Wow, that dude missed a lot of typos! His publisher should fire him or something…