The weather loomed over the channel, grey wet, and rough seas. However further to the North…way North the sun broke free and the clouds parted. The rains stopped and the waters calmed. Out of the weather a flotilla not seen since 1940 stretched across the gray waters. This time the boats were headed East not West to Dover.
The invasion of Fortress Europe had begun in the marsh lands and salty flats of Holland….
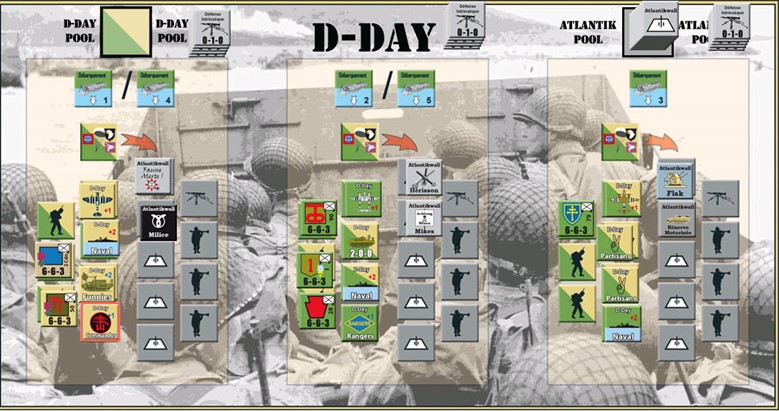
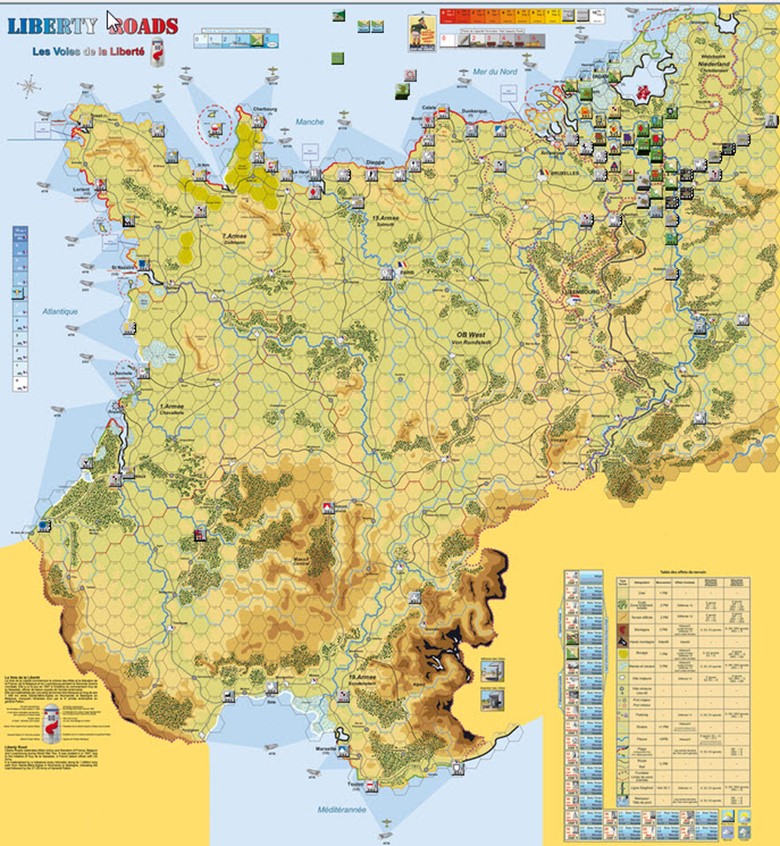
Wait, say what? Yep. American, Canadian and British forces teamed with Paratroopers to land from North of Den Haag and along the cost to the west of Amsterdam. The Game Liberty Roads from Hexasim in France provides one of the cleanest fastest playing set of rules for a Grand Operational scale game money can buy. You are placed into a decision framework [decision space] of Army General leading either Allied or German forces, moving your OOB at Divisional scale around to engage in the conquest and relief of Western Europe.
Your primary focus is securing victory hexes or moving units eastwards off map, these are your two player objectives. Supply, Air and Sea Transport are abstract enough to not require tokens for supply nor conduct air combat. In fact the game uses a series of tactical chits driven by player success metrics to allocate those resources. – Do better and you get more toys! Logistics are handled via a range to HQ method, out of range and you are ½ in effect for all attributes. Your HQ must of course trace to a ‘source of supply’
In the initial landing losses are light and the German general forgets to activate the Volkland rule. A rule which is buried in the end of the otherwise concise and clear rulebook. This would have activated 7 units to be placed on the map the instant a Allied units entered a German or Dutch hex.
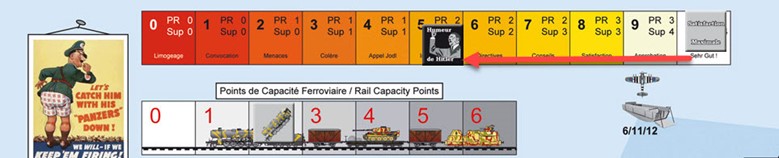
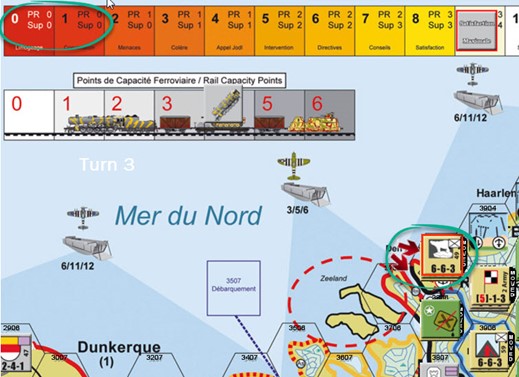
Sadly the chart above is not in the game on the VASSAL module which is a pity. Playing the physical world this would be useful [Hint: take a screen shot and print it out!]
How big an error is this and is the rule written well? We agreed it was minor and put it down to player error. We allow the Germans to move the units a couple of times to adjust and realize given the cruddy quality they would have not been much value if not delayed.
While you are the man in charge as the German player, you do need to keep Hitler happy. The Hitler track is a smart way to inflict the sorry constraints Hitler did upon his rotating staff of Generals fired for not successfully executing his genius. The track models Support chits and Replacements on a sliding scale until such time as you are fired and replaced then all is reset and you start again….:)
The Germans in turn 1 can move little due to another historical game mechanic, unless they roll well. As we can see below most units are stuck in place as of end of Turn 1. Operation Fortitude it was called and this limits initial German reaction. With a good roll and the right ports lost however it can be an automatic release.
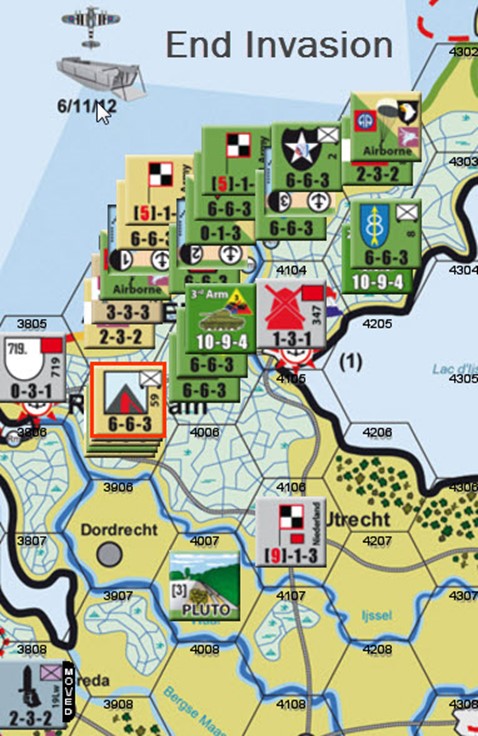
Finally ashore the Germans are surprised by the success of the Allies. The Allies are surprised as well.
These guys entrain and head North!
Turn 2 sees the crush of reinforcements. Knowing what we are facing via visible stacks and some solid die rolls on a innovative CRT [more on that shortly] the Allies grind inland.
Note also that there appears to be a stacking issue for the Brits shipping moves the Paras back to UK and 4 units are allowed in Beach landing hexes.
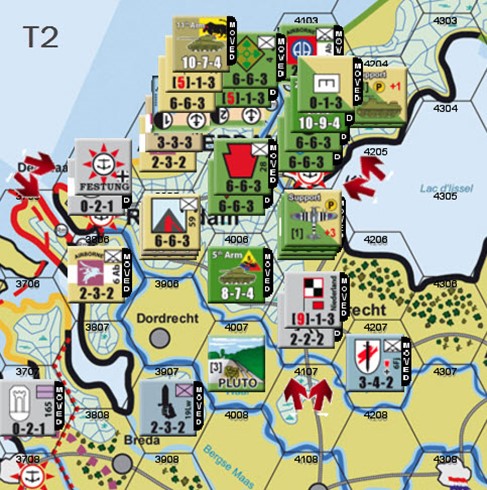
End turn 2
The Hitler track resets.
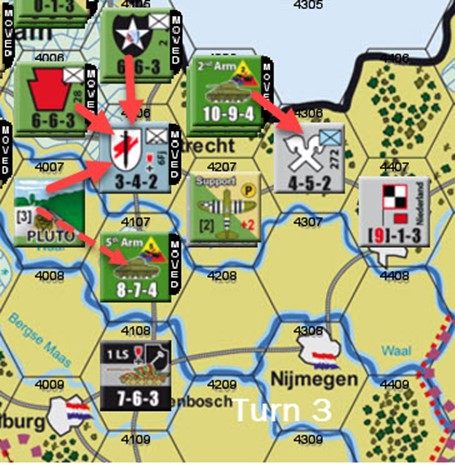
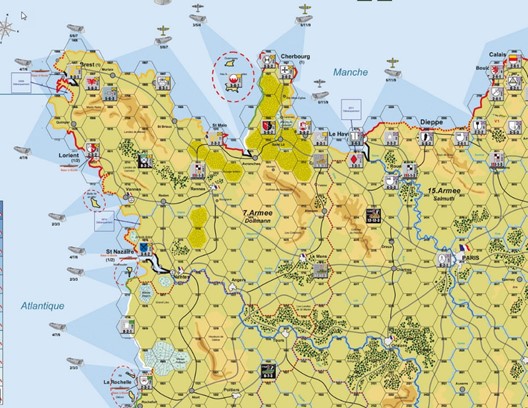
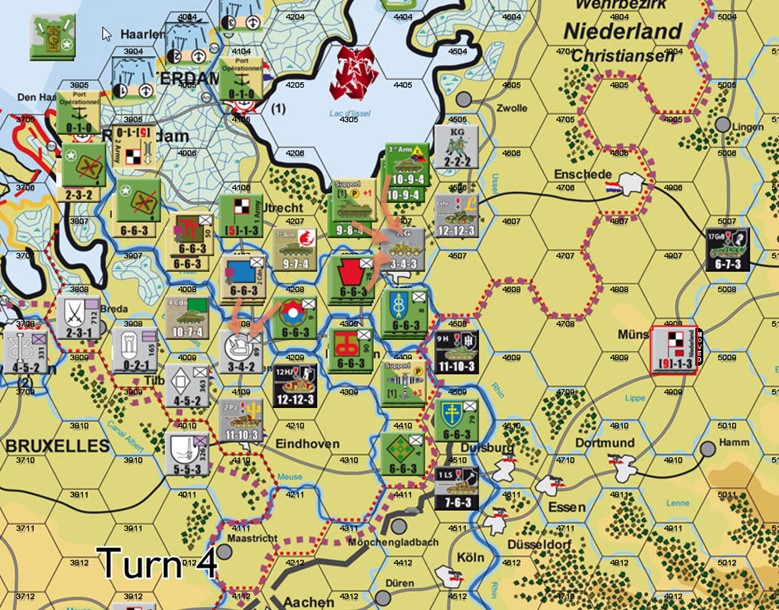
In turn 3 Utrecht falls to a massive US lead assault and the road to Arnhem is blocked by the 272nd German Division which held the line in wooded terrain against 3 tank divisions. The loss of Utrecht triggers the firing of the first OKW !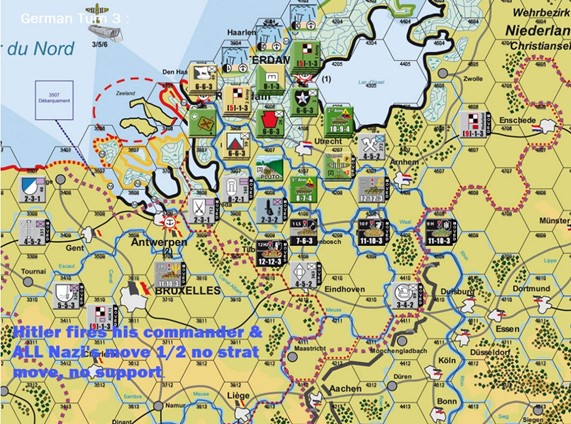
By now both players are getting the hang of the system and the Allies gear up a massive pus to garner more breathing room and ports to allows enhanced supply and more tactical chits.
From a strategy perspective the Allies are pressing South and East. Their goal is not Brussels however it is the Siegfried line. We want into Germany and the rich City VPS ASAP. The goal is to prevent the Germans from forming a deep defense around the Rhine by attacking from the North. The feints to the South will ideally be reinforced and we can ‘trap’ Germans on the wrong side of the river. Forcing them to go South and around into the German hinter land. Our supply chain is protected, our flanks secure. Lets roll!
If we are fortunate the Germans will abandon everything North of Dortmond and focus on the VP cities.
This would allow the Allies to build up a force to press East and conduct a map exit. A map exit requires 19 Divisions to exit the board for a win.
In the main when we look at the big picture there are a lot of Germans not in the fight. This is ideal. We have prempted their forces and dislocated them to the extent that they are not a factor in the fights we want to have.
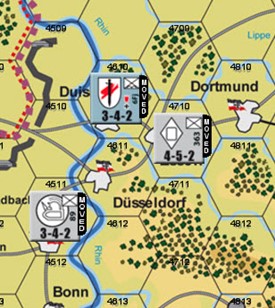
This of course will change as rail and foot slogger movement presses units to the North but by then we hope to be deep into enemy territory. Such that the will to fight on is broken and the German player concedes! 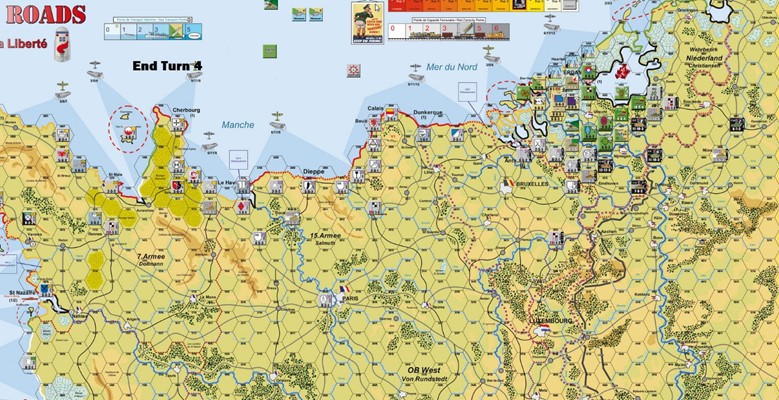
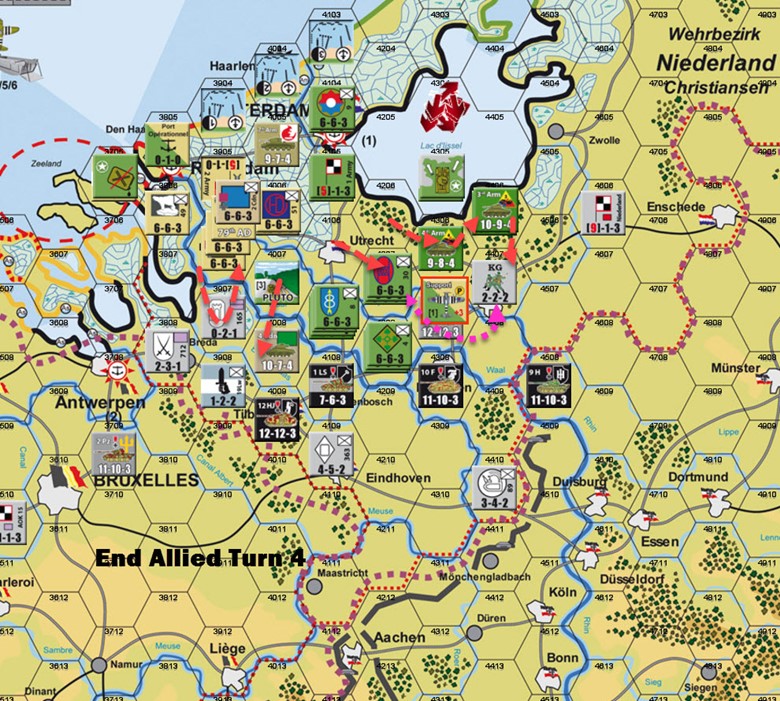
Turn 4 we drill on Arnhem a key city. Unlike Monty’s bridge too far the Germans are pressed back and give up the ground. Access the Niederland is wide open and even a 2nd invasion site to the North. But this is not our intended target.
The second site must be a location that forces a hard choice on the German. We want him on the horns of a dilemma. Should he pull back to the hinterland or slow the advance and of course capture of key cities? I have two locations in mind. Which now brings us to narrative in this game. Clearly this game goes off script the moment you choose a non standard landing location. Thus no history on rails here! However the game does not feel as if we are breaking history, rather exploring it.
In another sense the narrative is interesting in that the Allies have so many choices but those choices are subject to the vagaries of the tactical chit draw. Good narrative, massive replay value.
By the end of Turn 5 the German moves which were restricted by another OKW death/replacement on the Hitler track has limited movement to the extent that holes in the line have been exploited. A deep lunge along the Siegfried line and placement of German units into OOS has the German player reacting and pulling way back South and East.
We can now split the Armies up and send the Brits South to menace the flank of the 12th Hitler Jugen, 2nd Panzer and 326th division.

Which at the start of the German turn find themselves OOS. Defense is halved now. The German player might have counter attacked but chose not too! 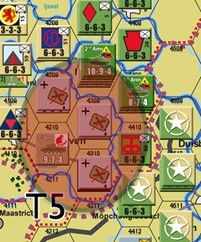
We took a chance pressing deep, 1 division is cut off. The Germans slip the noose, but head South West not Sth East! In turn 6 a lot of choices face us. Do we secure the eastward passage for exiting? Do we focus on killing the OOS units, do we try to crack the line? Or do we consolidate and drop a fresh invasion?
Lets take a look at the wat combat works quickly. As this is likely the heart of the game in terms on any unique attributes. Each combat relies on a simple ratio method, maxing at 6:1 down to 1:2. Odds are impact by doubling or halving defender attackers via terrain types. Column and DRMs are applied through the use of Tactical chit and skills of units such as Veteran status. Tactical chits are applied at the start of the turn either to a location or a unit. Most of the time tac chits must be placed within range of the PLUTO counter. This counter drives where ‘resources’ such as tac chits can be applied and where the Allied focus is. It can be moved for a cost in tac chits spent and more than one PLUTO may be on the map.
Thus the effort of the Allies when not using the optional rule is very clear. Air units provide column shifts to all attacks in its range (1,2,3 hexes), and impact can be significant up to +3 on the column shifts, such was the Allied air dominance.
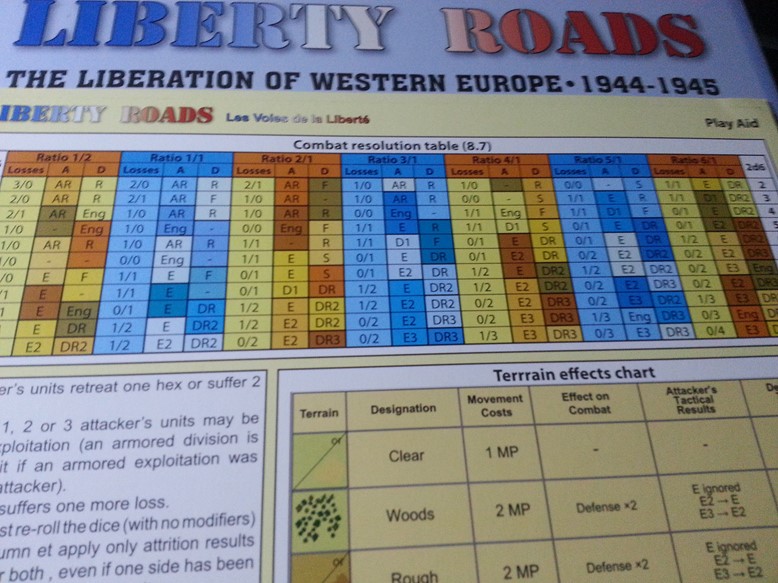
You can see the losses column above. Simple enough to discern that they are step losses. The A and D columns are secondary impacts. With a range of results. If using armour and declaring them as the guys wanting to Exploit; then an E# result is an exploit opportunity post combat. The color coding means that certain units can adjust the result up and down that colored band due their experience and or type in some cases. This means a retreat might be deferred or even a Engaged result can be changed. Did I mention no ZOCs? Yep no zones of control. This makes the system highly dynamic and challenging on both players as attack and counter attack with exploits can rip holes in lines.
At the conclusion of Turn 6 we agreed that with that experience we should reboot and have a ‘real game’. The Allies felt confident of a win and that the lads would really ‘ be home by Christmas’ so perhaps we had deviated too far from the historical!
As I reflect on these turns and the reboot opening offensive my mind is drawn to how much this is like The Mighty Endeavour with out the screaming Panzer storming rules that MultiMan Publishing’s SCS system imposes.
In fact I would hazard to say this is as clean and as straight forward game system as SCS but more streamlined and less forced. It deals with the historical topic smartly imposes enough meat to make it feel like a true historical game without the burden of an OCS/GOSS style system. Innovation really is limited to the Tactical Chit/CRT linkage, and the PLUTO/Hitler track concepts. Otherwise it is a standard hex and counter divisional pusher, albeit in a wonderful package with excellent maps, and busy but stunning counters. That and the RoundHammer [early Western Europe Invasion] expansion put icing on the cake that makes this game a big winner for me in the DDAY, Battle for Germany stakes. Hexasim have found situations for this game system to shine here and on the East Front.
Yet another game I own that sits unplayed. Great write-up!
:). GET BUSY!